
avg —
Sweet Yeast Dough Buns with Jam
Instructions
I get the products ready for work. I take all the ingredients out of the fridge ahead of time – they should be at room temperature, so the buns turn out with the right porous texture. The milk can be warmed gently to 30–40 °C.
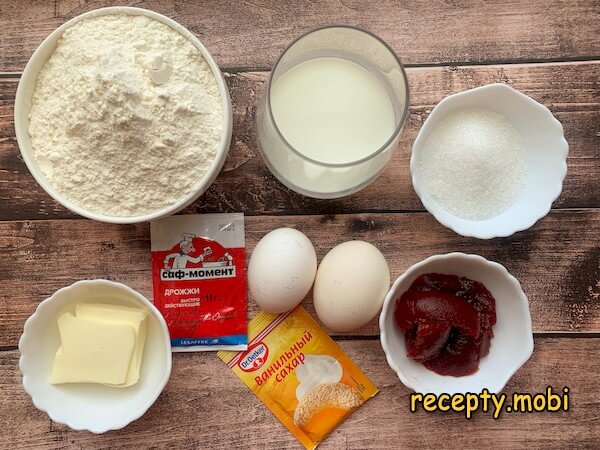
In a bowl I dissolve the yeast with the sugar. If you are using fresh yeast, rub it into the sugar with a spatula; it will start to melt and no lumps will form. Dry yeast can be combined with the sugar straight away and covered with warm milk. For a pleasant aroma I add vanilla sugar or vanillin, and salt the future dough. I crack 1 egg into the milk-and-sugar mixture and mix well.

I sift the flour in batches and start kneading the dough. You can do it by hand or in a special food processor. The amount given in the ingredients is approximate – everyone's flour is different, and you may need a little more or a little less. Never add all the flour at once! When the dough comes together into a single ball and no longer sticks to your hands, there is enough flour.

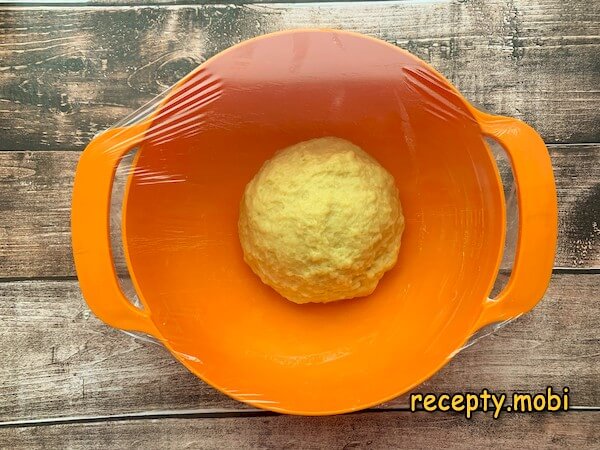
I add the softened butter to the dough and keep kneading until completely smooth. This usually takes about 5 minutes. The whole kneading process is roughly 10 minutes. I gather the dough into a ball and leave it in a dish whose sides are greased with butter. I cover it with cling film and leave it to prove for an hour. This is rich dough – do not hurry, let it rise.
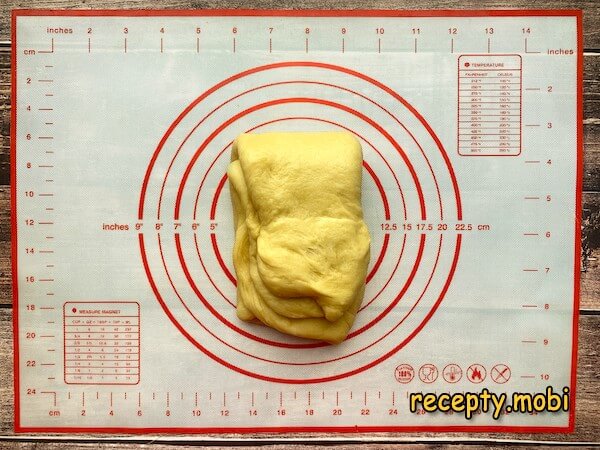
I knock the dough back so that all the air comes out – the buns will have an even porous texture. I stretch it into a rectangle, fold it like an envelope and leave it for another 10 minutes under a towel. In that time the gluten will relax, making the buns easier to shape.
I roll the "rested" dough into a wide rectangle about 3 mm thick. The shape really should be rectangular – so the buns come out pretty. I spread the jam onto the dough in an even layer, distributing it over the surface and leaving 1–2 cm free from the edges. As a filling you can also use poppy seeds or sugar with cinnamon.

I visually divide the rectangle of dough into 3 equal parts and fold the edges to the centre. I pinch the edges firmly with my fingers so the filling does not fall out. I lightly roll the dough with the rolling pin – so it becomes thinner and the layers stick together better.

I cut the envelope into strips – for convenience you can use a special pizza roller. I take one strip, stretch it slightly, twist the ends into a rope and form a ring, pinching the edges together.

I move the shaped pieces onto a sheet of parchment and let them prove for 30 minutes under a towel or cling film. The buns will grow in volume – they should not be placed close together. I turn the oven on to 180 °C to heat up. I brush the tops of the buns with the yolk of the remaining egg. I put them into the hot oven for 15 minutes.

The sweet yeast dough buns with jam are ready. Look how beautiful and golden they turn out!Bon appétit!


Tips
- 1
ALL INGREDIENTS AT ROOM TEMPERATURE – take them out of the fridge 2 hours in advance. This is the key to the right porous texture of yeast dough.
- 2
ADD THE FLOUR IN BATCHES – never tip it all in at once. The amount depends on the moisture of the flour, so go by the consistency.
- 3
TWO PROVES (1 hour + 30 minutes) – crucial for rich dough. Fatty dough rises more slowly than lean dough.
- 4
BRUSHING WITH YOLK gives a lovely glossy, golden colour. An alternative is milk + sugar (½ tsp) for a less glossy crust. A similar trick works with other kinds of sweet buns.
FAQ
Which jam should I choose? +
The best option is a thick jam or fruit butter, not a runny preserve (it will "leak out" during baking). The classics: apple, apricot, plum, cherry. Strawberry – children adore it. Orange or lemon – for a "citrus" version. Avoid jams with large pieces of fruit – they can tear the dough when you roll it out. Shop-bought "filling jam" is specially thickened – ideal. You can add 1 tsp of starch to a runny preserve – it will thicken when heated.
What can I use instead of jam? +
Filling options: poppy seeds (1 cup, scalded with boiling water, with 2 tbsp sugar added), cinnamon with sugar (5 tbsp sugar + 1 tsp cinnamon + 50 g soft butter), chocolate spread, thick condensed milk, boiled condensed milk, curd cheese with sugar (200 g curd cheese + 2 tbsp sugar + 1 egg). Each filling gives the buns its own character. For an "autumn" version – pumpkin paste with cinnamon. For a "festive" one – dried fruit with nuts.
How long do the buns keep? +
In a closed container at room temperature – 2–3 days. The next day they become a little denser – reheat for 5 seconds in the microwave under a damp napkin and the freshness returns. They should not be kept in the fridge – they will go stale and lose their softness. In the freezer – up to 1 month in a tightly sealed bag. Defrost in the oven at 150 °C for 5 minutes – as good as fresh. For a week's worth of breakfasts – freeze them and take out one at a time.
Why did the buns turn out "rubbery"? +
The reasons: too much flour (the dough is overloaded), not enough proving (the yeast did not have time to work), the dough overbaked in the oven (it needs 15 minutes, no more), cold ingredients during kneading. You cannot fix already "rubbery" buns – just take note for next time. For the next batch: less flour, longer proving, watch the baking time. A check for the dough's readiness: "the dough does not stick to your hands but stays soft" – that is the ideal.
- Comment
or post as a guest
Be the first to comment.


