
avg —
Chocolate Zebra Cheesecake
Instructions
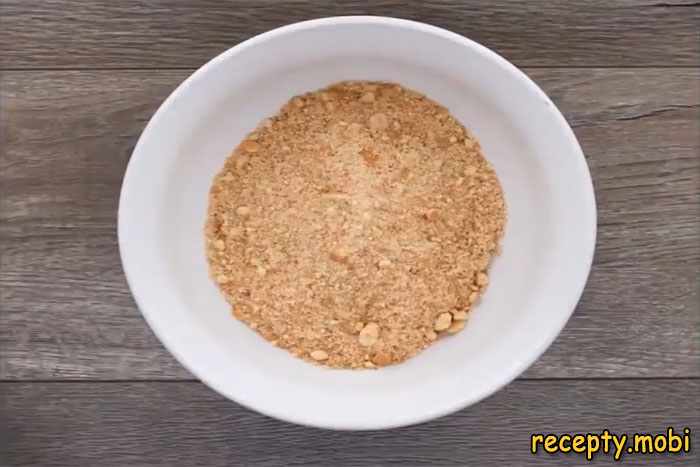
I start by preparing the cookie base. Take 250 g of crumbly shortbread cookies (such as plain tea biscuits without any glaze) and grind them into fine crumbs using a blender or food processor. Grinding takes 1–2 minutes – the crumbs should be fine and even, with no large pieces that could prevent the base from holding together firmly.
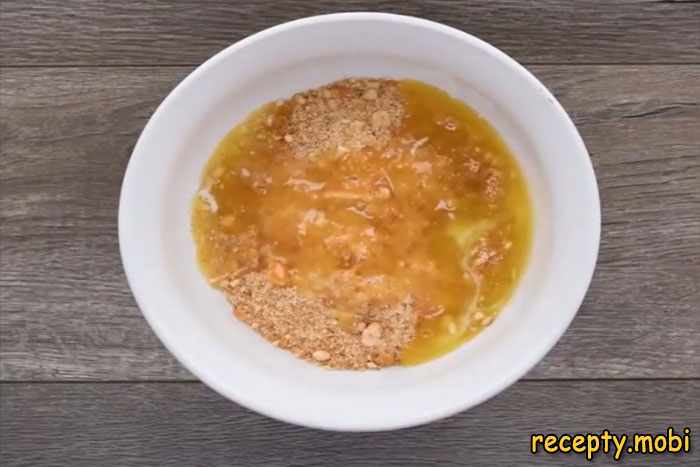
Melt the butter (75 g) in the microwave or over a water bath until liquid. Pour the melted butter into the cookie crumbs and stir thoroughly with a spoon or your hands until you get an even, crumbly mass resembling wet sand. Every crumb should be coated in butter.
Take a springform tin 20–22 cm in diameter and line the bottom with parchment paper. Tip the buttery crumbs into the tin and pack them down firmly with a tablespoon or a flat-bottomed glass, forming an even, dense layer about 5–7 mm thick. It is important to compact the base well, especially where the bottom meets the sides – this prevents the filling from leaking.
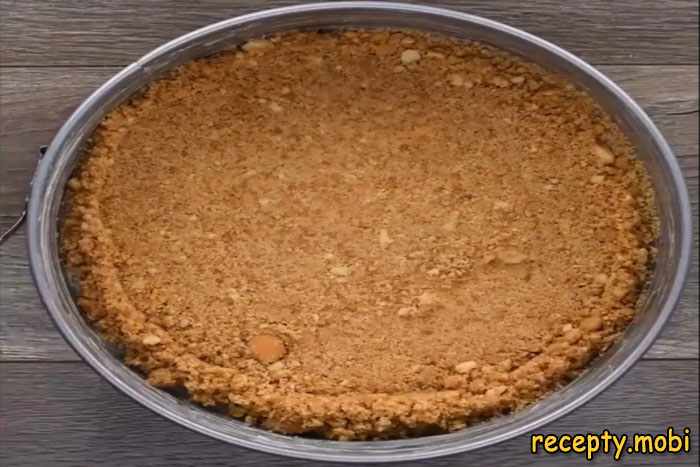
Preheat the oven to 180–200 °C. Put the tin with the base into the oven and bake for 10 minutes until lightly golden. Pre-baking makes the base crisp and keeps it from going soggy with moisture from the filling. After baking, take out the tin and let the base cool completely without removing it from the tin – about 20–30 minutes.
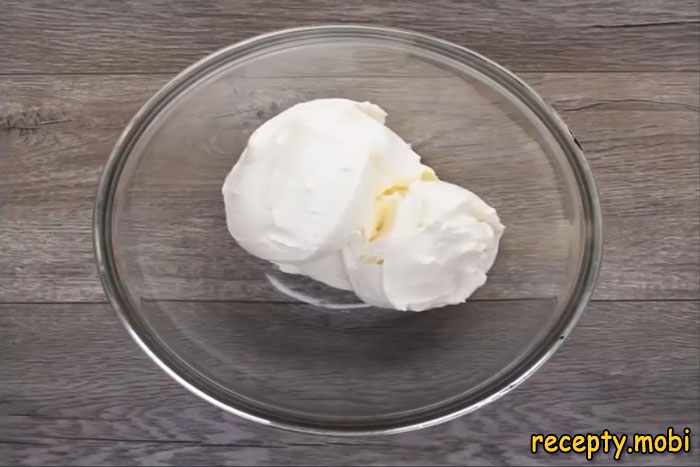
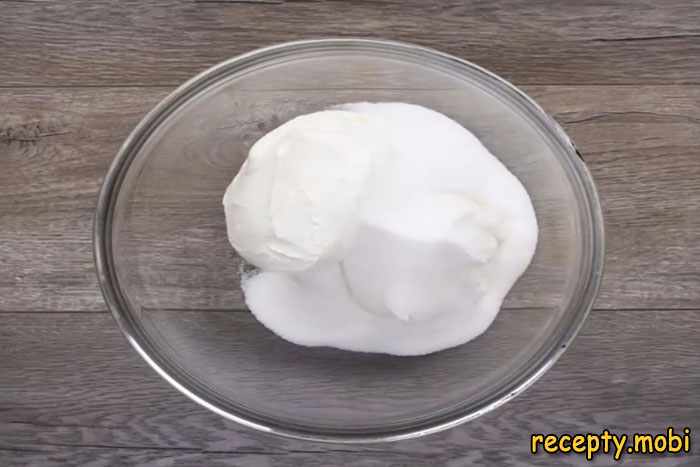
While the base cools, prepare the cheese filling. Take the cream cheese (800 g) out of the fridge in advance so that it warms up to room temperature – this is critically important for a smooth mixture without lumps. Put the cheese into a large, deep bowl and add 200 g of sugar (or powdered sugar for faster dissolving).
Mix the cream cheese with the sugar by hand using a whisk – it is better not to use a mixer on high speed, as that fills the mixture with air and creates bubbles that can turn into cracks during baking. Stir with smooth circular movements for 2–3 minutes until the sugar has fully dissolved and the mixture is even.
Add 200 g of sour cream with 20% fat – it makes the filling more tender and creamy. Stir in 1 tablespoon of cornstarch (potato starch can be used instead), a pinch of salt, and a little vanillin on the tip of a knife. The starch prevents the cheesecake from cracking during baking and stabilises the structure. Mix until smooth.
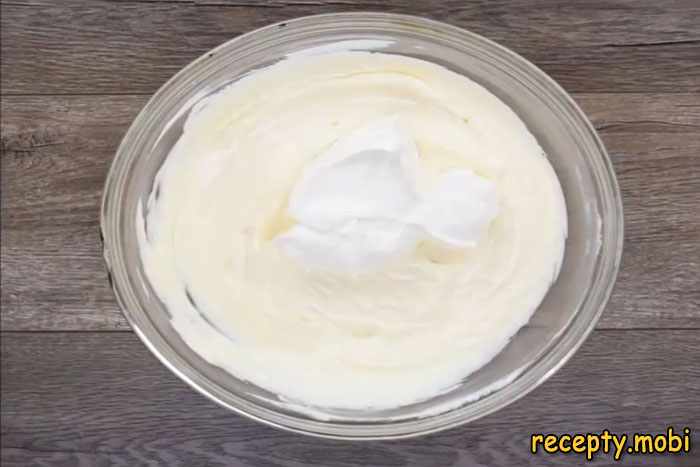
Break in 4 eggs one at a time, gently mixing each one into the cheese mixture and waiting for it to combine fully before adding the next. The eggs should be at room temperature – cold eggs will cause lumps. Stir gently, without whipping – the less air in the mixture, the smoother the surface of the cheesecake will be.
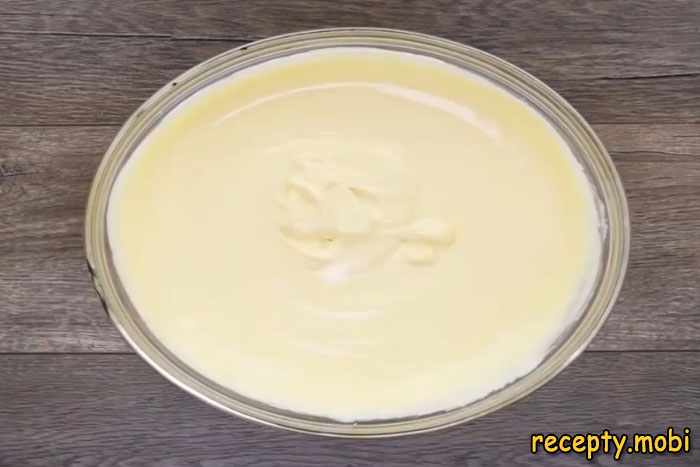
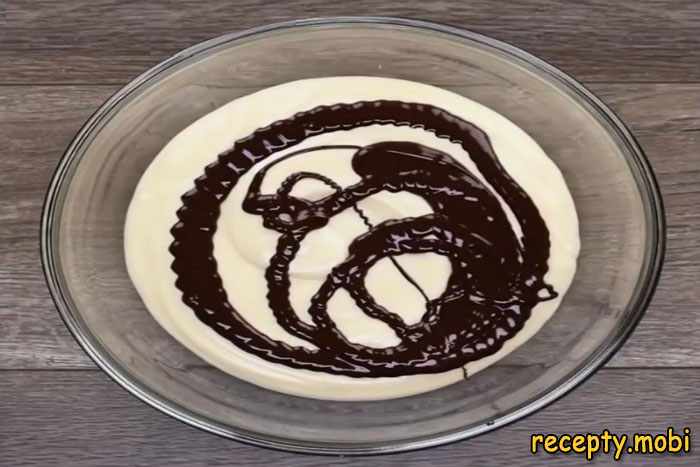
Divide the finished cheese mixture exactly in half into two separate bowls. Break the dark chocolate (100 g) into small pieces and melt it in the microwave in 15–20 second bursts, stirring after each one. The chocolate should become completely liquid and smooth. Pour the melted dark chocolate into one half of the mixture and stir thoroughly – you get a chocolate filling of a rich brown colour.
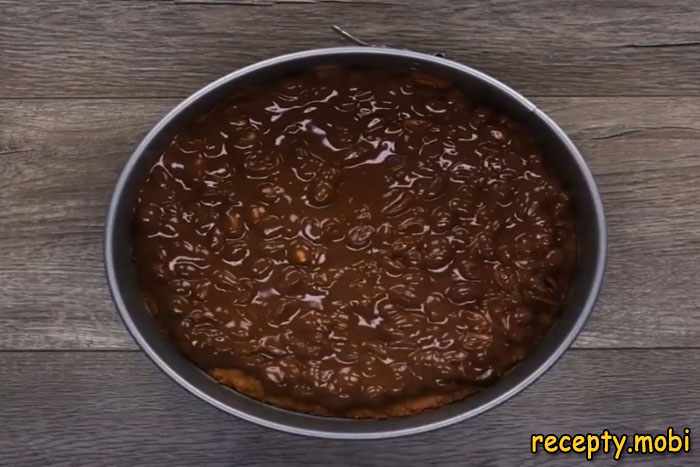
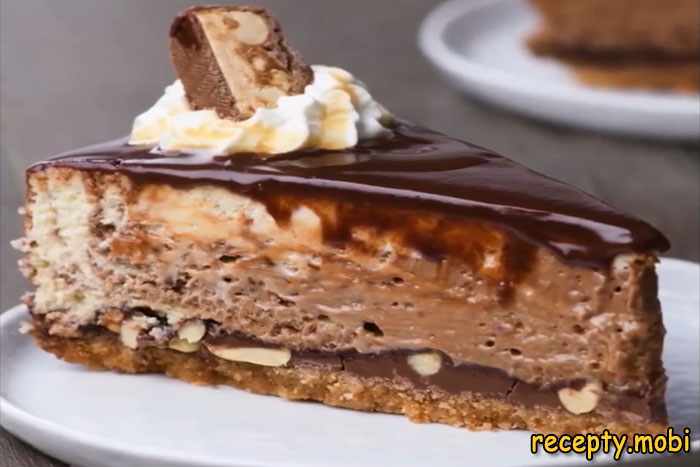
Melt the milk chocolate (200 g) as well and mix it with the roasted peanuts (150 g). The peanuts can be left whole or roughly chopped with a knife – whole nuts give an interesting texture. Spread the chocolate-and-peanut mixture over the cooled cookie base in an even layer – this will be the crunchy layer between the base and the filling.
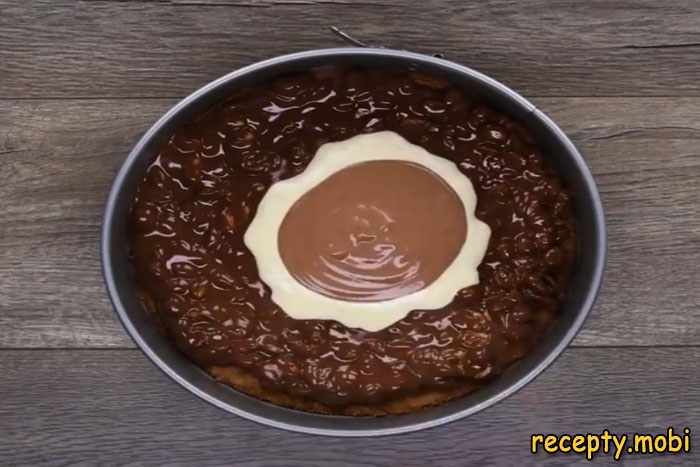
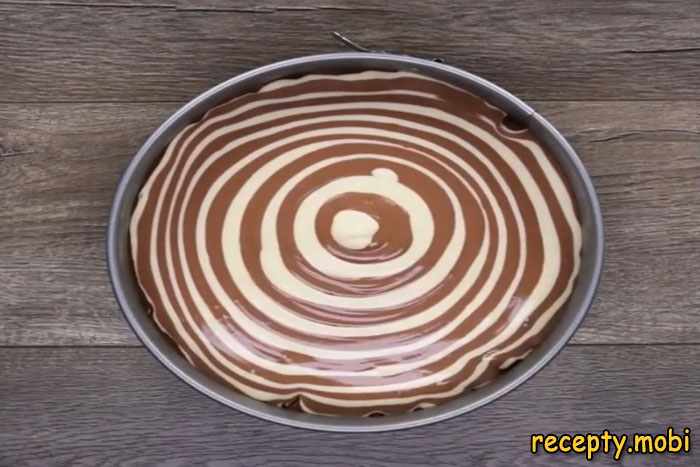
Now I create the "zebra" pattern. Take a ladle or a large spoon and start pouring the light and dark cheese mixtures in turn, exactly into the centre of the tin. The first portion is the light vanilla one, then the dark chocolate one, then light again, and so on. Each new portion pushes the previous one out towards the edges, forming concentric circles.
Keep alternating the portions until all the mixture is used up. A beautiful striped pattern of light and dark rings forms on the surface. If you like, you can draw a toothpick or a thin knife from the centre to the edges to create a more elaborate marbled pattern – this is the classic technique for a Zebra cheesecake.
Lower the oven temperature to 120 °C – this is the key moment for a perfect cheesecake without cracks. The low temperature ensures slow, even baking, so the mixture rises gently and does not suddenly sink. Place the tin in the centre of the oven and bake for 1.5–2 hours. Do not open the oven during baking – a sudden change in temperature will cause cracks.

Check for doneness by tapping the tin lightly – the centre of the cheesecake should wobble slightly, like jelly, but should not be liquid. When pressed with a finger, the surface springs back and does not sink. Do not worry if the middle looks underbaked – the cheesecake will set as it cools. Turn off the oven, open the door slightly, and leave the cheesecake inside for another hour to cool gradually.
After cooling in the oven, take out the cheesecake and leave it at room temperature for another 30 minutes. Then cover the tin with cling film and put it in the fridge for at least 4 hours, or better overnight. Full chilling is critically important – only when cold does the cheesecake reveal its flavour and acquire the right creamy texture.
Before serving, carefully run a thin knife around the inner edge of the tin to separate the cheesecake from the sides. Remove the ring of the springform tin. Melt the remaining milk or dark chocolate and decorate the top of the cheesecake with thin streaks or chocolate drops.
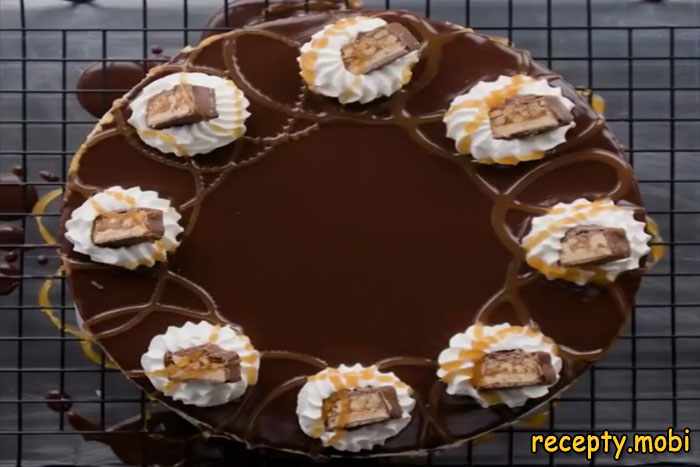
If you like, decorate the cheesecake with whipped cream from a can or a piping bag, forming small creamy peaks around the edge. You can add pieces of a chocolate bar, fresh berries, or crushed peanuts. The chocolate Zebra cheesecake is ready! Slice it into portions with a sharp knife dipped in hot water.


Tips
- 1
The cream cheese and eggs must be at room temperature – cold ingredients lead to lumps and an uneven texture. Take them out of the fridge 1–2 hours before you start.
- 2
Do not whip the cheese mixture too vigorously – too much air leads to cracks during baking. Stir by hand with a whisk, or use a mixer on its lowest speed.
- 3
After baking, be sure to leave the cheesecake in the turned-off oven with the door slightly open for at least 1 hour – gradual cooling prevents the surface from sinking sharply and cracking.
- 4
Before serving, chill the cheesecake in the fridge for at least 4 hours, or better overnight – only when cold does the flavour develop fully and the texture become perfectly creamy.
FAQ
What can replace the cream cheese in this recipe? +
Use a cream cheese such as Philadelphia, or a special cheese intended for cheesecakes. Ordinary granular curd cheese will not do – the consistency of the finished dessert would be completely different, crumbly rather than creamy.
Why did the cheesecake crack on top? +
The main causes are: too high a baking temperature, a sudden change in temperature (opening the oven), too much air in the mixture from vigorous whipping, or cooling that is too fast. Bake strictly at 120 °C and cool gradually.
Can the Zebra cheesecake be frozen? +
Yes, the cheesecake freezes very well for up to 2 months. Wrap individual slices in cling film and place them in a container. Defrost slowly in the fridge for 6–8 hours – this keeps the texture perfect.
Why did the middle of the cheesecake stay liquid? +
Most likely the cheesecake was not baked long enough, or the proportion of ingredients was off (too much liquid). A finished cheesecake should wobble slightly in the centre, like jelly, but should not be liquid. It will set fully when chilled in the fridge.
- Comment
or post as a guest
Be the first to comment.


