
avg —
Fried Cake with Strawberry Jam
Instructions
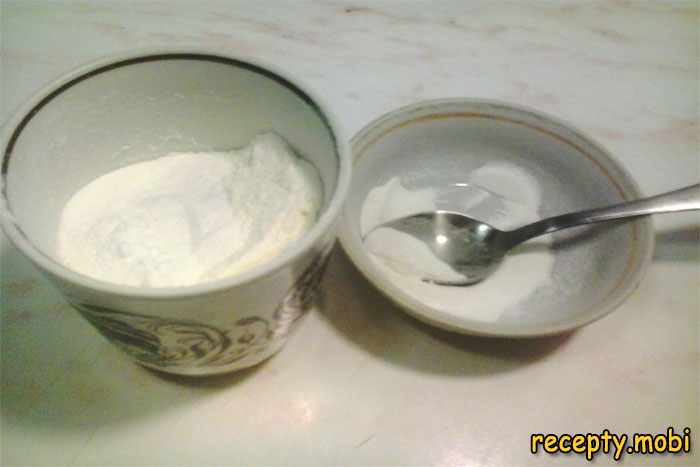
First I sift the wheat flour (2 cups, 320 g) through a fine sieve into a deep bowl – sifting saturates the flour with air and ensures fluffy layers. I add 1 tablespoon of baking powder, levelled, and mix the dry ingredients thoroughly with a whisk.
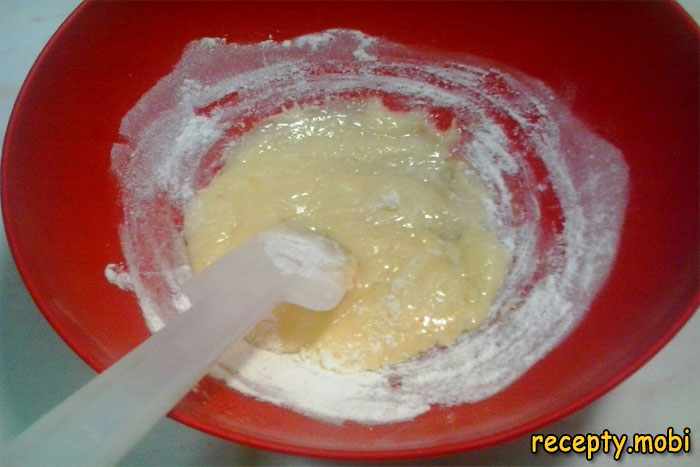
I separate 2 large eggs into whites and yolks – the whites into one container, the yolks into another. In a deep bowl I mix the yolks with ½ cup of sugar, add vanillin on the tip of a knife, and grind well with a spatula until smooth, for 2 minutes. The mixture will turn pale yellow and fluffy. I pour in 50 ml of odourless vegetable oil and mix everything thoroughly again with a whisk.
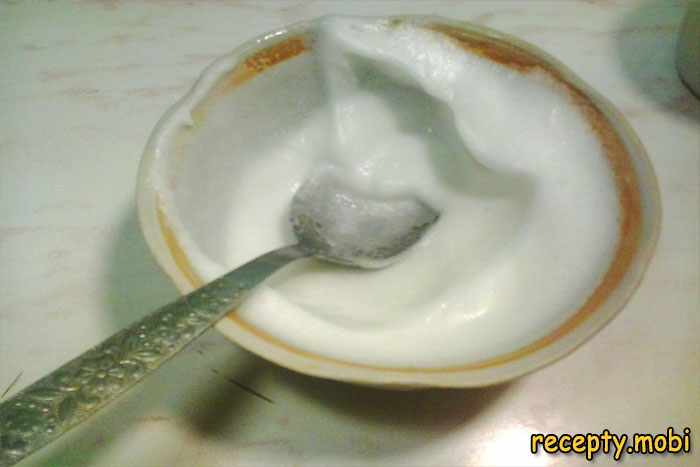
Egg whites whip better when cold, so 10 minutes before whipping I put them in the freezer – this home trick gives perfect fluffiness. I lightly salt the chilled whites with a pinch of salt (it stabilises the foam), start whipping with a mixer at low speed for 1 minute, then gradually increase the speed to maximum. I whip until stiff peaks form and the volume increases 2.5–3 times – the foam should hold on the whisk without falling.
To the ground yolks I add ½ cup of flour from the total amount, then gradually and gently fold in the whipped whites with a silicone spatula, using folding movements from the bottom up – this keeps the airy structure of the foam. The batter should take on a paste-like consistency of a pale cream colour.
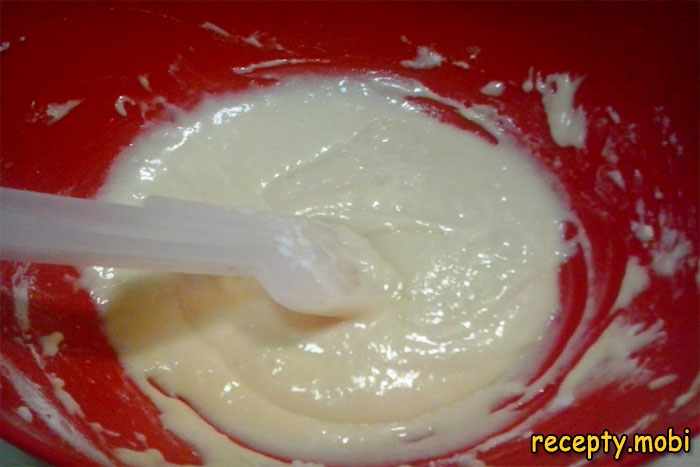
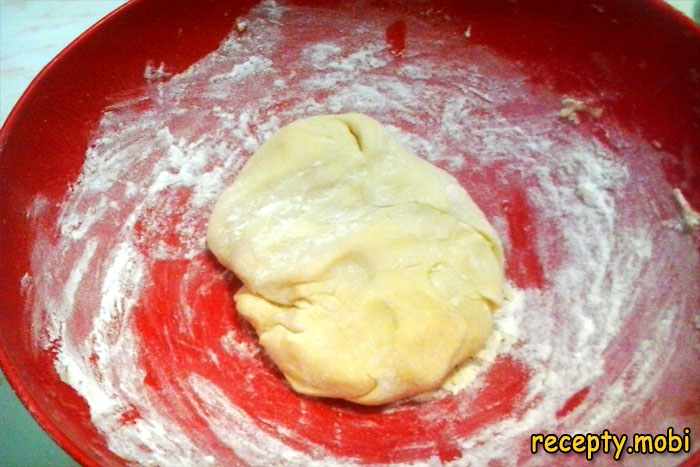
I add the remaining flour (1.5 cups) to the batter, gradually, half a cup at a time, and quickly knead a thick, smooth dough – it should turn out soft but not sticky, like dumpling dough. Do not knead it for long, so that the gluten does not activate and the layers do not turn out rubbery.
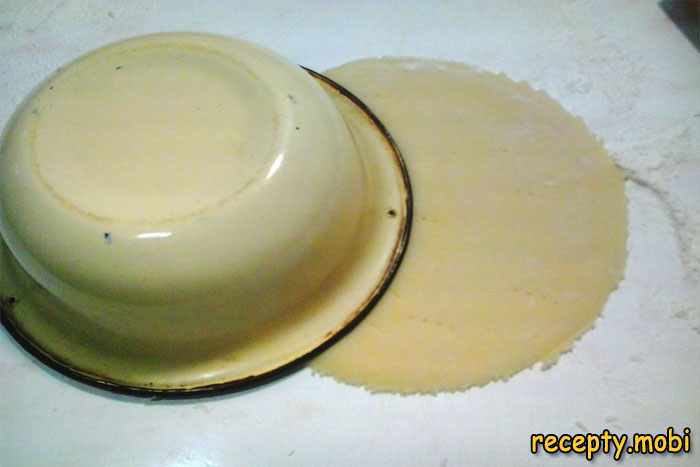
I take a portion of dough (about ⅕ of the whole amount), knead it on a work surface dusted with a handful of flour. I roll it out with a rolling pin into a round sheet 0.3–0.5 cm thick. Using a plate or lid 18–20 cm in diameter, I cut out an even circle, so that the future layer fits freely in your pan without creases.
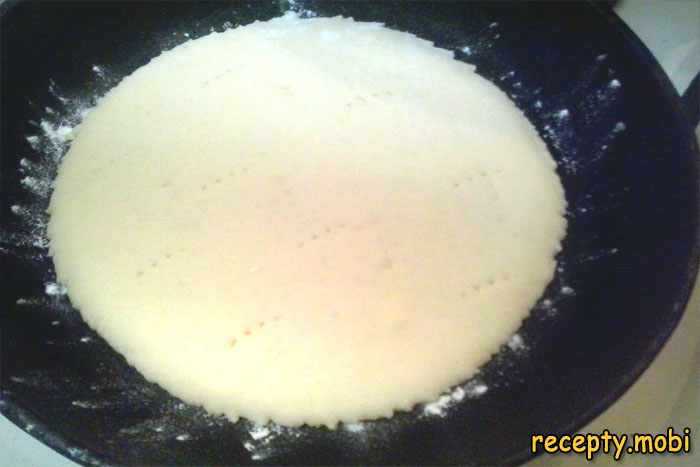
I heat a clean and completely dry non-stick frying pan over medium heat for 2 minutes, then sprinkle it with a pinch of flour. I carefully transfer the rolled-out layer onto the hot pan and bake until light golden on each side, 2–3 minutes. I keep the heat slightly above the minimum – too high will scorch the layer on the outside and leave it raw inside. I don't try to brown the layers too much, otherwise the cake will turn out dry and won't soak up the jam.
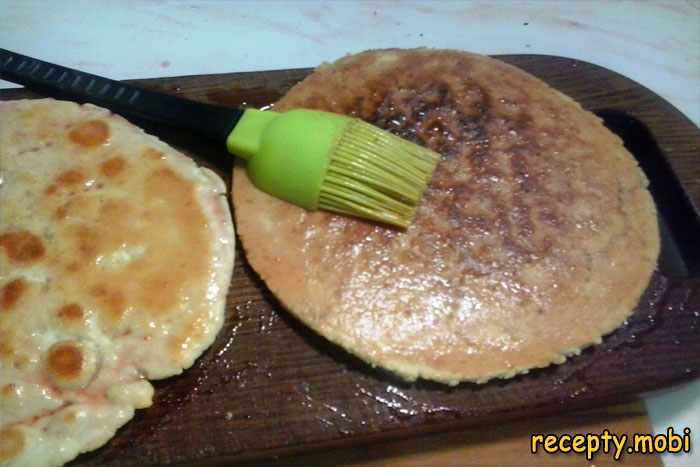
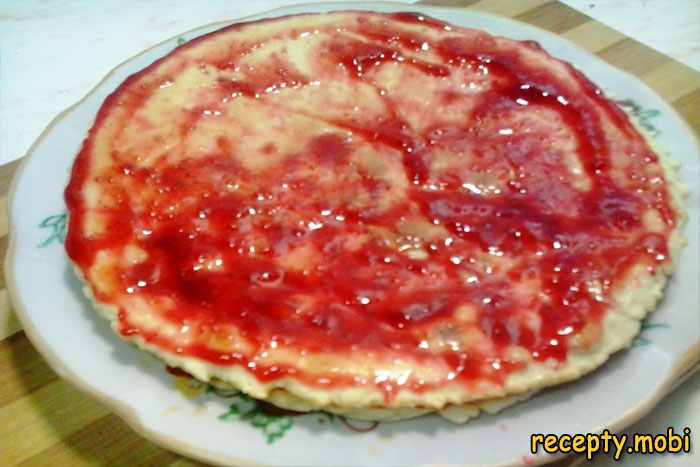
While the layers are still warm, I brush them with syrup on both sides using a pastry brush. To make the syrup, I mix 1 tablespoon of sugar, 4 tablespoons of water and 1 tablespoon of strawberry jam in a small saucepan, bring to the boil while stirring, and cool to room temperature. Warm layers absorb the syrup better than cooled ones – this is a critical moment for a moist cake.
When all 5 layers are ready and soaked with syrup, I start assembling the cake on a serving plate. I generously spread each layer with strawberry jam (about 3–4 tablespoons per layer) and stack them on top of each other, lightly pressing with my palm for a firm structure. Over the very top layer and around the sides I apply an even layer of the remaining jam – it becomes the decorative coating.
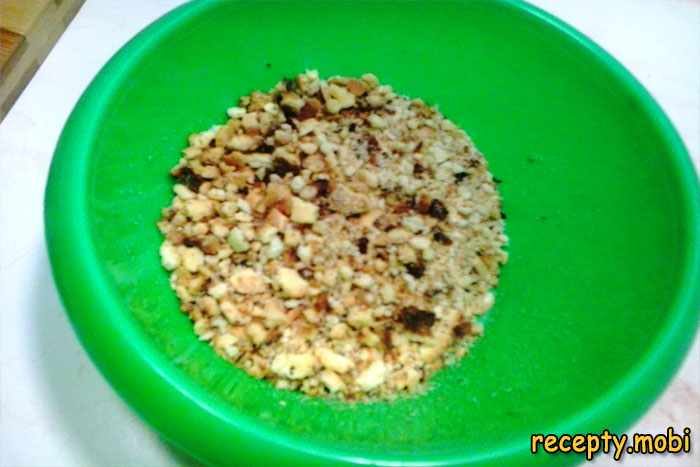
For a pretty homemade topping and decoration, I bake the leftover dough in the pan until crisp (it makes little flatbread-style crisps). I toast 1–2 handfuls of any nut kernels (walnuts, almonds, hazelnuts) on a dry pan for 2–3 minutes until fragrant. I grind the crisps and nuts in a blender or with a pestle and mortar into crumbs.
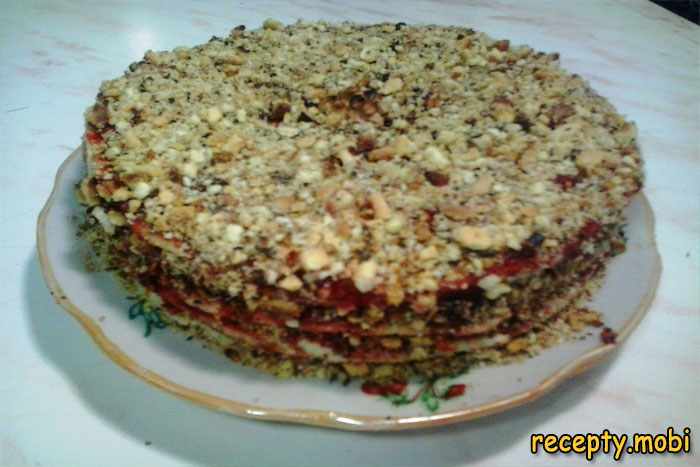
I decorate the homemade cake to my taste: I generously sprinkle crumbly nut crumbs over the top and sides, spreading them over the jam coating with my fingers. An alternative decoration is desiccated coconut, cocoa powder through a sieve, or fresh strawberries. I leave the finished cake for 1–2 hours at room temperature to let the layers soak in the jam, then put it in the fridge for 2 hours to fully set. I serve it chilled!


Tips
- 1
Don't over-fry the layers in the pan – they should be light golden in colour with a barely noticeable browned crust, otherwise the cake will turn out dry and won't soak up the jam. The optimum is 2–3 minutes on each side.
- 2
Brush the layers with syrup while they are still warm, straight after taking them off the pan – this way they absorb twice as much liquid and, once assembled, the cake will be juicier. Cold layers take in the syrup less well.
- 3
Be sure to let the assembled cake stand for at least 2 hours in the fridge before serving – in that time the layers fully soak in the jam, the flavours come together as one, and the homemade cake becomes as soft as if it were from the oven.
- 4
For a tall festive cake, take a double amount of ingredients – you will get 10 layers and a cake 10–12 cm high. The step-by-step recipe scales easily to the size of your family or celebration.
FAQ
What can I use to replace the strawberry jam in the cake? +
Any thick fruit preserve will do (apricot, cherry, apple, raspberry), homemade jam (without pits or large pieces of fruit), condensed milk with nuts, your favourite buttercream, or a sour-cream filling set with gelatine. Each substitute gives the cake its own character: apricot preserve – a sunny summer flavour, condensed milk – a rich caramel one, sour-cream filling – a refreshing tangy one. Combine 2 options (jam + condensed milk) for a complex flavour. The homemade version with strawberry jam remains the most aromatic.
How many layers do you get from the given amount of dough? +
From the given amount of dough (320 g of flour + 2 eggs + 50 ml of oil) you get 5 layers 18–20 cm in diameter and 4–5 mm thick – ideal for a medium-height cake for 6–8 servings. If you need a tall cake (12–15 cm) for a big celebration, double all the ingredients – you will get 10 layers for 12–16 people. The cooking time will increase proportionally – each layer bakes for 4–5 minutes in the pan. Work out the amount to suit the size of your family or guests.
Can the cake layers be baked in advance? +
Yes, this is a great way to save time when organising a celebration. Wrap the cooled, ready layers in cling film or put them in a bag and keep them at room temperature for up to 2 days, or in the fridge for up to 5 days. Before assembling the cake, lightly moisten each layer with the prepared sugar-and-jam syrup – this restores their freshness. You can also freeze the layers for up to 2 months, putting them into separate bags with parchment between them. Defrost at room temperature for 1 hour. The step-by-step recipe is suitable for preparing ahead of celebrations.
How do you flip the layers in the pan correctly so they don't break? +
Use a wide silicone spatula or a long-handled pancake turner – with an ordinary narrow spatula the layers often break. Before flipping, check that the underside is done: it should be golden, and the layer should come away freely from the pan (the spatula slides easily underneath). Carefully slide the spatula to the middle and flip with a quick, confident movement – hesitation leads to breakage. If a layer does break, it's no problem: assemble it into the cake, and the breaks will be hidden by the jam. The home trick with a silicone spatula works without fail.
- Comment
or post as a guest
Be the first to comment.


