
avg —
Pele Cake
Instructions
Break room-temperature eggs into a deep mixing bowl. Start the mixer on its lowest speed and gradually increase to maximum every 30 seconds. Keep whipping for 5 minutes at top speed until you have a good foam.

Without stopping the mixer, add the vanilla sugar and a couple of spoons of regular sugar, then gradually add the rest of the sugar. After the last addition, whip for 3 more minutes until the egg foam becomes quite thick.

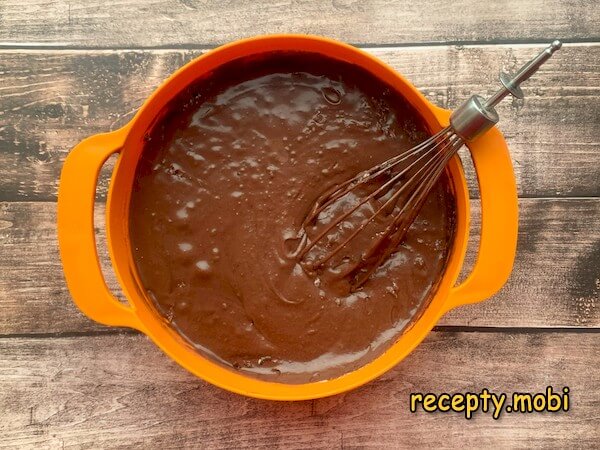
Add the cocoa powder and the warm (not hot) melted butter to the bowl. Combine with the mixer for about a minute. Pour in the kefir, add a few spoons of flour and mix again. If the recipe includes fermented-milk products, be sure to add slaked soda. In a separate bowl I slake the soda with table vinegar until it dissolves and transfer it to the batter. Add the flour in parts and mix on low speed for 2-3 minutes.
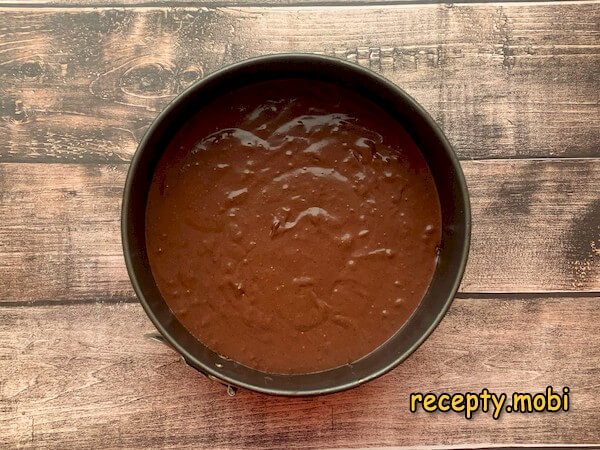
Divide the resulting batter into two equal portions. Line the bottom of the mould with parchment and do not grease the sides. Bake two layers for 25-30 minutes in an oven preheated to 180 °C. Check for doneness with a toothpick. The top will rise into a "hill" – this is a natural process.
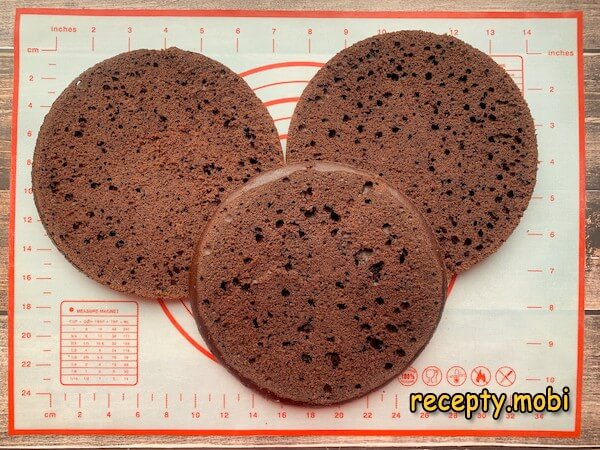
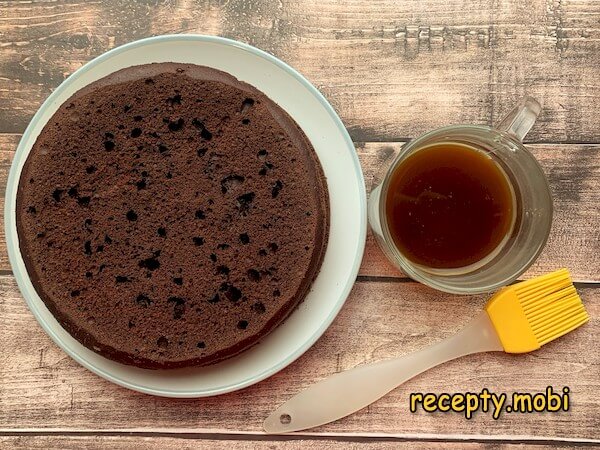
Cool the sponges completely on a rack – ideally let them stand for 3-4 hours. Cut off the tops and put them in a separate container, then cut each sponge into layers. You can cut them into three or four parts, depending on the thickness. Do not make the layers too thin – they are quite porous and fragile, and damage easily.
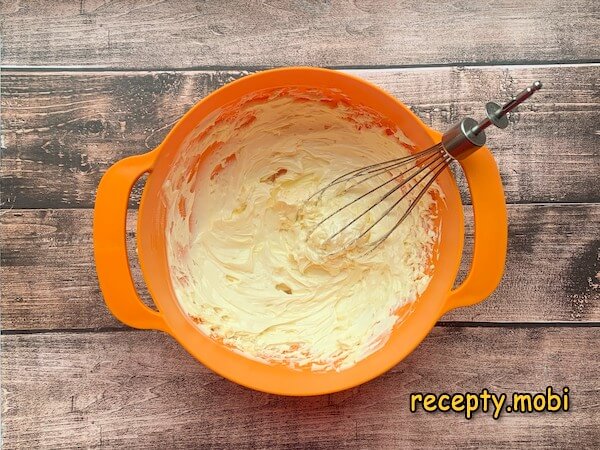
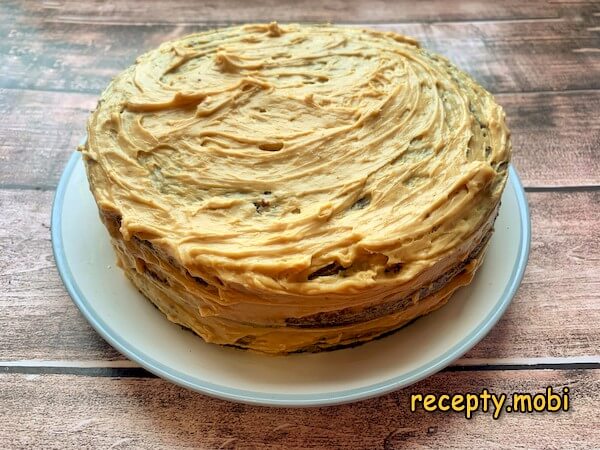
Let the butter for the cream soften to room temperature beforehand. Whip it from the lowest speed up to maximum until it is creamy and snow-white, 3-4 minutes.
Add the boiled condensed milk to the butter in parts. Whip the cream continuously for 2 minutes. You can buy ready-boiled condensed milk or boil it yourself in the tin for 2.5-3 hours.

Prepare the coffee soak: combine the sugar, coffee and water. To make the layers even tastier, you can add 1 tbsp of cognac. Brush each layer with the soak using a pastry brush. Adjust the degree of soaking to your own taste.
Place the first layer on a flat plate or tray and spread it with cream. The amount of cream should equal about half the thickness of the layer. Add the next layer, soak it from the top now that it is on the cake, and add cream again. Use the remaining cream to cover the top and sides.
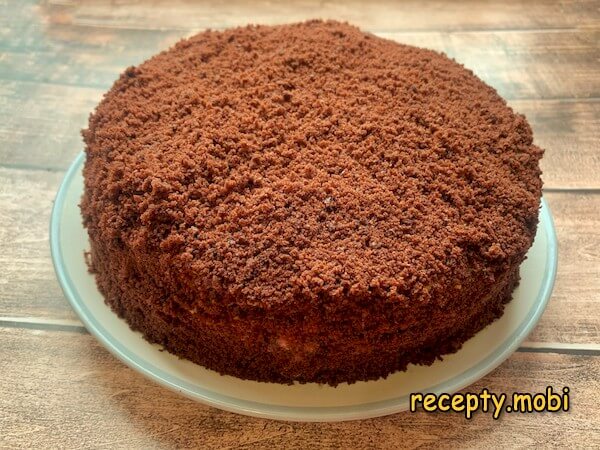
Break the trimmings from the layers into small pieces and grind them in a blender. Sprinkle these sponge crumbs over the top and sides of the cake. Decorate the top with chocolate shavings, chocolate bars or fresh berries. Put the cake in the fridge for 5 hours to stabilise and soak.
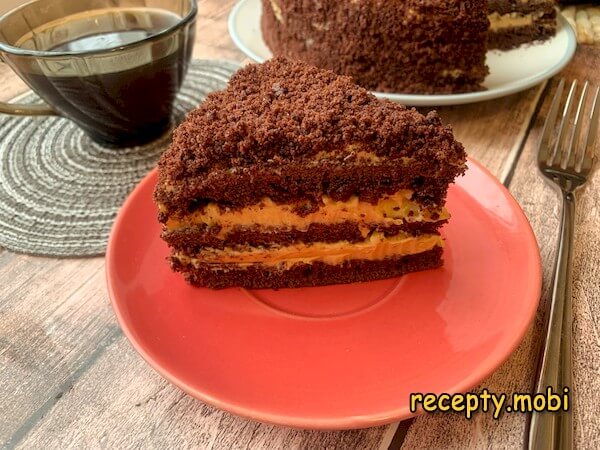
This is the beautiful and incredibly chocolatey Pele cake you get. Do not serve it straight from the fridge – let it stand at room temperature for 20 minutes. The gorgeous chocolate cross-section will not leave anyone indifferent, even those who are indifferent to sweets!Bon appétit!


Tips
- 1
Slake the soda with vinegar – this is the key for fermented-milk batter. Unslaked soda will leave an aftertaste, while its reaction with the kefir gives the cake its lightness.
- 2
Let the sponges rest for 3-4 hours at the very least – a full day is better. Cut straight away, they crumble and lose their shape, and the soak is uneven.
- 3
Keep the butter and condensed milk at the same temperature. Cold condensed milk plus warm butter gives lumps. Both should be at room temperature.
- 4
The coffee soak is Pele's signature touch. Coffee "underlines" the cocoa, making the chocolate taste even more chocolatey. The same principle works in other chocolate cakes.
FAQ
Which cocoa should I choose? +
Alkalized dark cocoa (Dutch-processed) gives a rich colour and a balanced flavour (Haller, Barry Callebaut, Valrhona). Natural cocoa is lighter and more acidic, but more aromatic. Avoid instant drinks like Nesquik with added sugar and milk powder – they will spoil the taste. "Rossiysky" and "Zolotoy Yarlyk" are good budget options. For Pele, cocoa with 20-22% cocoa butter (ordinary baking cocoa) is best. "Extra" cocoa with 30% is premium and gives more chocolate intensity. Never skimp on the cocoa in this recipe – it is the foundation of the cake's flavour.
What can replace boiled condensed milk? +
Alternatives: a chocolate custard cream (lighter), cream cheese (curd cheese + sugar + cream, a modern choice), a mascarpone cream with condensed milk (a restaurant version), or homemade caramel sauce (sweet, but less rich). Boiled condensed milk is this cake's calling card, and another cream changes its whole concept. You can boil the condensed milk yourself: cover the tin with water and boil it for 2.5-3 hours, topping up the water. Ready-made "Glavprodukt" or "Rogachev" are reliable brands. Avoid "condensed milk" made with vegetable fat – it will spoil the taste and texture of the cream.
How long does the cake keep? +
In the fridge under film or in a cake box – up to 4 days. The second or third day is the peak of flavour: the sponge soaks through completely and the cream becomes one with all the layers. In the freezer – up to 2 weeks, but thawing in the fridge over 8 hours changes the texture of the cream. The best approach: make it 1-2 days before serving and keep it in the fridge. Before serving, give it 20-30 minutes at room temperature. For longer storage, freeze the cake undecorated and add the decoration (the crumbs on top) after thawing for a fresh look.
What to serve the cake with? +
The classic tea-table pairing: with black tea (best of all with bergamot – Earl Grey), strong espresso or hot cocoa. With a glass of champagne or sparkling rosé for a festive presentation. For a "coffee ritual" – with a latte or cappuccino. Decorate the top with chocolate shavings, grated chocolate, cocoa nibs, fresh raspberries or cherries. For a birthday – with candles and fondant figures. For a dessert table – with a scoop of vanilla or plombir ice cream. Portions of 100-120 g are plenty (the cake is very rich); more than that and it is easy to overeat.
- Comment
or post as a guest
Be the first to comment.


