
avg —
Goose Feet Cottage Cheese Cookies
Instructions
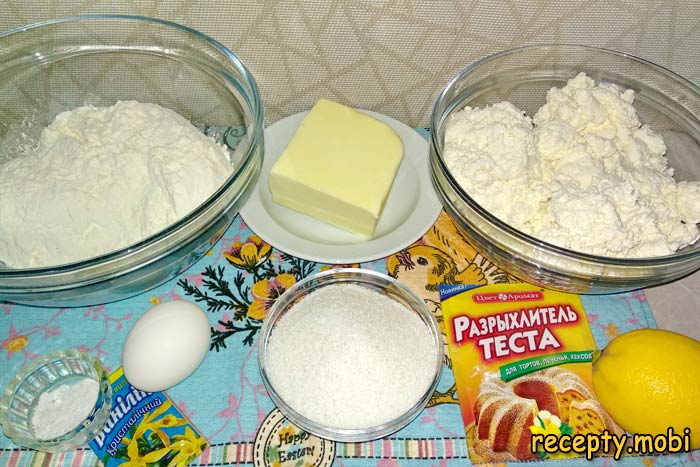
Prepare the ingredients for the goose feet curd cookies. The butter (200 g) should come straight from the fridge VERY COLD – this is critical for the "layered" structure of the dough. The sugar (200 g) is NOT added to the dough; it is used only as a "filling" when shaping. Cottage cheese of any fat content will do, but 9% is the best balanced choice.
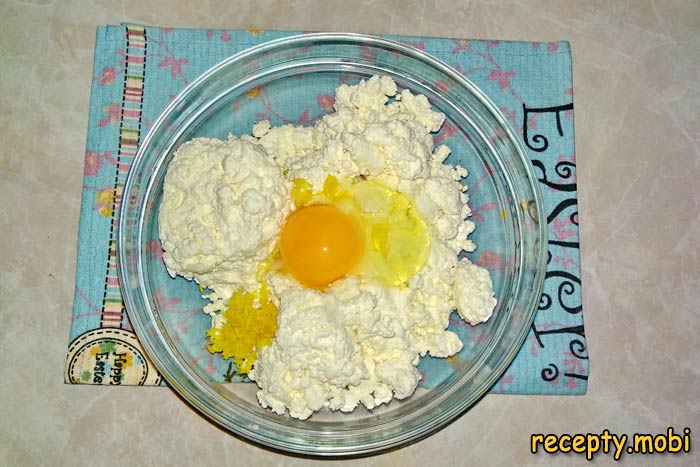
Put the cottage cheese (650 g) into a large mixing bowl, add 1 room-temperature egg, a pinch of salt (it balances the sweetness) and finely grated lemon zest (1 tsp) for a fresh citrus note. You can rub the cottage cheese through a sieve beforehand for a smooth, even texture without grains.
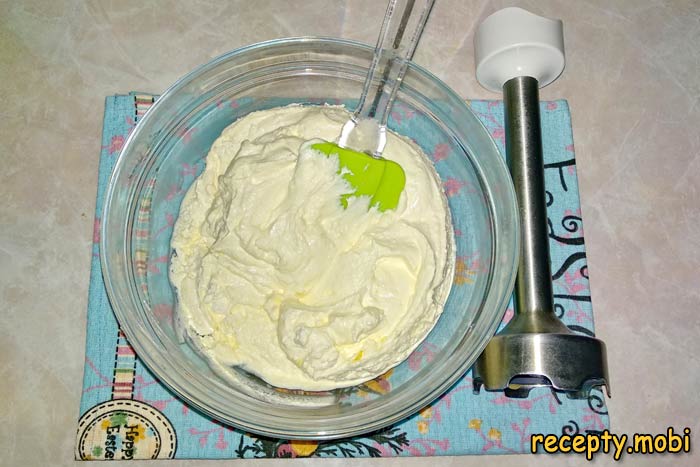
Thoroughly combine everything with the cottage cheese using a silicone spatula, or blend with an immersion blender for 1 minute until you have a smooth, elastic, uniform mass – the blender removes the curd grains completely. The finished mass should be creamy and free of lumps.
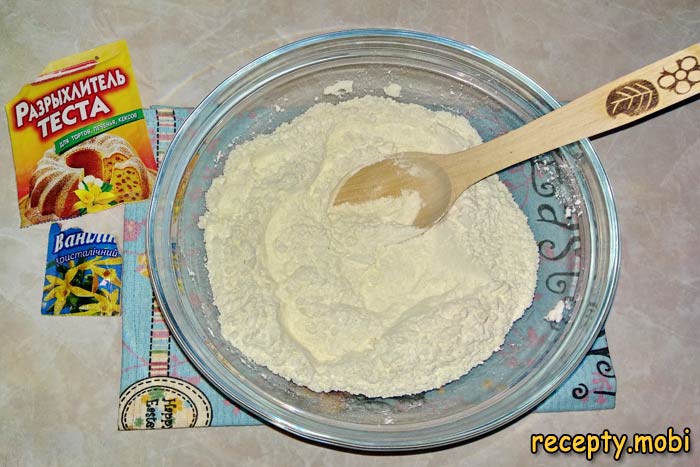
Set the curd mass aside for the moment. In a separate large bowl, mix the sifted flour (300 g), baking powder (10 g) and the packet of vanillin. Gently stir all the dry ingredients with a spoon until the baking powder is evenly distributed through the flour.
Take the butter out of the fridge – it should be VERY COLD, almost "rock hard" to the touch. Roll the piece of butter in flour on all sides – this creates a "protective" floury layer and makes it easier to grate later without sticking.
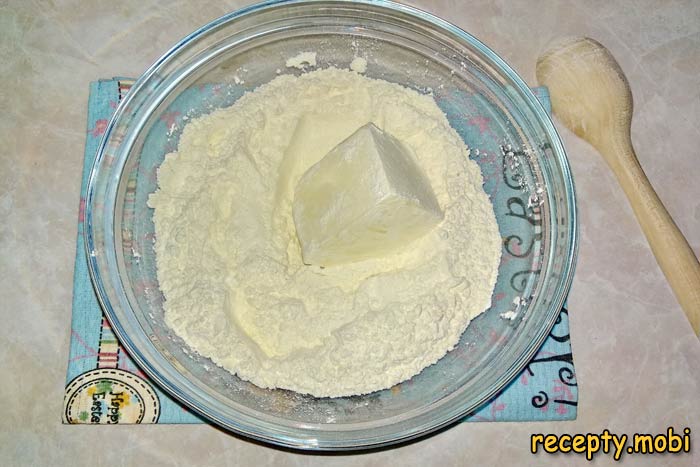
Grate the flour-coated butter on a coarse grater straight into the bowl with the flour mixture. Then quickly rub the butter into the flour with your fingers until you get a "crumb" – a loose, floury, buttery crumb, like a streusel. Cold butter gives the dough its "flakiness"; warm butter will "glue" the flour together.
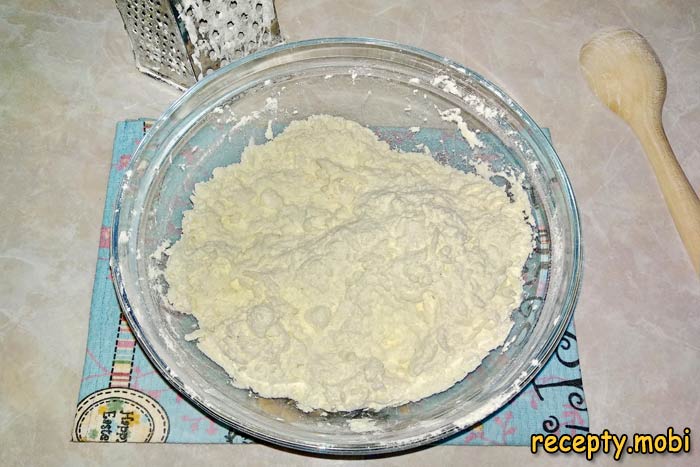
Add the curd mass to the bowl with the floury crumb and mix until uniform – first with a spoon (the dough is sticky), then with your hands. The dough turns out fairly sticky; to make it easier to knead, you can lightly moisten your hands with vegetable oil. Do not "clog" it with extra flour!

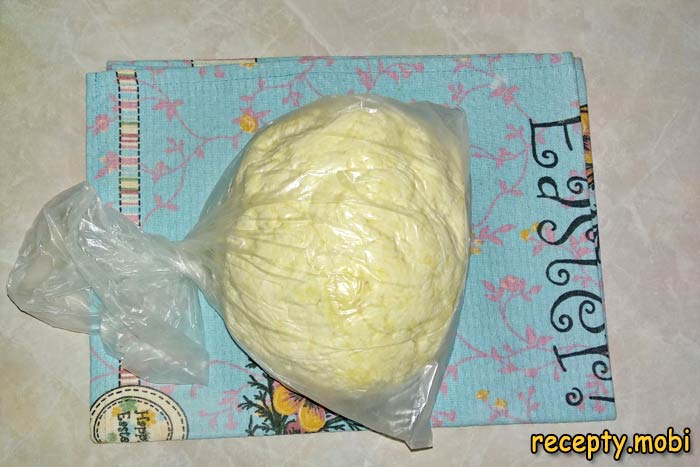
Knead the dough well for 2–3 minutes, but do NOT add too much flour and work quickly – so that the butter does not "warm up" from the heat of your hands. Shape the finished soft dough into a ball, wrap it tightly in a plastic bag or cling film and put it in the fridge for 15–20 minutes to chill.
After 15–20 minutes, take the chilled dough out of the fridge. Dust the work surface with flour and lay out 1/3 of the dough (put the remaining 2/3 back in the fridge). Work with the dough in small portions – so that it does not "warm up" and "lose" its flakiness.
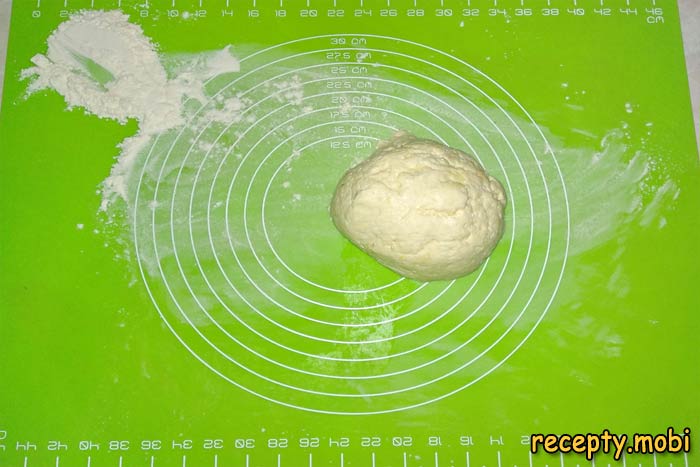
With a rolling pin, roll the dough into a thin sheet 3–5 mm thick – no thicker, or the cookies will not bake through. Using a glass or a special round cutter 9 cm in diameter, cut out circles. Leave the circles on the work surface and put the rest of the dough (the trimmings) back in the fridge for reuse.

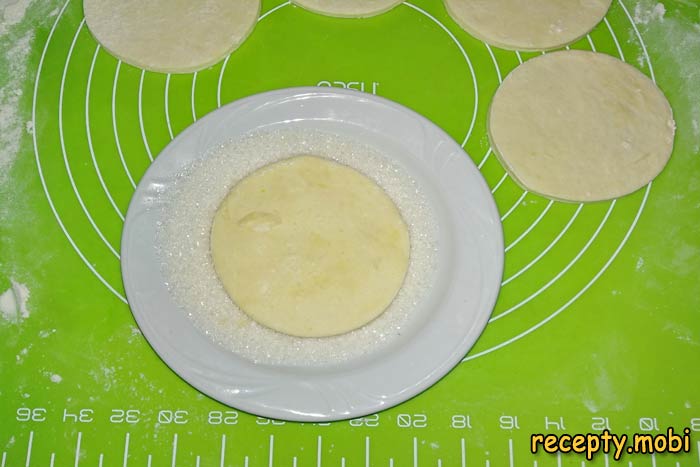
Now start forming the "goose feet" – it is IMPORTANT to do this correctly! Pour sugar (200 g) onto a flat plate – it will be the "sweet filling" between the layers of dough. Take a circle of dough and place its UNDERSIDE (the side that lay on the board, with the least flour) onto the sugar. Press down firmly – so that as much sugar as possible "sticks" to the dough.
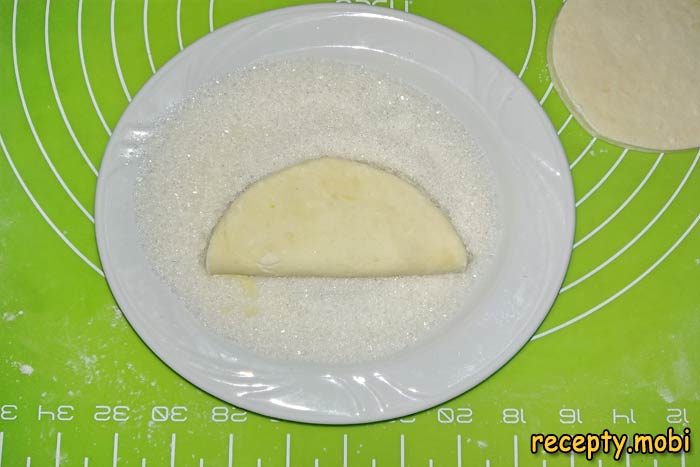
Fold the circle of dough IN HALF – the sugared surface should end up INSIDE. You will get a half-circle. Press the outer side of the half-circle firmly into the sugar again – for a second "layer" of filling. This step gives the feet their characteristic "layered" structure.
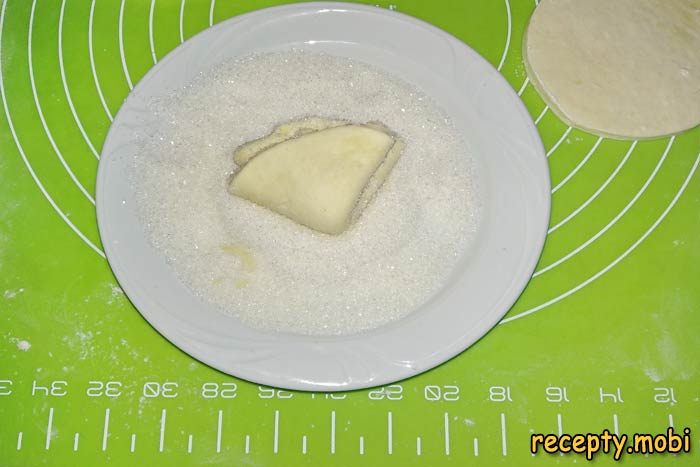
Fold the resulting half-circle IN HALF AGAIN – the sugar should once more end up inside. Lightly press the finished "triangle" so the cookie does not open up during baking. Repeat the same steps in batches with the remaining dough from the fridge.
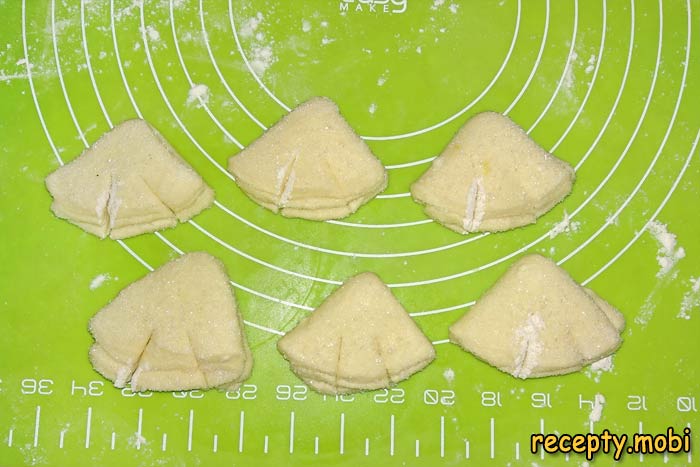
In the end you get "triangular" cookie blanks that look like goose feet. To make the pastries look even more like a goose's foot, on each triangle I make 2–3 cuts along the wide edge with a sharp knife – imitating the "toes" of the foot.
You can also make a decorative "pattern" on the cookie with a fork – dip the fork in flour and press it against the surface of the triangle. You will get a pretty "imprint" of stripes. Dipping the knife and fork in flour is essential – so the tools do not stick to the dough.

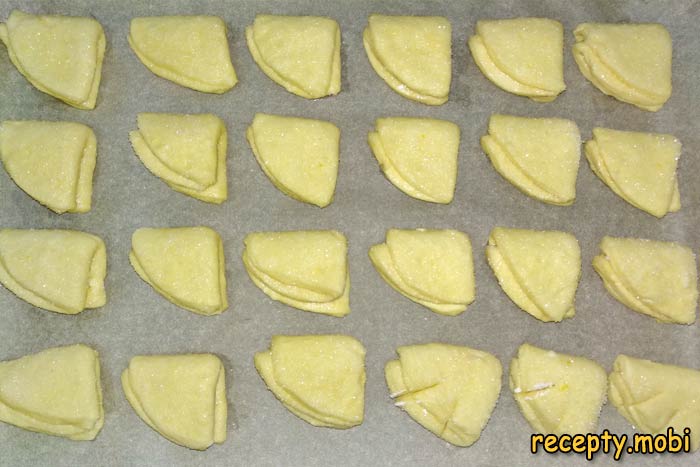
Lay the future "goose feet" cookies on a baking sheet lined with parchment brushed with vegetable oil. Arrange them 2–3 cm apart – the cookies will grow in size as they bake. Place the cookies on the parchment with the side WITHOUT SUGAR down – otherwise the sugar will "melt" into caramel and stick to the paper.
Bake the "goose feet" in an oven preheated to 190 °C for 20–25 minutes, until golden and springy when pressed. Check doneness with a toothpick or by breaking one cookie open – it should be baked through inside with no raw dough. The sugar on top will turn into a beautiful caramel crust.
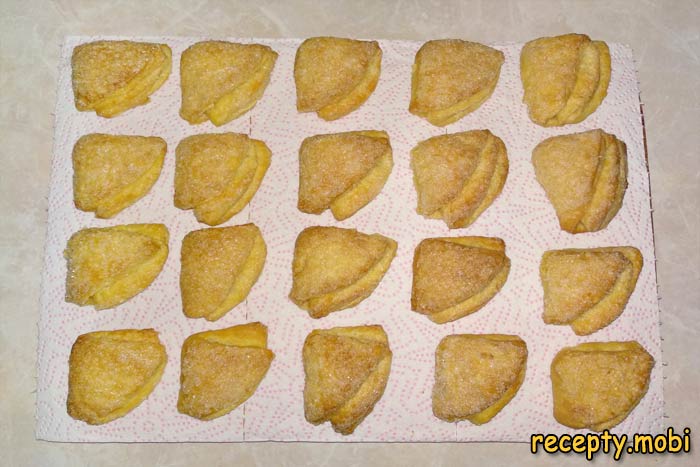
The finished cookies without decoration have "smooth" triangles with a caramel crust – also a pretty presentation. With fork or knife decoration, you get a "textured" surface with an interesting pattern.
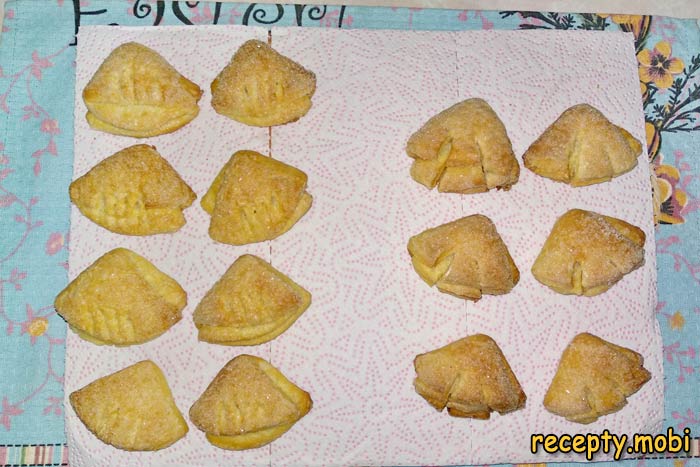
In a short time (45 minutes of active work) you get a large basket of fragrant homemade cookies (40 pieces). The goose feet cottage cheese cookies are ready! I serve them at a family tea, take them when visiting, or simply enjoy them as a tasty homemade snack for the whole family.


Tips
- 1
The butter must be COLD from the fridge – the "crumb" with flour gives the dough its "layered" structure, while warm butter "glues" the flour together and ruins the structure.
- 2
Sugar is the "filling" between the layers, not an "ingredient" of the dough. If you add sugar to the dough, you will get an "ordinary" cookie with no layering.
- 3
Work with the dough in small portions (1/3 at a time) and keep the rest in the fridge – the dough must not "warm up". I bake curd cookies "Hearts" on a similar principle.
- 4
The cookies go wonderfully with milk, tea or cocoa – serve them for a family breakfast or afternoon snack for the whole family.
FAQ
Can I use dry yeast instead of baking powder? +
No, only baking powder is suitable for this recipe. Dry yeast needs a long proving time (1.5–2 hours in the warm) – that does not suit this cold "layered" dough with butter, which must stay cold. Yeast also gives a different dough structure – a fluffy "bread roll" texture rather than the "layered" one of goose feet. If you have no baking powder, replace it with baking soda (1/2 tsp) slaked with lemon juice or vinegar. Without a leavening agent the cookies will turn out dense and "rock hard" – do not skip this ingredient.
Which cottage cheese is best to use? +
The ideal choice is homemade or farm cottage cheese with 9% fat (the classic "medium" option). Lower-fat (5%) gives "dryish" cookies, while higher-fat (18%) makes them "greasy" and heavy. The cottage cheese should be fresh, with no signs of souring – check the use-by date and smell it before using. Grainy, "crumbly" cottage cheese must be rubbed through a sieve or blended – otherwise the grains will be noticeable in the finished cookies and spoil the tender texture. Good cottage cheese is the foundation of a tasty cookie.
How long do the finished "goose feet" cookies keep? +
The finished cookies keep in a tightly closed tin or container at room temperature for up to 5–7 days without losing their crunch. Do not store them in plastic bags – the cookies will "go soft" and lose their crisp crust. In the fridge they keep for up to 10 days (but go stale faster). You can freeze the finished cookies for 1 month in an airtight bag – thaw them in the open air for 1–2 hours before eating. To restore the crunch after storage, dry them for 5 minutes in the oven at 100 °C. Ideally, eat them fresh within 3–4 days.
What to serve the cookies with? +
They are ideal for a morning breakfast with hot drinks: black tea with milk (the classic), green or fruit tea, coffee with milk or cream, cocoa with marshmallows, hot chocolate. For a child's breakfast – with milk, drinking yoghurt or ryazhenka. As an afternoon snack – with dried-fruit compote or a berry fruit drink. For a festive table – as part of a "homemade" dessert assortment with other baked goods. As a handmade gift – beautifully packed in glass jars with a bow for friends or relatives. A versatile homemade bake for any occasion.
- Comment
or post as a guest
Be the first to comment.


