
avg —
Cherry Pie with Puff Pastry
Instructions
I thaw the ready-made puff pastry (450 g) at room temperature for 30–40 minutes – do not thaw it in the microwave, as the dough will go runny from the heat. I roll it out on a floured surface to a thickness of 5 mm for the bottom layer. Pastry that is too thin, 2–3 mm, will tear under the weight of the filling, while pastry that is too thick, 10 mm, will not bake through evenly.
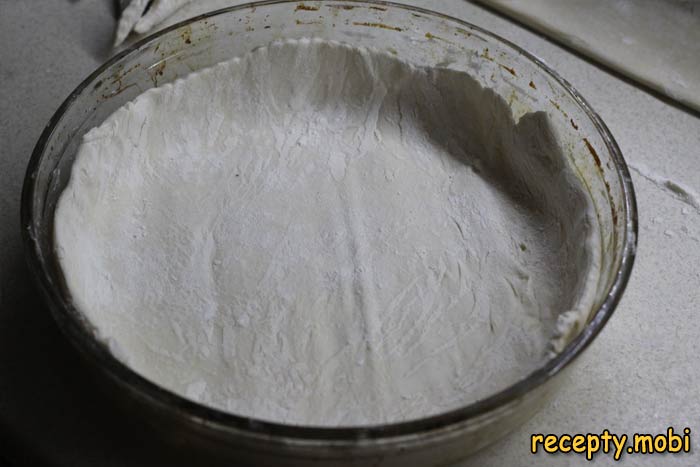
I lay the rolled-out sheet of pastry into a pie dish (ceramic or metal) 24–26 cm in diameter, forming high sides 3–4 cm tall around the edges. High sides hold in the cherry juice during baking. Without sides the juice will run over the edges onto the tray and burn.
In a separate bowl I thoroughly combine the pitted cherries (400 g – fresh, frozen or from compote, without the syrup), the sugar (3 tbsp) and the potato starch (1 tbsp). The starch should coat all the berries evenly – it will seal each cherry in a thin film and prevent the juice from running out.
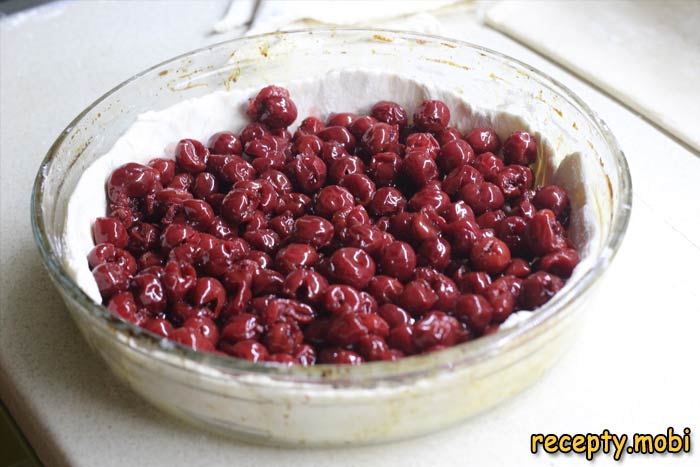
If I use frozen cherries, you MUST thaw them first and drain off all the released liquid through a colander. Excess water from frozen cherries will make the pie runny. If the cherries are in syrup, drain the syrup thoroughly and pat the berries dry with a paper towel.
I spread the prepared cherry filling evenly over the base of the pie, without filling the sides right to the top – I leave 1 cm of free space for the pastry to rise during baking. Excess filling will run over the edges as it bakes.
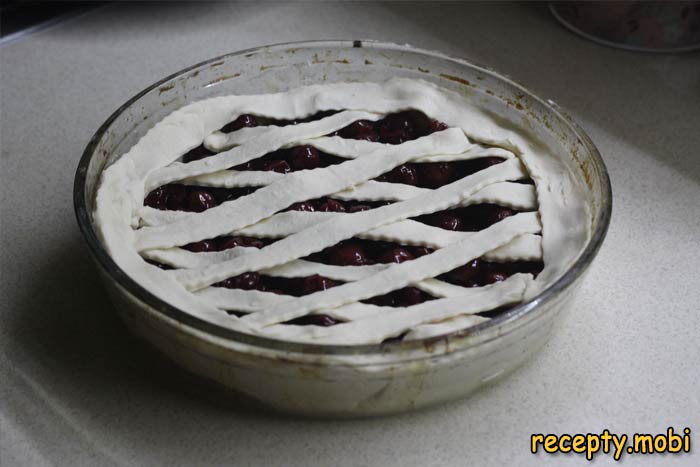
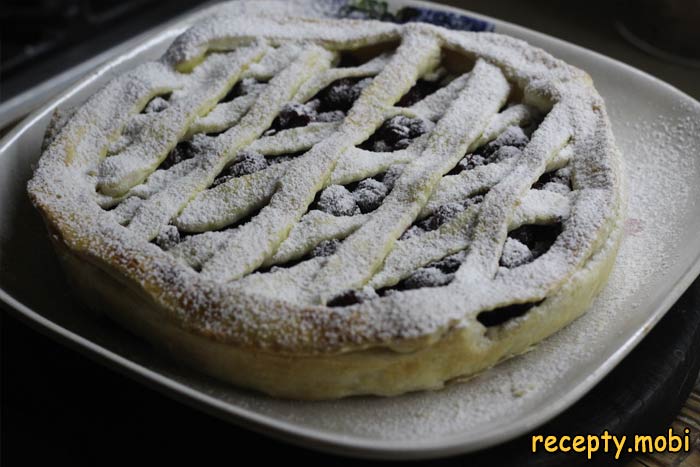
I roll out the second sheet of pastry to a thickness of 3–5 mm and cut it with a sharp knife or a pizza cutter into strips 1.5–2 cm wide. From the strips I form a neat lattice over the cherry filling, weaving the strips crosswise for an attractive presentation. With one long strip I form a border around the edge, pinching the sides together with the bottom layer.
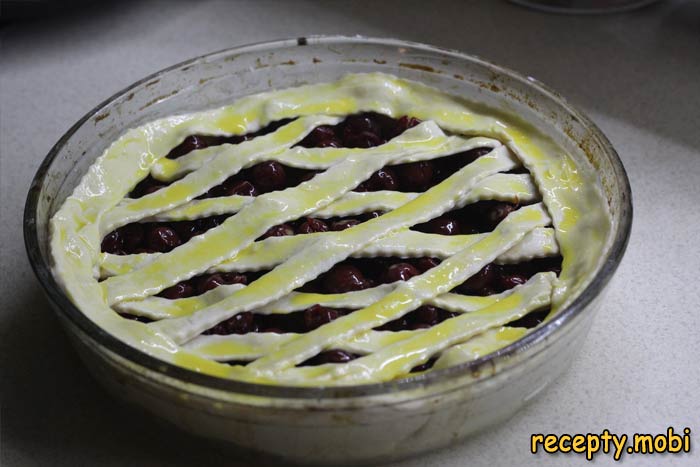
I make a glaze for a glossy crust: in a cup I mix the yolk (1 pc) with water (1 tbsp) until smooth. I brush all the pastry strips and the sides thoroughly with a silicone brush – the yolk and water give a lovely glossy golden crust during baking.
I bake the pie in an oven preheated to 180 °C for 25–30 minutes, until the crust is golden and the filling visibly bubbles between the strips of pastry (a sign that the starch has thickened). Do not open the door for the first 20 minutes – the pastry will collapse. Doneness is judged by the golden crust and the aroma.
I take the finished pie out of the oven and let it cool in the dish for 15–20 minutes – a hot pie is hard to slice neatly and the filling will run. Before serving I dust it with powdered sugar through a fine sieve for a pretty snowy finish. The cherry pie with puff pastry is ready!


Tips
- 1
Potato starch in the filling thickens the cherry juice – the pie will not run onto the tray and will keep a juicy, jelly-like filling.
- 2
Pinch the sides and the border firmly together with the bottom layer of pastry – the pie will not burn underneath and the filling will not run over the edges.
- 3
Always remove the excess liquid from frozen cherries after thawing – otherwise the pie will turn out runny and watery. I bake apple charlotte on a similar principle.
- 4
Serve the pie warm with a scoop of vanilla ice cream, whipped cream, or simply dusted with powdered sugar – all versatile additions.
FAQ
Can I use jam instead of fresh cherries? +
Yes, you can use cherry preserves or jam – this is the winter version of the pie. But do NOT add sugar (the jam is already sweet) and double the amount of starch (2 tbsp) – jam is runny and needs a stronger thickener. Any berry jam will also work: raspberry, currant, or blueberry. Jam makes a more cloying pie in terms of flavour. Fresh or frozen cherries give a natural tartness and a cleaner taste. Fresh cherries make the best pie.
Do I need to remove the pits from the cherries? +
You absolutely must! Pits in the pie are both inconvenient (you have to spit them out) and dangerous (you could break a tooth). Use a special cherry pitter (it costs next to nothing in any kitchenware shop) – it will process 400 g of cherries in 5 minutes without splashes or mess. Without a pitter, squeeze the pits out by hand through a slit made with a knife, but that is slow and messy. Frozen cherries usually have no pits (check the label). Cherries in syrup are also pitted. For convenience, always buy pitted cherries.
What can replace cherries in the pie? +
Any seasonal berries and fruit will work: sweet cherries (sweeter, you can reduce the sugar), black or red currants (more sour, increase the sugar to 4 tbsp), blueberries (neutral flavour), raspberries (more delicate), strawberries in large pieces. Among fruits – sliced apples with cinnamon (the classic charlotte), peaches or apricots in cubes, pears in slices. You can make a mixed berry filling – a blend of 3–4 kinds of berries. The principles are the same: mix with sugar and starch, place on the pastry, and bake.
How long does the finished pie keep? +
The finished cherry pie keeps at room temperature for up to 2 days under cling film or in a tightly sealed container, and in the fridge for up to 4 days (though it goes stale). For longer storage, freeze it in portions for 1 month in airtight bags – before eating, thaw it completely at room temperature and, if you like, warm it for 5 minutes in the oven at 100 °C to restore the crispness. On the second day the pie is even tastier – the juice has soaked into the pastry and the flavours have come together. Perfect for a family tea at the weekend.
- Comment
or post as a guest
Be the first to comment.


")
