
avg —
Chicken and Pepper Pie 'Rainbow'
Instructions
First, I prepare and measure out all the necessary ingredients. I take the butter out of the refrigerator in advance and leave it on the table so that it reaches room temperature and softens. It is better to use butter made from pasteurised cream rather than from vegetable fats. In a separate dish I mix the flour with the baking powder and salt. Into a deep bowl I pour the milk. Then I crack two chicken eggs into it. Next I add the butter, cut into pieces, to the milk mixture.

I stir the milk mixture with a fork so that the milk and eggs are well combined (the butter will float as small crumbs). Gradually I add the flour and knead a soft, elastic dough by hand. It does not need a long kneading (2-3 minutes is enough). The dough should come together well into a ball. You may need to add (or take away) a little flour. This depends on the quality of the flour. I added about 20 grams more.
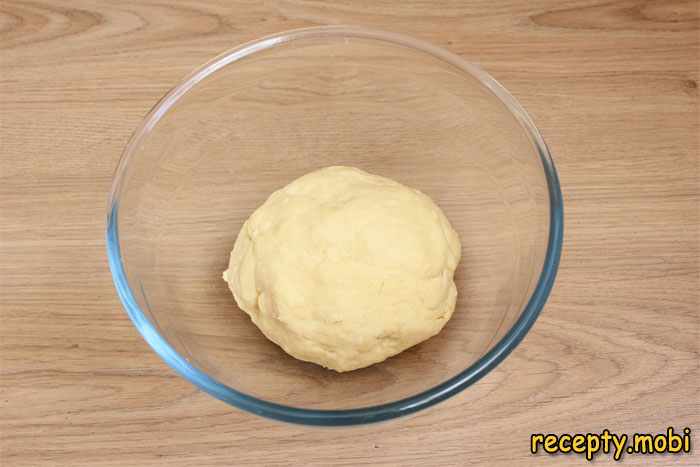
I put the ball of dough in the refrigerator until the filling is ready. Next I get on with making the filling for the pie. I heat a frying pan on the stove. I pour in vegetable oil (1 tbsp). I add the chicken fillet, cut beforehand into 1 by 1 cm cubes. I fry it over high heat for 4-5 minutes until lightly golden.
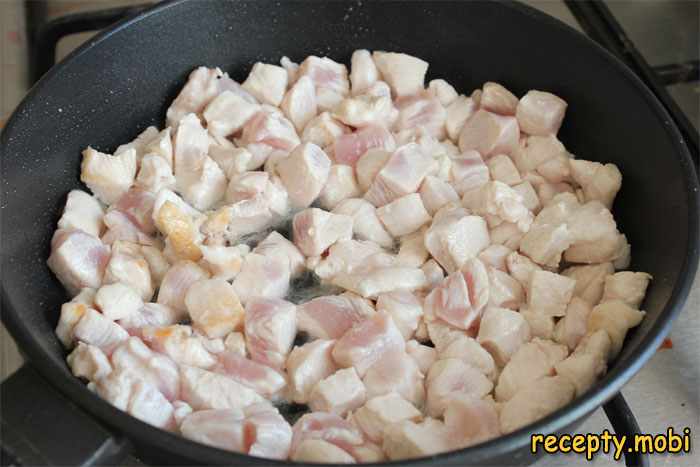
I carefully transfer the fried chicken fillet into a separate bowl or pot.

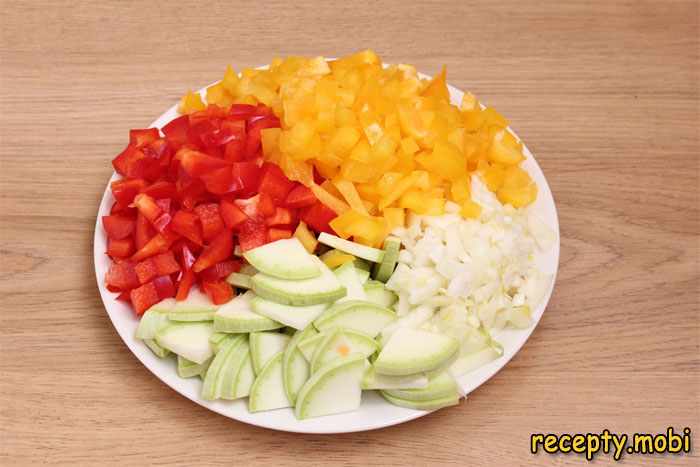
While the chicken fillet is frying, I prepare the vegetables for the filling. I rinse the bell peppers and zucchini thoroughly. I remove the seeds and the inner membranes from the bell peppers. I cut them into small pieces (or strips). I cut the zucchini lengthwise, then each half lengthwise in half again. Then I cut it across. This gives neat little triangles. I peel the onion and then chop it finely.
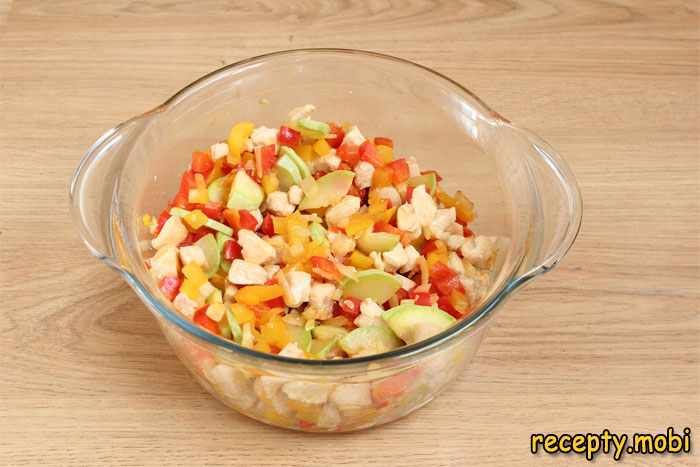
Into the pan I used earlier for the fillet, now reheated, I add another 1 tbsp of vegetable oil. I transfer the chopped vegetables to the pan and fry them over high heat for about 3 minutes (until lightly browned). Then I transfer the fried vegetables to the bowl with the chicken fillet and mix well. I add salt to taste.
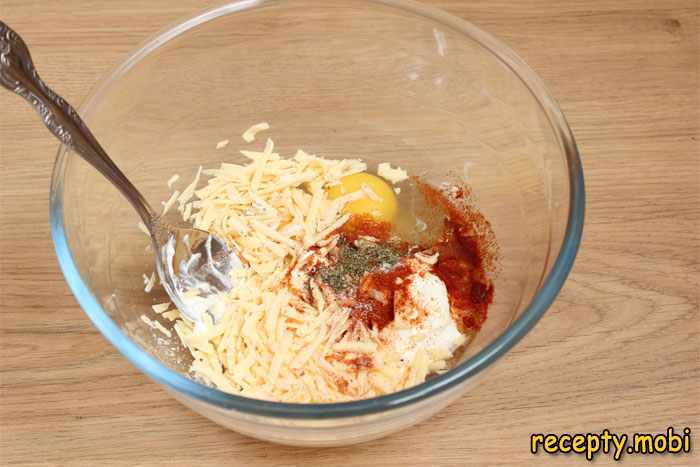
I make the sour-cream pour for the pie. Into a deep plate I put the sour cream, crack in the chicken eggs (2 pcs), add grated cheese (I grate it on a coarse grater), add a pinch of salt, the herbes de Provence and the sweet paprika. I mix well. The pour for the pie is ready.
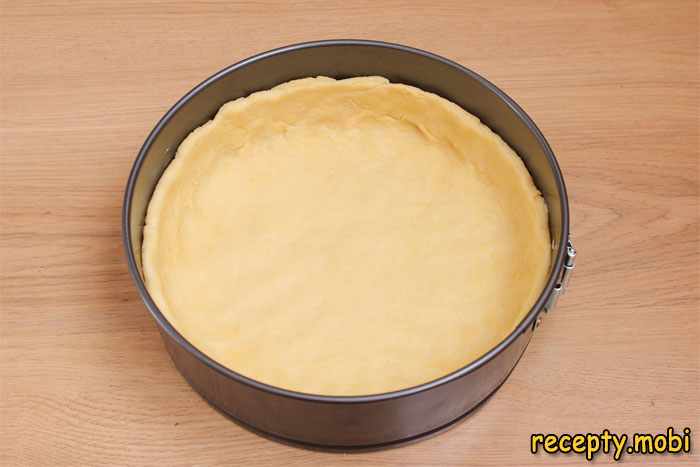
I take out a springform non-stick baking tin. I grease it with a little butter. I place the ball of dough in the middle. And by hand I roll out (press) the dough across the bottom of the tin. I shape high sides from the dough (the sides are about 6 cm tall).
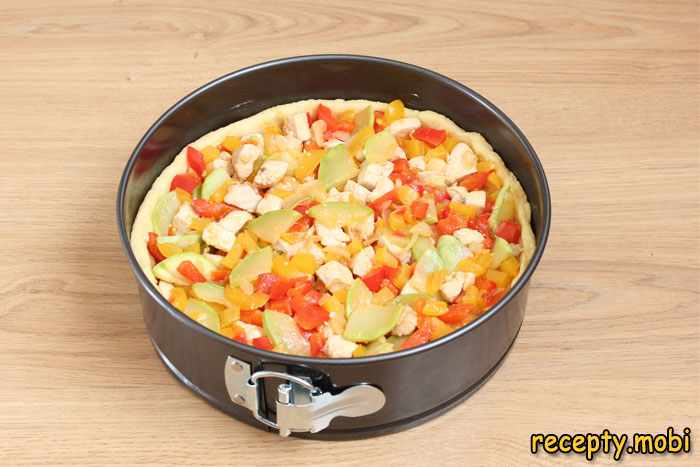
I gently lay the filling into the tin, level it with a spoon and press it down a little.
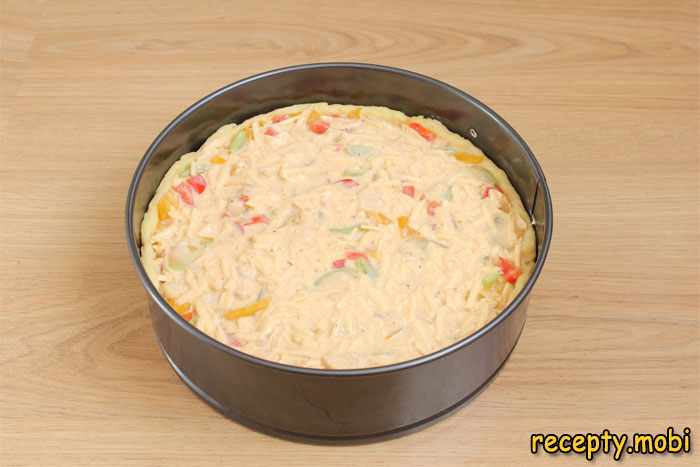
On top I evenly pour over the sour-cream pour.
I put the tin with the "Colorful" pie to bake in an oven preheated to 185 degrees for 55-60 minutes. After about an hour you will smell incredible aromas wafting through your kitchen. I let the baked pie cool slightly by placing the tin on a wooden tray. Then I carefully remove it from the tin and transfer it to a plate. The "Colorful" pie is ready. The pie goes beautifully with tea, kefir, milk, compote or kissel. The cooled "Colorful" chicken and pepper pie is best kept in the refrigerator, if it has not been swept off the table in 5 minutes. Enjoy your snack!


- Comment
or post as a guest
Be the first to comment.
")


