
avg —
Royal Curd Pie in the Oven (Tsarskaya Vatrushka)
Instructions
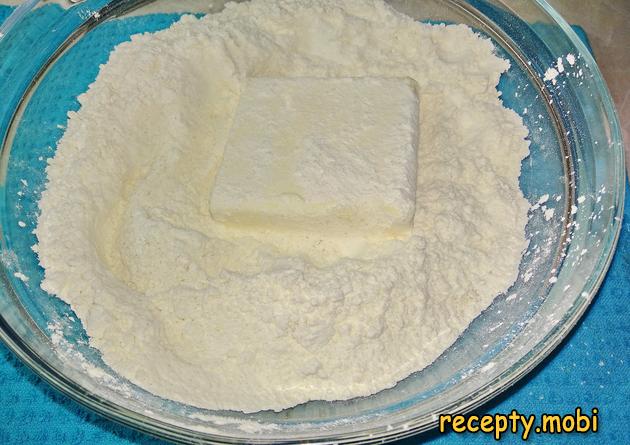
I prepare the products for the shortcrust crumb. I put the butter (180 g) into the FREEZER at least 2–3 hours ahead — this is the "secret" of crumbly pastry for a royal vatrushka. Warm butter would simply soak into the flour and the dough would turn out tough.
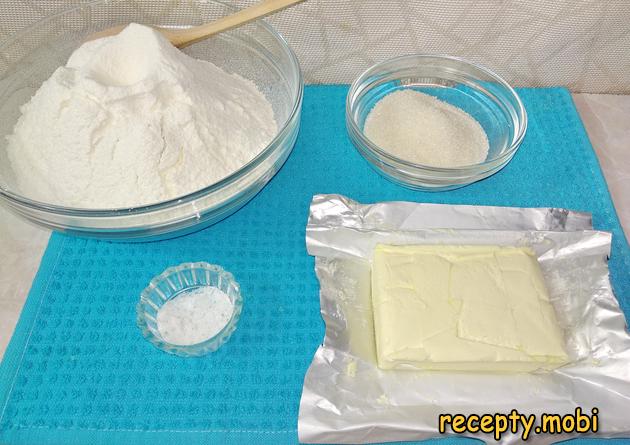
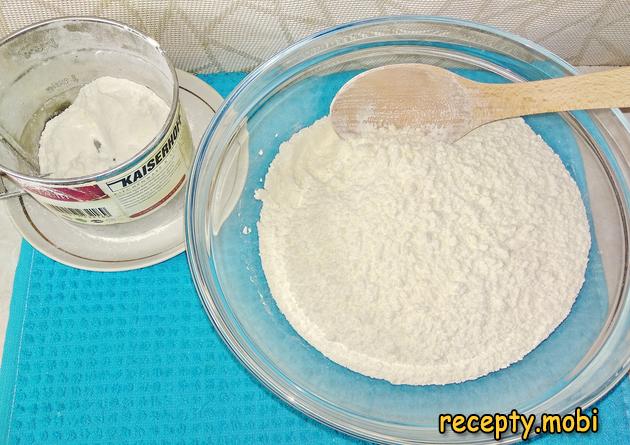
I always sift the flour (550 g) through a sieve or a mug-sieve — it enriches it with air for an airy dough structure. A large amount of flour gives a "thick" shortcrust crumb, the base of the pie.
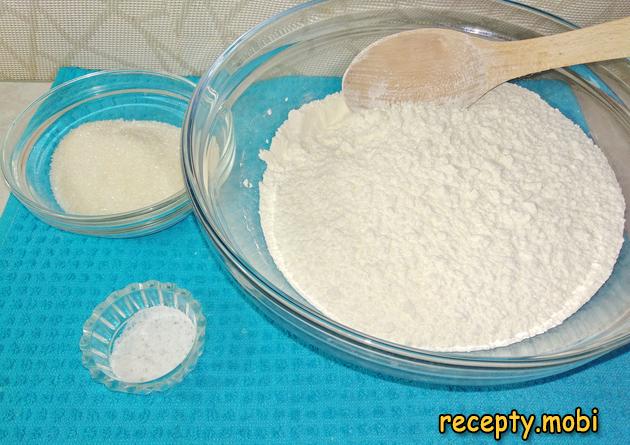
I add the sugar (100 g) and a pinch of salt (one or two pinches) to the sifted flour. I mix the dry ingredients thoroughly with a whisk until evenly distributed. The sugar gives the dough sweetness, the salt balances the flavour.
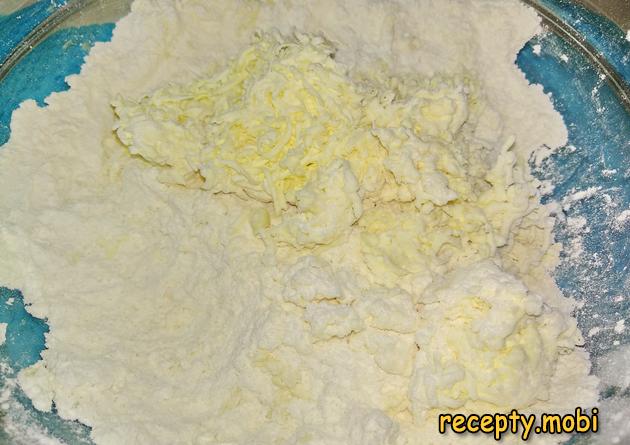
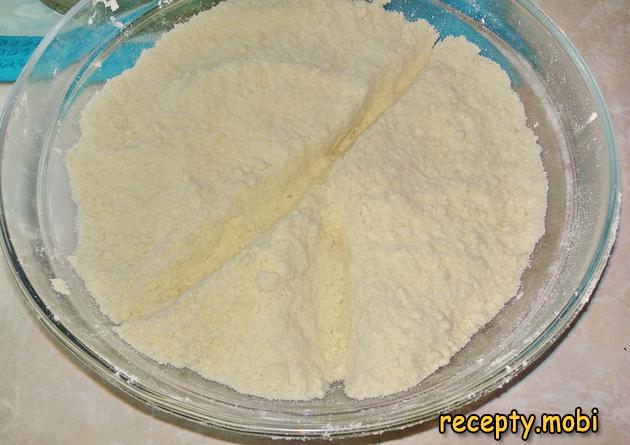
I take the frozen butter out of the freezer and dust it with flour straight away — the flour clings to the butter and keeps it from melting while you grate it. I grate the frozen butter on the FINE side of a grater right into the flour-and-sugar mixture, working quickly so the butter has no time to warm up.
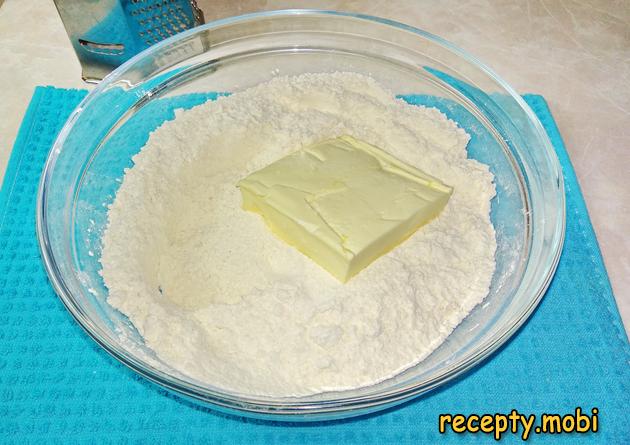
Next, I rub the butter into the flour WITH MY HANDS — you get a fine crumb the size of a pea. I do this FAST so the butter does not warm up from the heat of my hands. The finished crumb is golden, with visible pieces of cold butter. I put the prepared shortcrust crumb in the refrigerator for 30 minutes.
Meanwhile I prepare the cottage cheese filling — the "secret" of a tender texture. I gather the products from the list: cottage cheese 9% (700 g), sugar (200 g), eggs (4 large or 5 medium), vanillin (1 packet), a pinch of salt. Cottage cheese at 9% is the "golden mean" for fat content (5% gives a dryish filling, 18% too rich).
To prepare the cottage cheese filling, gather the ingredients according to the list. You can add the vanillin or leave it out as you wish.
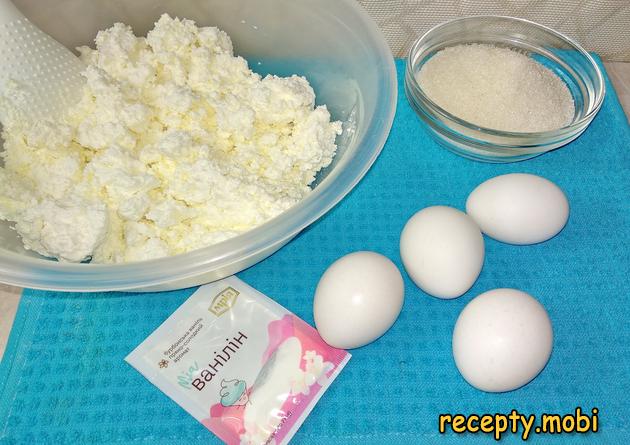
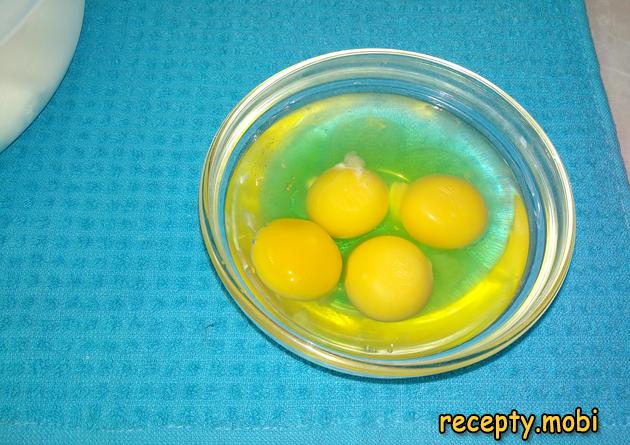
I crack the eggs (4 pcs.) into a separate bowl one at a time and check their quality — a bad egg would spoil the whole batch. Fresh eggs have a firm yolk and thick, clear white with no off smell.
Into a large mixing bowl I put all the cottage cheese (700 g). I add the sugar (200 g), a pinch of salt, the vanillin (1 packet) and the prepared eggs. The salt is critically important — it rounds out the flavour and boosts the sweetness; without it the filling would taste flat.
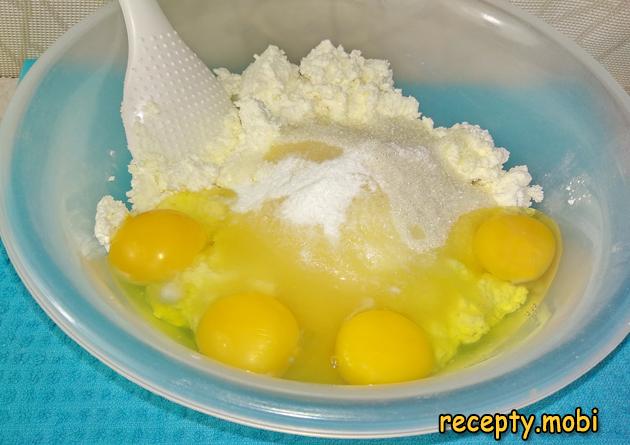
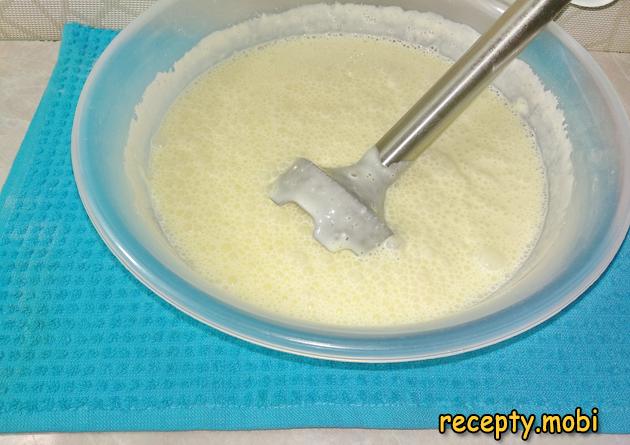
The CRITICAL STEP for a smooth texture: I whip the cottage cheese with the eggs, sugar and spices in a BLENDER (immersion or stand) until completely smooth, 3–5 minutes. The finished filling MUST HAVE NO grains of cottage cheese — this is the "secret" of the tender, cheesecake-like texture of the baked pie.

You end up with a smooth, fluffy cottage cheese mass with the consistency of a thick cream. There should be no visible grains or lumps left in the finished filling. If you have no blender, pass the cottage cheese through a fine sieve — it takes time, but the result is the same.
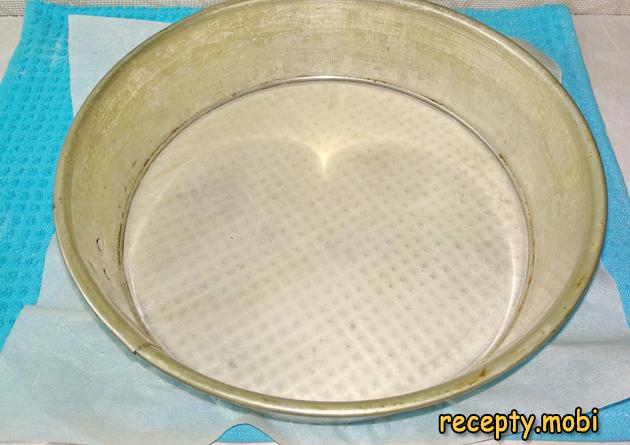
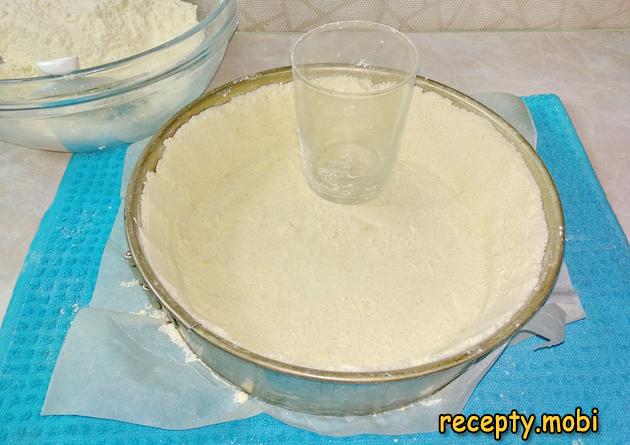
I prepare a SPRINGFORM pan 22 cm in diameter — the best size for a tall, handsome vatrushka. You can take a wider pan, but then the pie will be lower. I line the bottom with parchment paper and leave the sides bare, neither covered nor greased — the shortcrust dough will not stick to the walls anyway.
I take the chilled shortcrust crumb out of the refrigerator. I visually divide the crumb into THREE PARTS. From ½ of the dough I will form the BASE of the pie. The other ½ I divide once more into 4 parts — ¼ for the sides and ¾ for the top layer.
I form the base of the pie: I tip half of the dough crumb into the pan and spread it evenly across the bottom with my hands. I compact the crumb with a smooth glass or a masher, forming an even, "pressed" base 1 cm thick. From ¼ of the dough I form the sides: I tip the crumb around the rim of the pan and compact it against the walls with the glass too. The height and thickness of the sides should be EVEN all the way round, about 4–5 cm high.
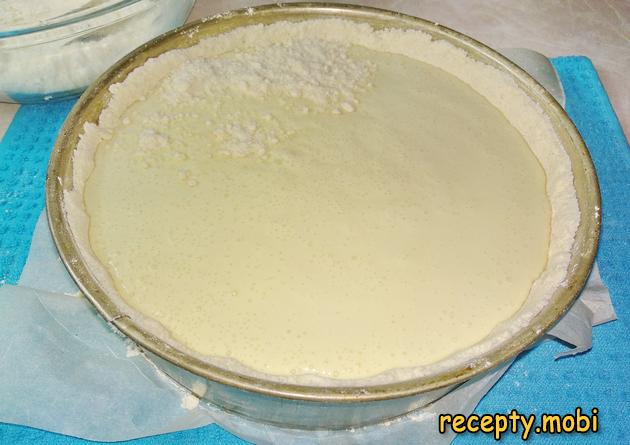
I fill the ready dough "trough" with the cottage cheese filling — gently pouring the whipped mass right up to the top of the sides. The cottage cheese mass fills the pan to the brim — that is normal; during baking it rises like a soufflé.
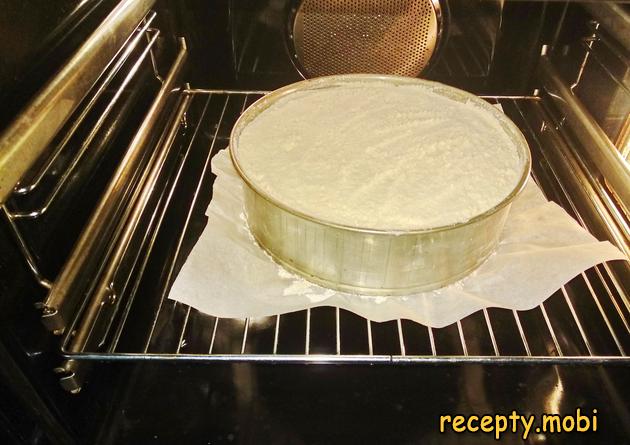
With the remaining ¾ of the half of the dough crumb, I dust the cottage cheese mass on top. I do this in an EVEN layer — all the filling should be covered with dough, with no bare patches. I gently press the crumb down with my palm to compact it.

I preheat the oven to 180–190°C, top-and-bottom heat (depending on the power of the stove). I put the pan with the vatrushka in the oven for 45–55 minutes. It may need a little more, up to an hour — keep an eye on the pie so it bakes through and the crust browns nicely.
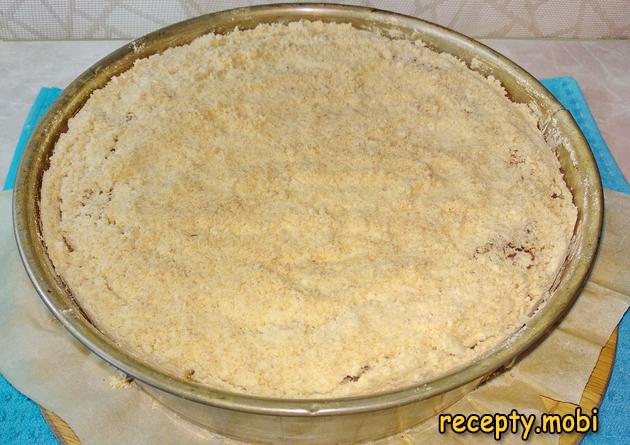
I take the finished royal vatrushka out of the oven. IMPORTANT: YOU MUST NOT TAKE IT OUT OF THE PAN STRAIGHT AWAY — baked goods with cottage cheese should "rest" for 3–8 hours until fully cooled. It is ideal to bake in the morning and leave it to cool overnight — the pie firms up as much as possible and takes on its characteristic "royal" structure.

After 3–8 hours of cooling, the little cracks that appeared on top during baking tighten up and the top layer becomes even. I carefully open the springform pan — the vatrushka comes out freely.
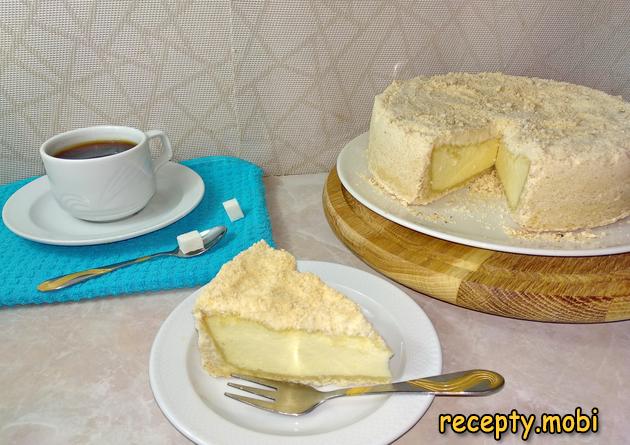
I cut the pie into wedges with a sharp knife. In the cross-section you can clearly see the dense, uniform filling of a creamy colour and the even shortcrust base with a caramel hue.
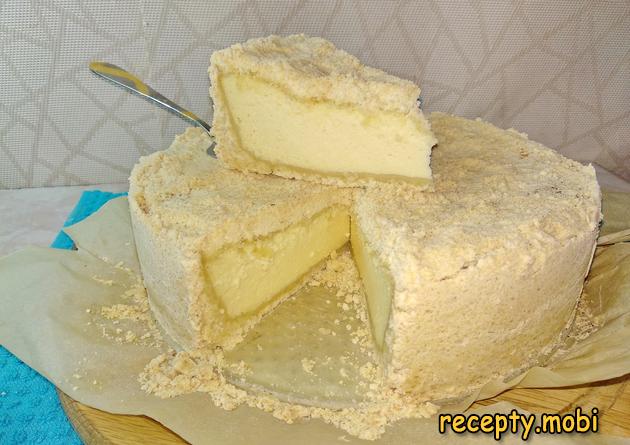
I brew some tea and call everyone to the table!The royal curd pie in the oven is a large, striking pie that truly lives up to its "royal" name. I bake it on a principle similar to a New York cheesecake.


Tips
- 1
ALWAYS whip the filling in a blender until completely smooth — the "secret" of a smooth texture with no grains of cottage cheese.
- 2
Use butter STRAIGHT FROM THE FREEZER, well chilled — the "secret" of crumbly shortcrust pastry.
- 3
Let the vatrushka "rest" for 3–8 hours after baking — without this the pie will not take on its compact "royal" structure. I bake my New York cheesecake on a similar principle.
- 4
Use cottage cheese with 9% fat — less fatty gives a "dry" filling, fattier a "greasy" one.
Video
FAQ
What can I use instead of cottage cheese in the filling? +
Several options work: ricotta (a more "Italian" version with a tender, creamy texture), mascarpone (a more "gourmet" cream cheese), Philadelphia cream cheese (for a "cheesecake" version), a 50/50 mix of cottage cheese and sour cream (a more "tender" filling), or thick Greek yoghurt 10% plus cottage cheese 50/50 (a "lighter" version). For a lactose-free version, use soy or coconut "cottage cheese". Cottage cheese at 9% is the "classic" for a Russian royal vatrushka because of its dense structure and characteristic curd flavour. Each substitute gives its own character. For a "premium" version, use mascarpone with cottage cheese 50/50.
Can it be baked without eggs? +
Yes, there are vegan and Lenten alternatives. Without eggs, using starch: replace the 4 eggs with 4 tbsp of corn or potato starch — it binds the filling without eggs. With a flax "egg": 4 tbsp of ground flax + 12 tbsp of water, left to stand for 5 minutes until jelly-like. With aquafaba: 12 tbsp of the liquid from canned chickpeas whipped to a foam — a vegan replacement. With banana purée: 2 ripe bananas mashed to a purée + 2 tbsp of starch — a "tropical" version. The texture without eggs will differ a little, but the flavour stays "curdy". Ideal for strict fasting and vegans.
How long does the royal vatrushka keep? +
The finished pie keeps in the refrigerator for up to 4 days in a tightly closed container or under cling film. On day 2–3 the flavour is even richer — the filling firms up to the maximum and soaks up the aromas. Before serving, warm it for 1 minute in the microwave to bring back its tenderness (or serve it cold — the "Russian" classic). You can freeze it whole or in portions for 1 month in airtight film — before serving, thaw it fully in the refrigerator for 8 hours. Ideal for getting ahead — bake on Sunday for a whole week of tea drinking.
What should the vatrushka be served with? +
It is ideal with hot drinks after lunch or dinner. With tea — black with lemon or green with jasmine (the classic of Russian tea drinking), herbal tea with mint, or Earl Grey with bergamot. With coffee — espresso, latte, cappuccino, cocoa with milk, hot chocolate. For a children's birthday — with a milkshake or fruit drink. Among adult drinks — dessert liqueurs (Baileys, Amaretto), white semi-sweet wine (Moscato), sweet sparkling (Prosecco), sweet red (Cahors for the Russian classic). For an Easter spread — with kulichi and painted eggs as the "triumvirate" of Russian desserts.
- Comment
or post as a guest
Be the first to comment.


