
avg —
Mimosa Salad with Sardines
Instructions
Gather all the necessary products for making the Mimosa salad with sardines. Have the eggs, potatoes and carrots already boiled and completely cooled before you start, since warm ingredients will quickly soften the layered structure once assembled in the pastry ring on the serving plate.
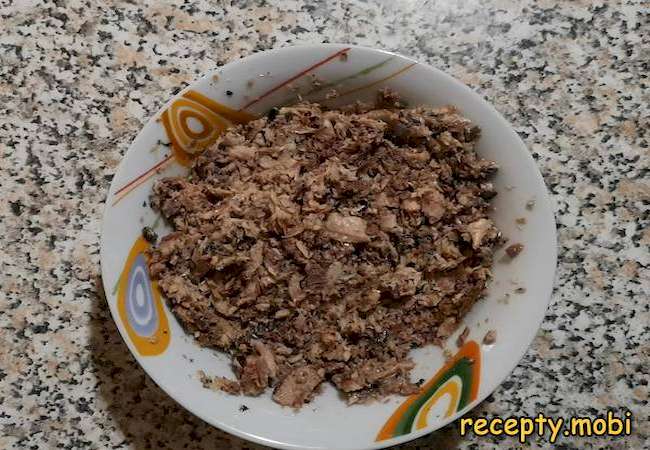
Open the can of sardines and drain off the oil completely into a separate bowl. Transfer the fish to a convenient plate and mash it gently with a fork until you have a uniform paste with no large chunks remaining for the smoothest possible bottom layer.
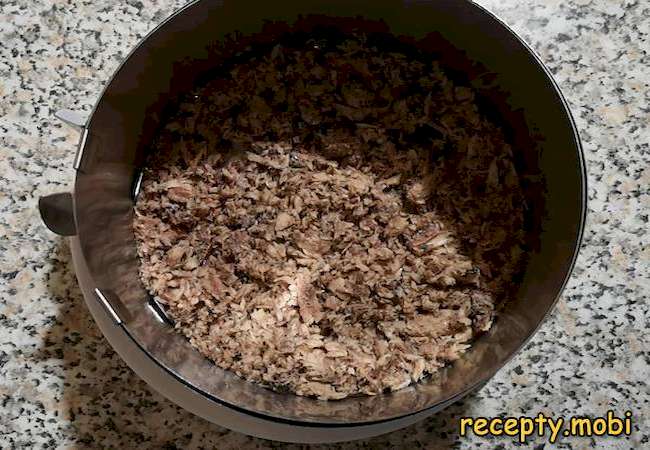
Place a 16-centimetre pastry ring on the serving plate and spoon in the mashed sardines as the very first layer. Press the fish gently with the back of a spoon to compact it evenly across the entire base of the ring before moving on to the next layer.
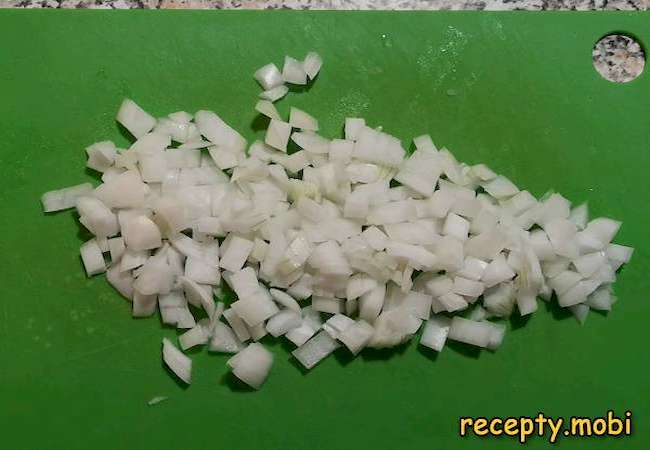
Cut the peeled onion into very small even cubes. Smaller dice releases more flavour into the salad and prevents large raw pieces from dominating any single bite when the dish is later sliced and served at the table to guests.
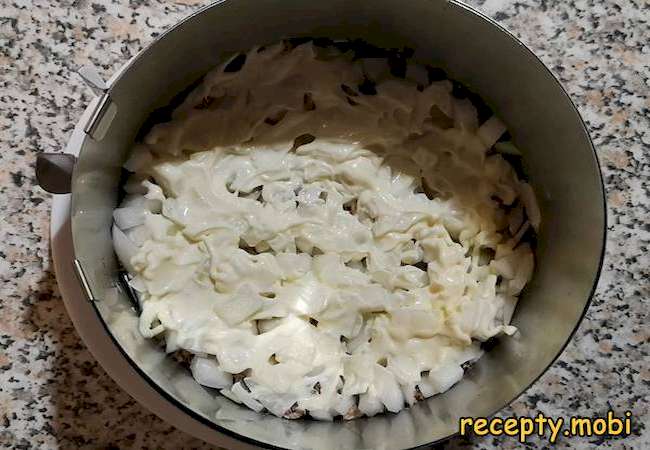
Spread the chopped onion as the second layer over the sardines and squeeze a fine net of mayonnaise across the top using a piping bag or zip-top bag with a corner snipped off. The net pattern uses less mayonnaise overall than a full layer would.
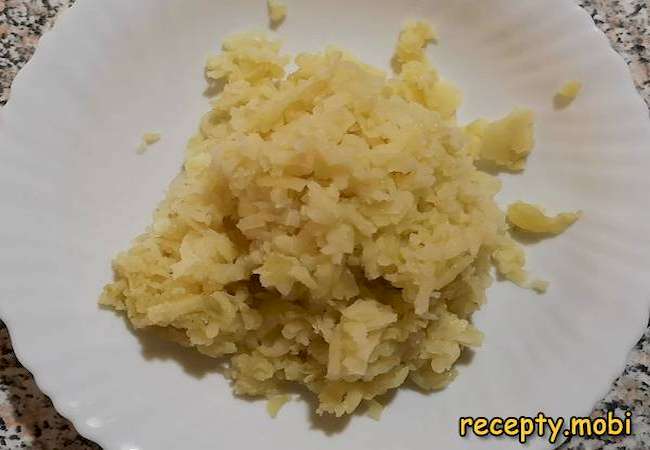
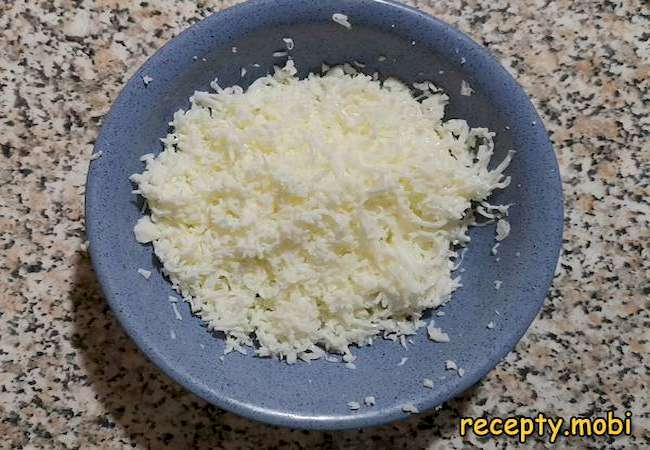
Remove the skin from the boiled potatoes once they are completely cool. Cool potatoes peel far more easily than warm ones, and the cooled flesh holds its shape better when grated for the next layer of the carefully constructed salad.

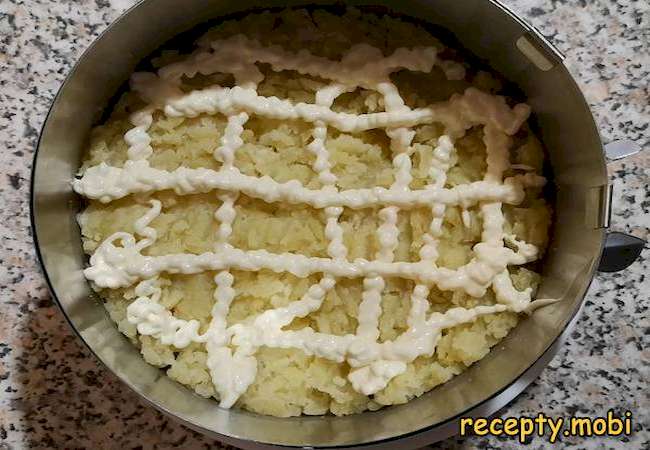
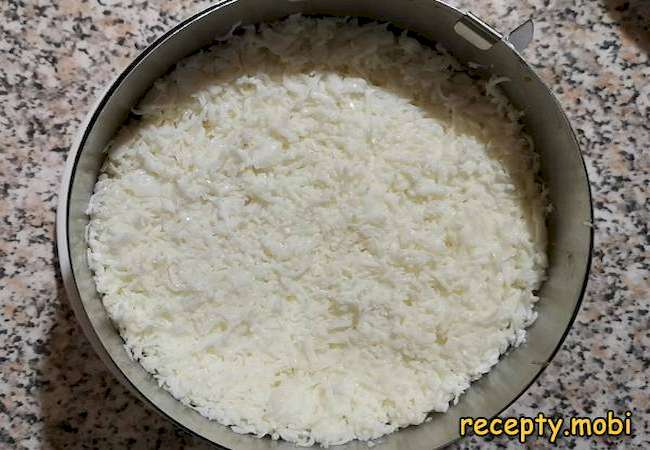
Grate the cooled boiled potatoes on the larger side of a box grater. The coarser texture creates more visual interest in the cross-section of the salad and helps the potato layer stand out as a distinct band rather than blending invisibly into the mayonnaise above and below.
Spread the grated potato evenly as the next layer in the pastry ring and cover with another fine decorative net of mayonnaise. Press the potato gently to even out the surface, but do not compact too firmly, since you want the layer to remain visibly distinct.
Peel the cooled boiled carrot and grate it on the larger side of the box grater. The bright orange colour of the carrot adds a beautiful contrast to the white potato layer below and the snowy egg-white layer that comes immediately after in the assembly.
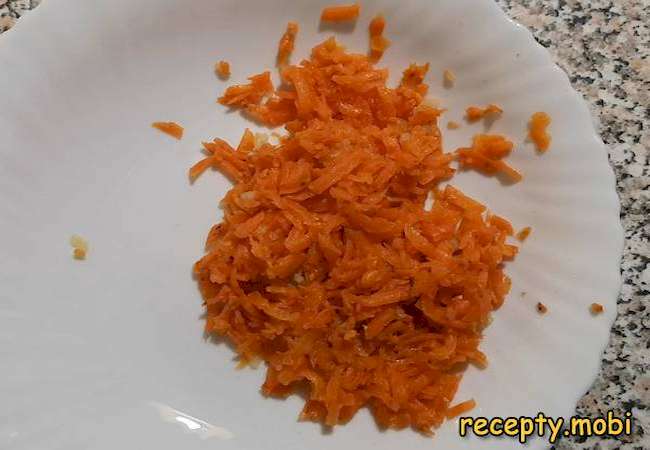
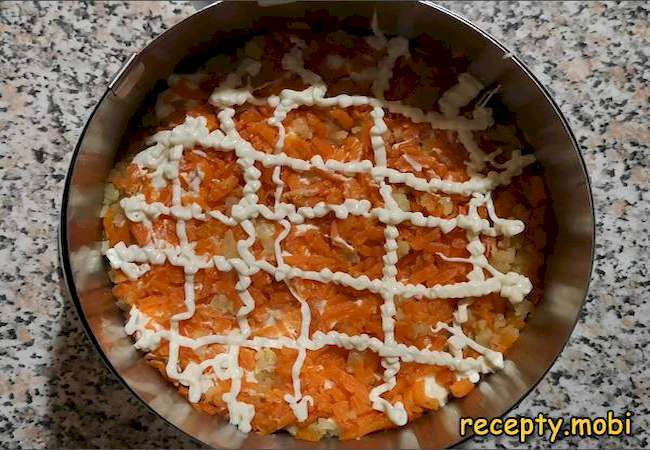
Spread the grated carrot in an even layer across the potato and cover with another decorative net of mayonnaise. The carrot layer is the most colourful in the salad, so distribute it carefully to ensure every slice shows a clean band of bright orange when cut.
Carefully separate the egg whites from the yolks while the eggs are still cold from the refrigerator. Cold eggs separate more cleanly than warm ones, with the yolk holding its shape better and slipping cleanly out of the surrounding white without breaking unexpectedly during the process.
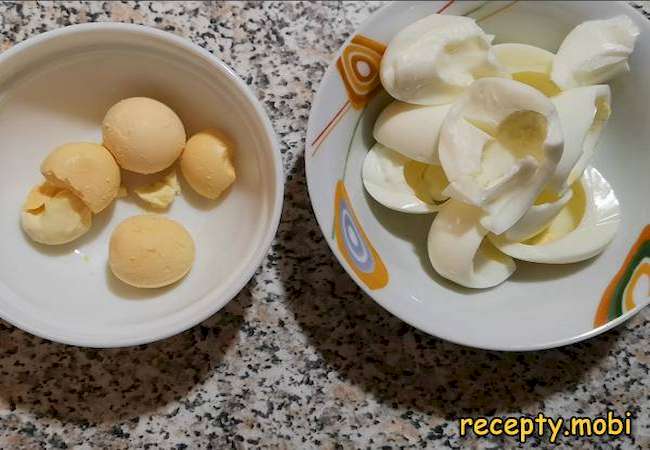
Grate the boiled egg whites on the fine side of the box grater. Take care not to over-press the whites against the metal teeth, since they can quickly turn into a mushy paste rather than the clean light strands you want for the layered construction of the salad.
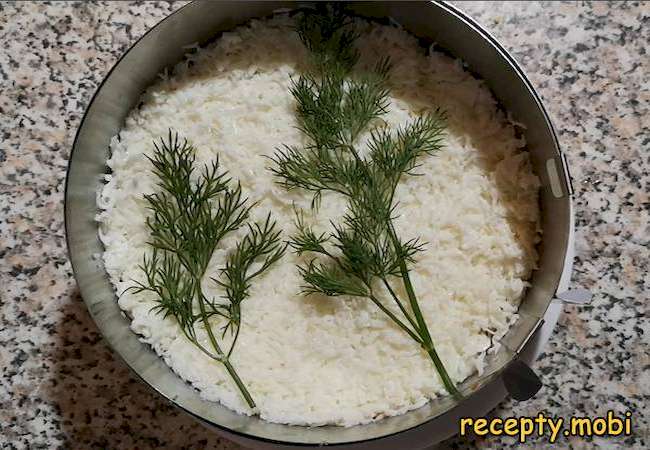
Distribute the grated egg whites evenly over the most recent carrot-and-mayonnaise layer in the pastry ring. Do not cover the whites with another mayonnaise net at this stage, since the next layer of decoration goes directly on top of the white surface for visual contrast.
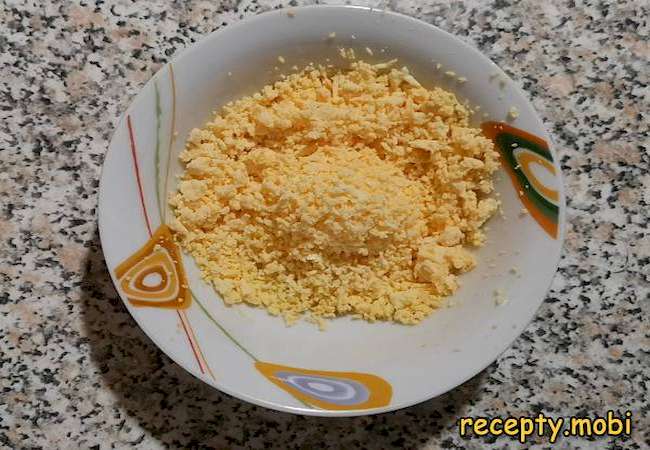
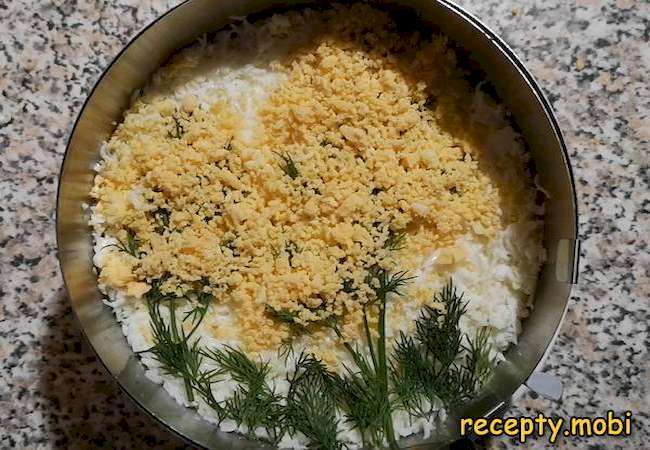
Grate the boiled egg yolks on the fine side of the box grater as well. The yolks are the showpiece of this salad, providing the bright yellow colour that gives Mimosa its name from the spring flower of the same colour, so handle them gently to keep the strands light.
As decoration, place a few sprigs of fresh dill on top of the white egg layer in the pastry ring. The dill provides a vivid green base for the bright golden yolks that come next and turns the salad into a recognizable representation of the mimosa flower.
Sprinkle the dill sprigs generously with the grated yolks so the composition resembles the bright spring mimosa flower. The shaped decoration is not strictly required: you can also just spread mayonnaise on the whites layer and cover with grated yolks for a simpler finish. Send the salad to the refrigerator for several hours to soak.
After the soaking time, take the salad out of the refrigerator and carefully remove the pastry ring by running a thin knife around the inside edge to release the salad cleanly. The Mimosa salad with sardines is ready to be served. Bon appetit!


Tips
- 1
Choose canned sardines packed in oil rather than tomato sauce or water, since the oil-packed variety has the richest cleanest flavour and the firmest texture that holds up best as the bottom layer of this salad. Drain the fish thoroughly before mashing to prevent excess oil from soaking into the layers above and unbalancing the carefully calibrated structure of the entire dish during the long refrigerator rest.
- 2
Boil the eggs for exactly nine minutes from the moment the water reaches a rolling boil, then plunge them straight into ice water to stop the cooking and prevent the green ring around the yolk. For another celebration-worthy layered seafood salad to add variety to your festive table, try our beautiful Mimosa salad with pink salmon, which uses a similar pastry ring technique.
- 3
Soak the chopped raw onion briefly in boiling water for ten minutes to remove its harsh sharpness while keeping enough crunch to give the salad a pleasing textural contrast against the softer layers above. Drain thoroughly and pat dry before adding, since excess water will quickly make the bottom of the salad soggy and unbalance the whole carefully constructed dish before serving.
- 4
The flavours of this salad genuinely improve when given six to eight hours in the refrigerator before serving, so plan ahead and assemble it the day before any celebration. For another classic layered Slavic salad that rewards advance preparation, try our hearty men's caprice salad with beef, which uses similar layering techniques.
FAQ
Can I use other canned fish instead of sardines? +
Yes, canned tuna, salmon, mackerel and even sprats all work beautifully in this layered salad and produce slightly different but equally satisfying results depending on which fish you choose. Drain whichever variety you select thoroughly before mashing, and consider adjusting the quantity of mayonnaise depending on how oily or dry the fish turns out to be once mashed. Each fish brings its own personality to the finished celebration centerpiece.
Why is my salad too dense? +
A dense Mimosa salad usually means the layers were compacted too firmly during assembly, particularly the egg-white and grated-vegetable layers in the middle. Press only gently with the back of a spoon when building each layer, just enough to even out the surface without crushing the strands together into a paste. Use a fine grater rather than a knife for the eggs, vegetables and cheese to keep everything light and airy in the cross-section.
How long does this salad keep? +
Store the assembled salad covered tightly with cling film in the refrigerator for up to two full days for the best possible eating quality. The flavours actually improve significantly on the second day, as the layers settle and the mayonnaise softens the boiled eggs and vegetables into a beautifully harmonious whole. Avoid storing for any longer than this, since the texture eventually starts to suffer and the overall composition begins to lose its appealing layered shape.
Can I make this salad without a pastry ring? +
Absolutely. A deep glass salad bowl works just as well and shows off the beautiful coloured layers through the side of the dish, which adds drama at the dinner table. A square or rectangular springform tin lined with cling film also produces sharp clean edges if you prefer that look. Avoid shallow plates, since the layered structure depends on enough depth to support the carefully built tower of ingredients.
- Comment
or post as a guest
Be the first to comment.


