
avg —
Pumpkin Cheesecake
Instructions
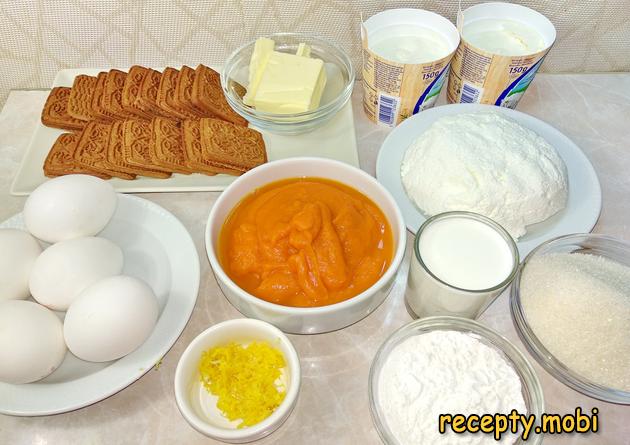
Gather the necessary products on a clean work surface for making the pumpkin cheesecake. The multi-step recipe goes more smoothly with everything measured and ready before starting.
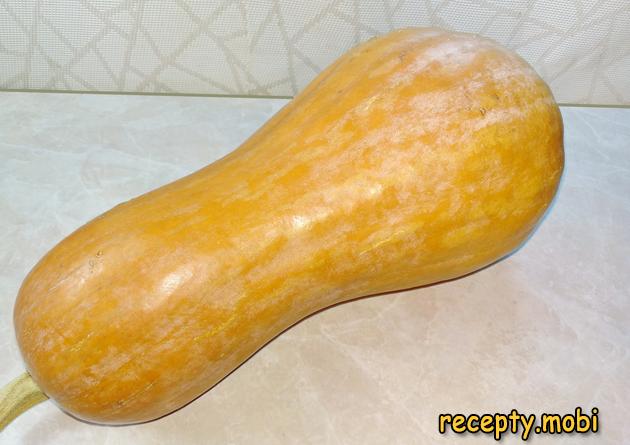
For the dessert, choose properly sweet pumpkin varieties such as butternut, kabocha or Hokkaido, since sweet pumpkins taste lovely and lack the strong pumpkin aroma of more savoury varieties.
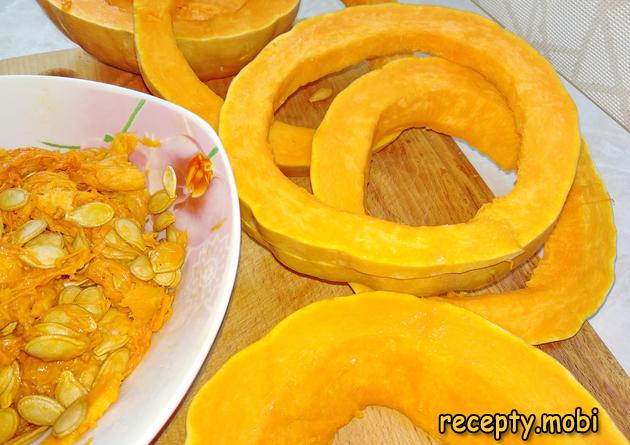
Cut the pumpkin in half, scoop out all the seeds and stringy insides, then slice the halves into rings about 2 centimetres thick. Cutting into rings makes peeling much easier than trying to peel a whole pumpkin would be.
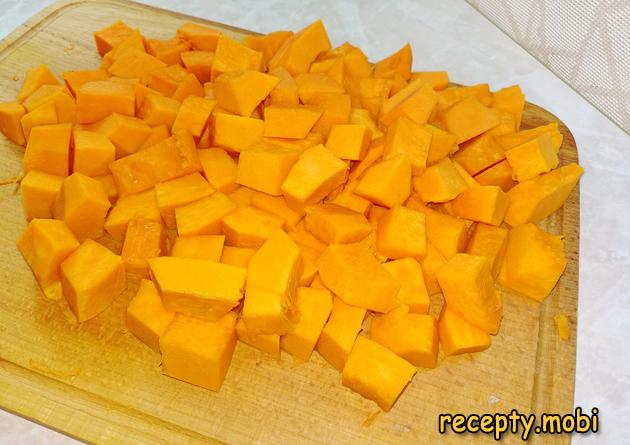
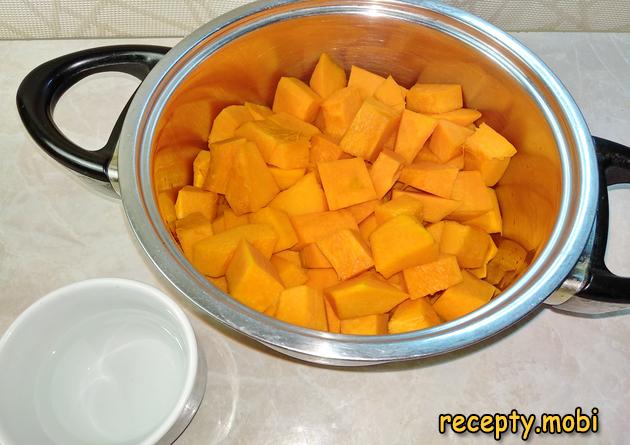
Cut the peeled pumpkin into small pieces of arbitrary shape ready for stewing. Smaller pieces cook more quickly and evenly than larger chunks, so aim for pieces no larger than walnut size for the best result.
Transfer the pumpkin pieces to a heavy-bottomed saucepan and add a small amount of water (just enough to cover the bottom of the dish). The water creates the steam needed for gentle stewing without boiling the pumpkin in liquid.
Stew the pumpkin gently with the lid on for 20 minutes until completely tender when pierced with a fork. Stir occasionally to prevent any sticking at the bottom of the pan during the gentle cooking time.
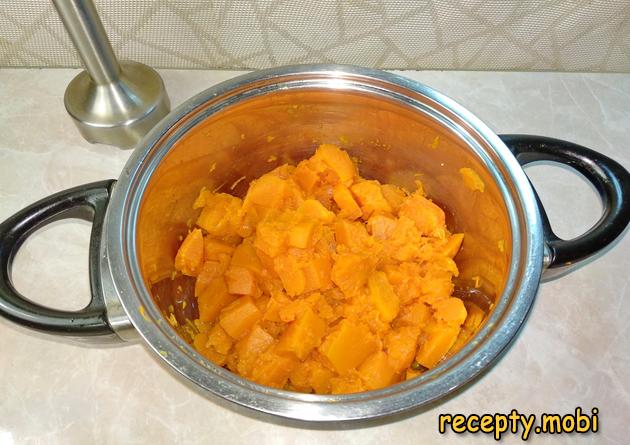
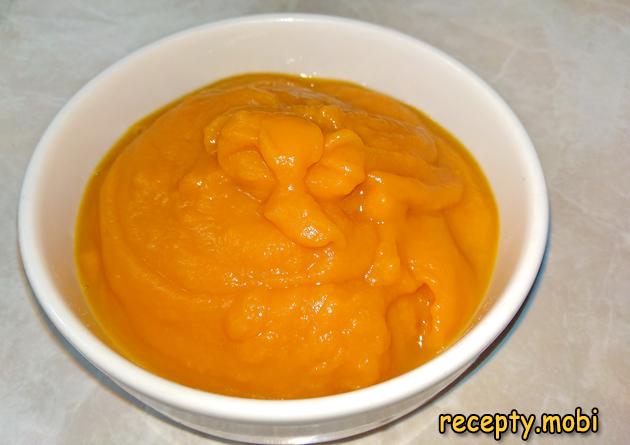
Blend the cooked pumpkin using a hand-held immersion blender until completely smooth. The pumpkin puree is now properly ready for use in the cheesecake filling later.
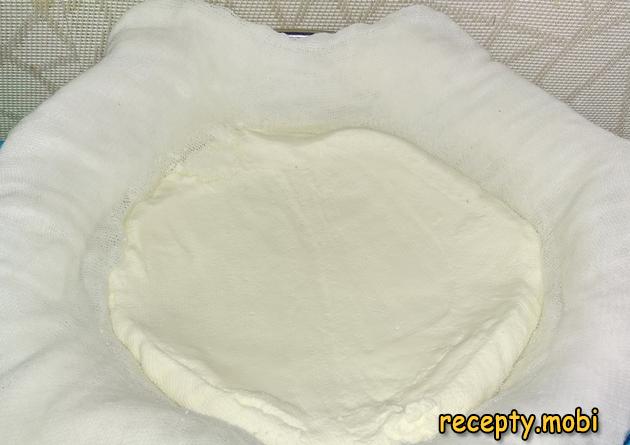
Prepare homemade cream cheese in advance. Place the unopened kefir packages in the freezer overnight to freeze solid throughout. The freezing step is what makes the kefir-to-cheese conversion possible.
In the morning, cut open the frozen kefir packages and transfer the ice-kefir to a fine-mesh colander lined with several layers of cheesecloth. Wait patiently for all the whey to drain away as the kefir thaws, leaving behind the firm cream cheese.
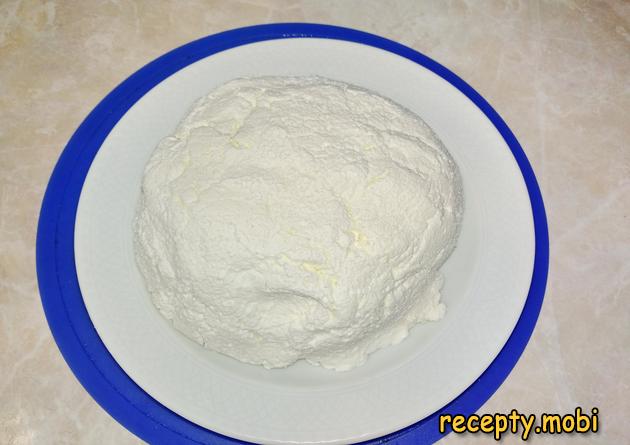
The homemade cream cheese is now ready to use. Both the cream cheese and the pumpkin puree should be prepared the day before assembling the cheesecake for the smoothest workflow on the actual baking day.
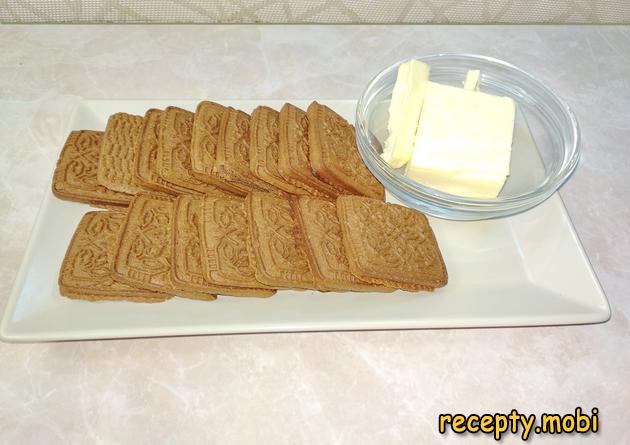
Gather the ingredients for the cookie base: chocolate cookies and butter. Have everything measured and ready before starting the brief base preparation step.
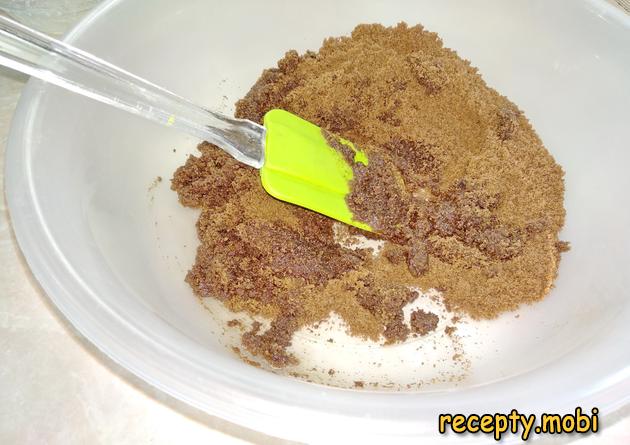
Crush the chocolate cookies into fine crumbs using a rolling pin in a sealed plastic bag, or pulse them briefly in a food processor. Melt the butter completely in a water bath or in the microwave on a low power setting.
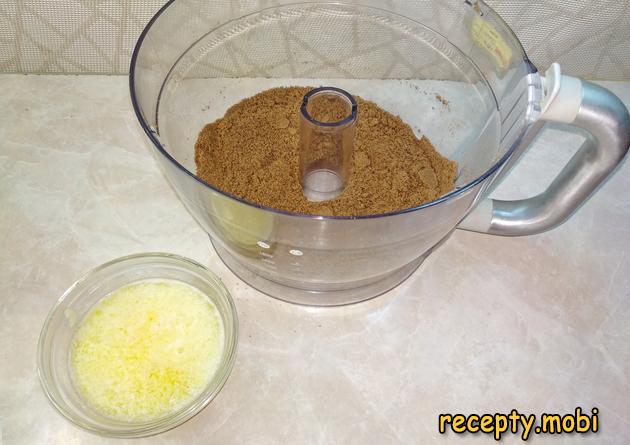
Mix the cookie crumbs with the melted butter until the mixture reaches the consistency of "wet sand" that holds together when squeezed in the hand but crumbles apart when released.
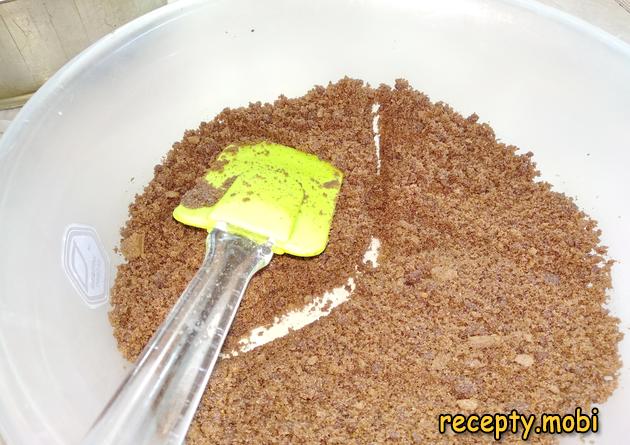
Divide the prepared cookie crumb mixture into one-third and two-thirds portions. The larger portion will form the side walls, while the smaller portion will form the bottom of the cheesecake base.
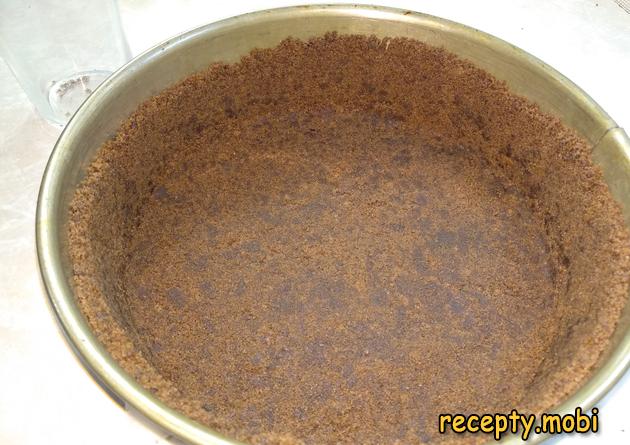
Form the side walls of the cheesecake from the larger portion of crumbs by pressing them firmly up the sides of a springform tin. Aim for an even thickness of about 1 centimetre all the way around the perimeter.
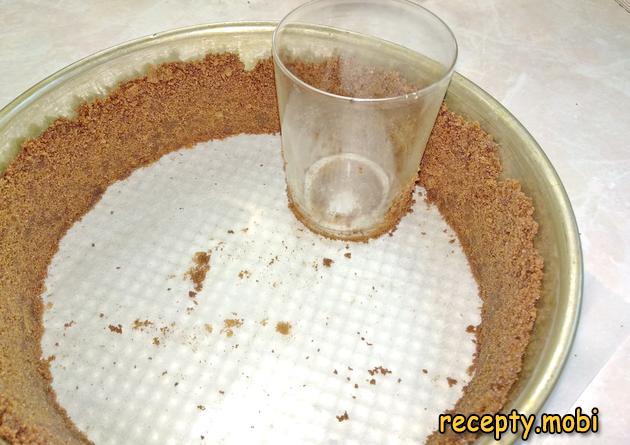
Form the bottom of the cheesecake from the remaining crumbs. A smooth glass works conveniently to compact the crumbs evenly across the bottom of the tin. Preheat the oven to 170 degrees Celsius and bake the base for 7 minutes to set firmly.
Transfer the homemade cream cheese, the cream and the sugar to a deep mixing bowl, and blend everything together with an immersion blender until completely smooth and uniform throughout.
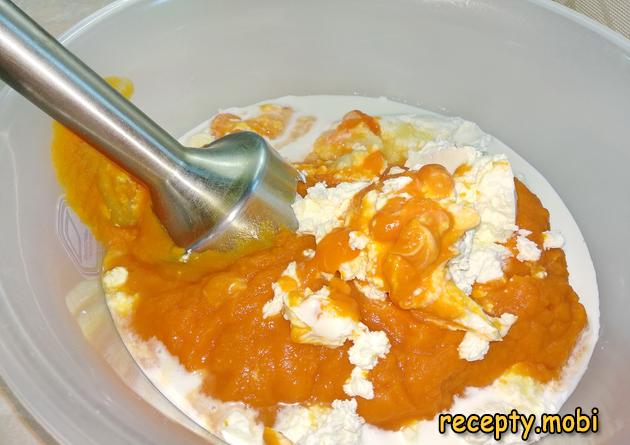
Add the citrus zest and the cornstarch to the cream cheese mixture and blend everything together again until properly uniform throughout the entire batch.

Add the eggs to the homogeneous mass and mix everything together with a hand whisk only. Do not use the blender at this stage, since it is not recommended to whip the eggs into a foam for proper pumpkin cheesecake.
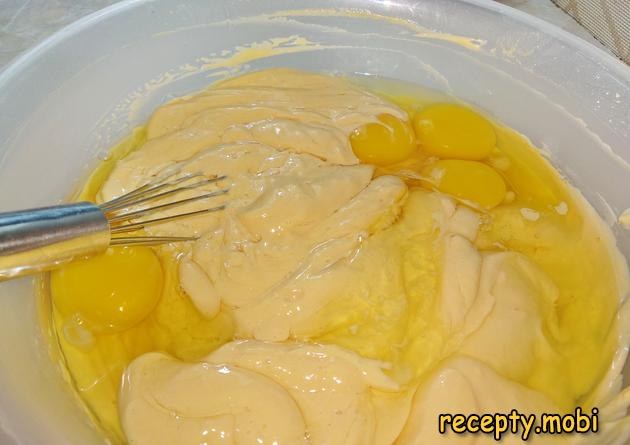
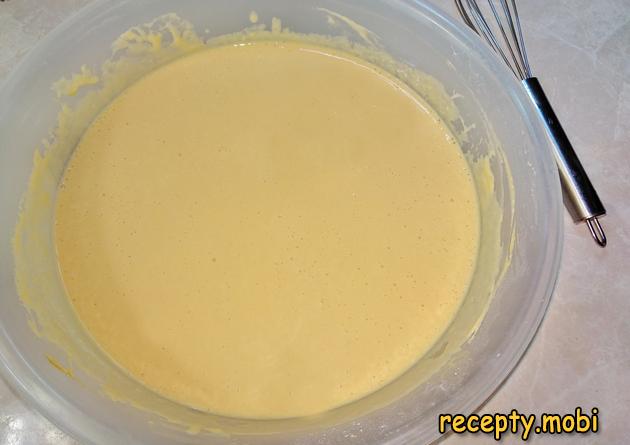
The result should be a beautifully smooth mixture without any visible bubbles. Bubbles in the batter would produce holes and cracks in the finished cheesecake during baking.
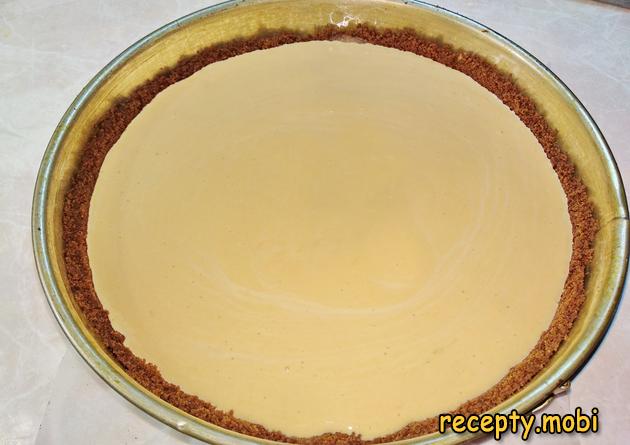
Add the prepared pumpkin puree to the cream cheese mixture and stir gently to combine. Pour the finished cheese-and-pumpkin filling into the tin with the prepared cookie base.
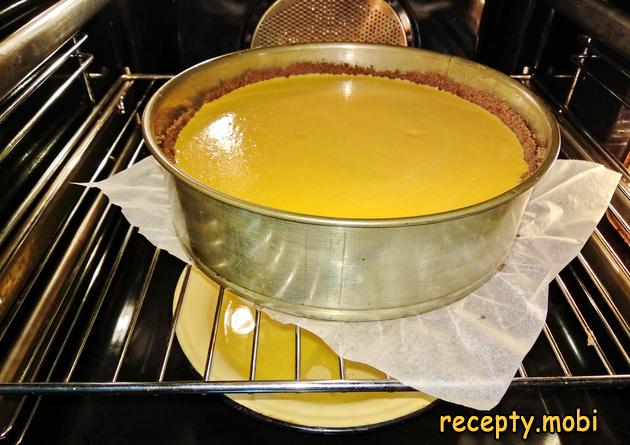
Preheat the oven to 100 degrees Celsius, placing a deep container with very hot water on the bottom of the oven to create the steam needed for gentle baking. Set the pumpkin cheesecake on the middle rack and bake for 2.5 to 3 hours total. The pie should cool completely in the oven with the door propped slightly open. Once cool, transfer the cheesecake to the refrigerator for a few hours to set firmly.
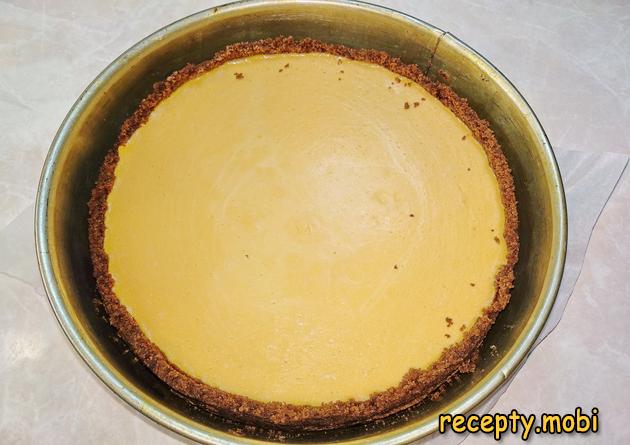
After the long resting time, the sides of the cake should have completely separated from the edges of the springform tin, which signals the cake is properly set and ready to unmould cleanly.
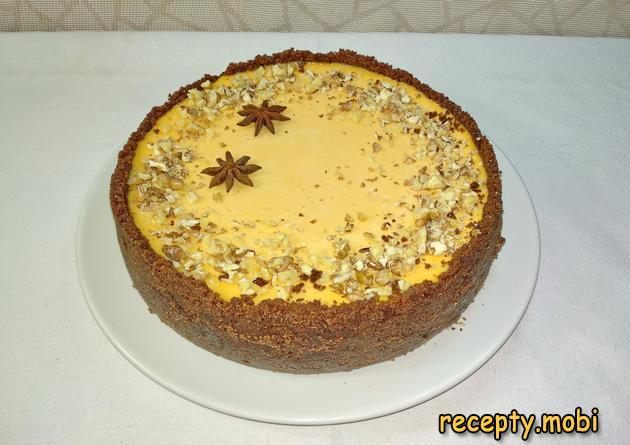
Take the pumpkin cheesecake out of the springform tin and transfer carefully to a serving plate. Decorate to your taste using whole or chopped fried walnuts, fresh autumnal berries, or simple sprigs of fresh mint for a properly festive presentation.
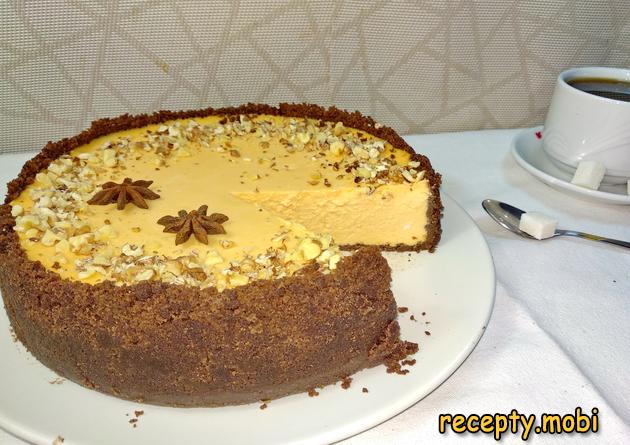
The cut cross-section reveals the beautifully smooth velvety structure that has been achieved through the careful slow baking technique. Brew a fragrant pot of properly strong tea and invite the whole family to the table to enjoy this beautifully autumnal homemade dessert. Bon appetit!


Tips
- 1
Use properly sweet pumpkin varieties such as butternut, kabocha or Hokkaido for the best flavour in the finished cheesecake, since these varieties have the deepest most pleasant taste and lack the strong pumpkin aroma of more savoury types. Avoid carving pumpkins (such as those used for Halloween jack-o-lanterns), since these tend to be watery and bland with much less character. Sourcing the right pumpkin variety genuinely matters for the best result.
- 2
Bake the cheesecake at a low temperature with a water bath in the oven for the smoothest crack-free finished surface. To pair this beautiful autumnal dessert with another classic homemade dessert from the same regional culinary tradition, try our beautifully tender nuts with condensed milk classic recipe as a sweeter contrasting alternative for celebration spreads.
- 3
Allow the cheesecake to cool slowly in the turned-off oven with the door slightly open, since rapid temperature changes cause the cheesecake to crack on the surface. The slow cooling step is genuinely essential for the smoothest finished appearance. After the slow oven cooling, transfer to the refrigerator for at least 4 hours (ideally overnight) to set firmly enough for clean slicing into individual portions on the serving plate.
- 4
Garnish the finished cheesecake with toasted walnuts, fresh berries, a dusting of cinnamon or even a drizzle of caramel sauce for a properly festive autumnal presentation. For another beautifully smooth dairy-based dessert recipe, try our beautifully creamy custard curd Easter cake as a different cheese-based celebration alternative.
FAQ
Can I use canned pumpkin puree instead of fresh? +
Yes, canned pumpkin puree works perfectly well in this recipe and saves the considerable time required to prepare fresh puree from a whole pumpkin. Use the same total weight as the recipe calls for in fresh puree. Choose pure 100% pumpkin canned puree without any added sugar, spices or other ingredients for the cleanest flavour. The texture and colour of the finished cheesecake will be very similar to the fresh-puree version, though some bakers detect a slightly different aftertaste.
What can I substitute for the homemade cream cheese? +
Store-bought cream cheese (such as Philadelphia brand) works perfectly well as a substitute for the homemade kefir-based version and saves considerable advance preparation time. Use the same total weight as the recipe calls for in homemade. Mascarpone also works as a luxurious alternative that produces a richer creamier finished cheesecake. Avoid low-fat cream cheese, since the lower fat content produces a noticeably less satisfying finished texture and a noticeably less pronounced flavour.
How long does this cheesecake keep? +
Store the assembled cheesecake covered loosely in the refrigerator for up to four full days for best results. The flavours actually improve significantly during the first day or two as the pumpkin and cream cheese continue to merge into a beautifully harmonious whole. The cheesecake also freezes well for up to three months when wrapped tightly in cling film and foil. Thaw overnight in the refrigerator before serving for the best texture and flavour.
Why did my cheesecake crack on top? +
Cracked cheesecake usually means the temperature was too high during baking or the cooling was too rapid. Always bake at the recommended low temperature of 100 degrees Celsius with a water bath in the oven for the most reliable crack-free results. The slow cooling step in the turned-off oven with the door propped open is also essential. If your cheesecake does crack despite proper technique, simply cover the crack with a generous garnish of nuts or fresh berries, which hides the imperfection completely.
- Comment
or post as a guest
Be the first to comment.


