Boiling: Principles, Rules and Techniques
Boiling is the simplest and most universal cooking technique — food is brought to doneness in water or another liquid at around 100°C — but despite how easy it seems, the details matter and have a real impact on the final dish. I'll cover the main principles: what temperature different ingredients need, whether to start in cold or boiling water (this changes the flavor and texture), how much salt to add, whether to use a lid and why. You'll also find typical timings for common ingredients: vegetables 5-30 minutes, meat 1-3 hours, fish 10-20 minutes, grains by their own rules. A practical guide for cooks of every level.
Thermal processing of food is the most important cooking technique, the one that prepares the lion’s share of dishes. Heat softens food and makes it safe, so that it is well absorbed by the body and does no harm. Careless thermal processing changes the flavour for the worse, creates carcinogenic substances in food, and destroys vitamins. To prevent this, you need to know how to treat food with heat correctly.
One of the most important methods of thermal processing is boiling. Boiling is cooking food in liquid over “fire” with the participation of steam. The liquid used may be plain water, milk, vegetable juices, and infusions. There are several types of boiling, each with its own features and each affecting the texture, taste, and aroma of a dish in its own way.
At first glance it seems that boiling is the simplest method of thermal processing, but in practice it turns out to be more complicated than, for example, frying or baking. Boiling is used to make porridges, soups, and compotes, and to cook meat, fish, vegetables, and fruit. The canning process also depends on boiling.
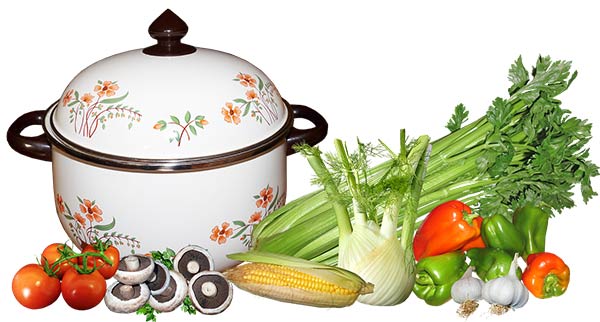
First courses hold a special place in the human diet. Vegetarian soups help keep weight at the desired level and stimulate the metabolism. Liquid creates a feeling of fullness without a sense of an overloaded, heavy stomach. First courses should be included in everyone’s diet, because they are necessary for preventing disorders of the gastrointestinal tract and also help maintain an optimal water balance.
From history
Boiling is the third method of preparing food invented by people, after baking in ash and bringing food to readiness over an open fire. For a long time it was believed that boiling appeared after the invention of pottery, that is, roughly two to three thousand years before our era. However, modern research suggests that boiling is a more ancient method, appearing ten to fifteen thousand years before our era. In those times, boiling was carried out in wooden vessels or with no vessel at all.
The carcass of a slaughtered animal was filled with ice, sewn shut, and a fire was built on top of it. As vessels for boiling, people used wooden containers into which they poured liquid and placed red-hot stones. After pottery appeared, boiling became more varied, and with the appearance of metal cookware, boiling came to be considered the main method of preparing food.

Features of traditional boiling
Traditional boiling involves heating food in a liquid that completely covers it. The liquid used may be water, broth, milk, syrup, infusions, or vegetable juices. When boiling certain foods, much more liquid is needed than usual. As a result of boiling, the main share of the nutrients contained in the food passes into the liquid. At home, food is boiled in special cookware, most often a pot, using gas, electric, or induction stoves. In camping conditions, boiling is done in cauldrons over an open fire.
Food is heated through contact with the hot liquid. The boiling temperature is approximately one hundred degrees. The process of traditional boiling goes as follows:
- First, the food is placed in cold or hot liquid.
- Strong heat is turned on, and until the liquid boils the cooking is carried out on high heat under a closed lid.
- After the liquid boils, the heat is reduced and the dish continues cooking on low heat at a moderate boil until fully done.
- You must reduce the heat during boiling. If you ignore this rule, a vigorous boil will cause the liquid to boil away quickly, the broth to turn cloudy, the food to lose its shape, and the aromatic substances to evaporate.
One of the drawbacks of traditional boiling is that during boiling the entire flavour of the food, together with its nutrients, passes into the broth, leaving the food itself tasteless. However, this drawback of the method turns into an advantage when there are doubts about the environmental cleanliness of the food, because during boiling it is freed from dangerous substances.

Types of boiling
In modern cooking there are several types of boiling, which differ from one another in the intensity of heating and boiling and in the use of open or closed cookware.
Poaching
Poaching is the boiling of food in a small amount of liquid or in its own juice. This method is most often used for foods saturated with a large amount of moisture. The food is lowered into a vessel with liquid that covers only one-third of it and is cooked until done under a closed lid. The upper part of the food, not submerged in the liquid, cooks under the action of steam. A dish prepared by poaching has a more pronounced flavour, because fewer nutrients pass into the liquid compared with traditional boiling. Juicy vegetables are poached without adding liquid, using only the juice they contain.
Steaming
Steaming is the dominant method of preparing dishes in dietary and therapeutic diets that require gentle treatment of the gastrointestinal tract. Steaming is done in special steamer pots or in steam cabinets. Water is poured into the pot, then a special perforated insert is set in place, on which the food is laid out. The pot is tightly closed with a lid and set on the heat. As the water boils, the pot fills with steam, which cooks the food. As a result, the food turns out juicy, with a tender texture, its shape is preserved as much as possible, and there is less loss of nutrients.
You can steam even when you have no special steamer pot. Take an ordinary pot, fill it halfway with water, and tie a linen napkin across it so that something like a hammock is formed inside. Place the food on the napkin, then cover it with an inverted plate and set the pot on the heat.
Contactless boiling
Contactless boiling is a less common method of preparation compared with the others. It is also called cooking in a “water bath or steam bath”. The main principle is that the food is brought to readiness without direct contact with the fire, either of the liquid or of the vessel in which it sits.
How is contactless boiling done? Water is poured into a large pot, which is set on the heat. The food is placed in another pot whose diameter is smaller than the one on the heat. The smaller pot is set inside the larger one. This is how cooking in a “water bath” takes place. If the larger pot is covered with a lid, the process turns into cooking in a “steam bath”, during which the food is cooked with steam. Contactless boiling is more costly in terms of energy and time, but as a result the food acquires an unusual taste.

How to properly boil meat?
Meat is boiled in plain water or vegetable broth. It is placed into boiling water to prevent the nutrients from passing out of the meat into the liquid, by quickly coagulating the surface proteins. If you lower the meat into cold water, most of the nutrients will pass into the broth. During boiling, a so-called “foam” forms on the surface of the meat, which results from the coagulation of proteins. Home cooks are used to the idea that the foam must always be skimmed off, but specialists do not recommend doing this, since the foam has nutritional value.
The taste and quality of the finished meat depend on the ratio of food to liquid. During boiling, liquid passes from the meat into the broth, so its volume increases. For this reason, at the start of boiling you should not pour in enough liquid to cover the meat completely. The meat is boiled under a tightly closed lid at the lowest intensity of boiling. Such boiling prevents the oxidation of fat and the appearance of an unpleasant lardy taste in the broth.
The washed and cleaned meat is lowered into boiling water that just barely covers it. First, strong heat is turned on to bring the liquid to a boil, then it is set to the minimum and the meat is boiled until done on low heat under the lid. Adding water during boiling must not be allowed, since this significantly worsens the taste. You need to calculate the amount of liquid accurately from the very start. After the meat is cooked, it should be left to rest under a closed lid for ten minutes.
How to properly cook fish?
Small fish are lowered into boiling water to preserve the maximum amount of protein. Large fish are placed in cold water, with more water added as cooking progresses. The head need not be removed; it is enough to take out the eyes and gills. For cooking, shallow enamelled cookware is recommended. You should not pour in a lot of water, since excess liquid spoils the taste of the fish. Fish is boiled only on low heat, because a vigorous boil also significantly worsens the flavour qualities of the finished product.
Some kinds of fish have a specific smell that is best removed before boiling. River fish may smell of mud. The smell can be removed by soaking the fish beforehand in water with vinegar (two tablespoons per litre of water). The smell of cod, flounder, and halibut can be removed by adding half a glass of cucumber brine for each litre of water during boiling. The fishy smell can also be removed with milk – it is enough to pour some into the pot.
Fish will keep its shape if you make crosswise cuts in the skin. The recommended boiling temperature is a few degrees below the boiling point. The fish will turn out juicy and will keep its taste and nutrients. When boiling sea fish, you can add herbs and spices – then it will keep its shape and break apart less.
Small fish are boiled for five to ten minutes, medium fish and pieces of fish are ready fifteen to twenty minutes after boiling begins, and large fish will take thirty to forty minutes. Fish is considered done when the flesh separates easily from the spine. Until serving, boiled fish is kept in the broth to prevent it from drying out.
How to properly cook pasta?
Pasta is boiled in a large amount of water, significantly exceeding the volume of the pasta, with added salt. The pasta is lowered into boiling water, stirred, and cooked on medium heat. Covering the pot with a lid is not recommended – otherwise the foam that forms during boiling will spill over onto the stove. The exact cooking time depends on the quality of the pasta and the flour from which it is made. Usually the cooking time is indicated on the package. It is best to choose pasta made from durum wheat. If you follow the recommended cooking time, it will not turn into “mush”.
How to properly cook vegetables?
Boiled vegetables can be used as a side dish or as ingredients for salads. In both cases they need to be boiled correctly to preserve a pleasant taste and the maximum of nutrients.
Vegetables are lowered into boiling water – this way they cook faster, which means more nutrients are preserved. The water should cover the vegetables completely, so that no part of them is left exposed to the air. It is recommended to pour in even a little more water, since during cooking it boils away and exposes parts of the vegetables. The water should be lightly salted. The cooking time for each vegetable is individual:
- whole potatoes – thirty minutes;
- potatoes cut into pieces – twelve to fifteen minutes;
- tomatoes – twenty minutes;
- cauliflower – eight minutes;
- parsley – twenty minutes;
- carrots – thirty minutes;
- beetroot – forty to sixty minutes;
- cabbage – ten minutes;
- aubergines – thirty minutes;
- courgettes – fifteen minutes.

How to properly cook soup?
The ingredients for soup should be fresh and thoroughly prepared, that is, peeled and washed. The shape of the pieces when the food is cut is hugely important, since a particular shape affects the taste in its own way. In one soup the food is added whole, for others it is cut into cubes or strips. To people who are not well acquainted with culinary secrets, it seems that this is necessary for the sake of aesthetics, but the shape of the food directly affects the flavour qualities of the finished soup.
The ingredients are added to the soup gradually, keeping in mind the time needed for each particular one to be done. Meat or vegetables must not be overcooked – this leads to a worsening of the taste and a loss of shape. The soup should not boil for too long; it should be ready when all the ingredients are cooked but not overcooked.
Salt is added to the soup at the end, when the main vegetables have already cooked but are not yet overdone. It is exactly then that they are able to absorb the salt. If you salt the soup too early, its cooking time will increase, and as a result it may turn out oversalted, since the solid ingredients will not absorb the salt and it will remain in the broth. If salt is added too late, the solid part of the soup will be tasteless.
The most crucial moment in preparation comes a few minutes before the soup is done, when it has already been salted. At that point an ordinary soup can be turned into a masterpiece by adding various spices and seasonings. The finished soup should not be served straight away; it should be left to rest. To do this, cover the pot with a lid and leave it for about twenty minutes so that the soup “comes to readiness”.


