
avg —
Bread Crumbs at Home
Instructions
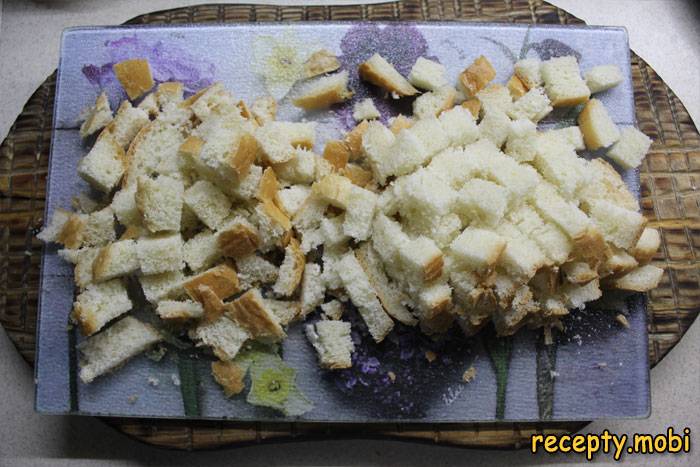
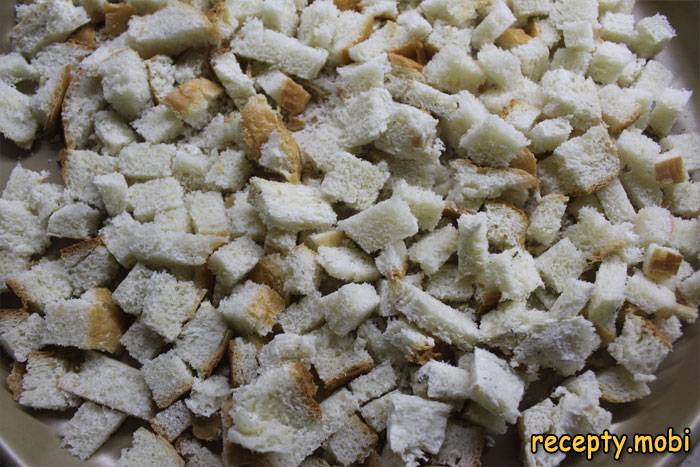
Cut the bread into small cubes of about 1.5–2 cm. It is best to use a stale baguette that is 2–3 days old – fresh bread is too moist and takes a long time to dry out, while over-dried bread crumbles as you cut it. Leave the crust on – it is what gives the finished crumbs their characteristic golden colour and pleasant aroma.
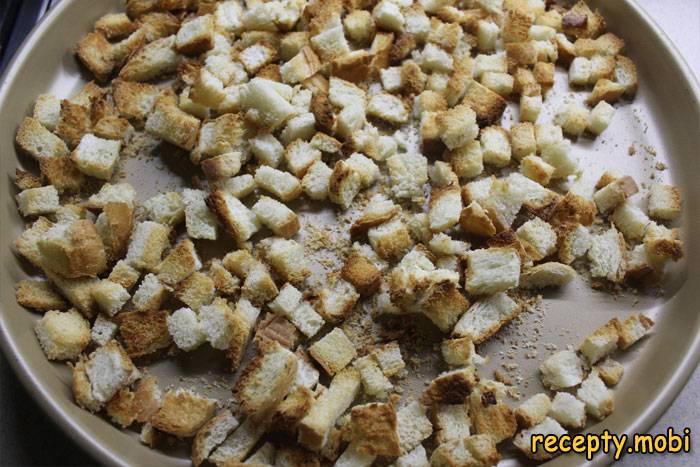
Spread the cubes on a baking tray in a single layer without oil, leaving small gaps between them. Dry them in the oven for 15–20 minutes at 200 °C with convection until golden, stirring occasionally with a spatula. Without convection, dry them at 180 °C for 10 minutes longer – without the fan, the bread dries more slowly. Do not exceed the temperature – the crumbs will burn and taste bitter in the finished dishes.
Let the crumbs cool a little on the tray for 5–7 minutes, but not completely – otherwise they will absorb condensation as they cool in an enclosed space and turn soggy. The ideal state is warm to the touch, hard, and breaking with a distinct crunch. If the cubes bend, return them to the oven for another 5 minutes.
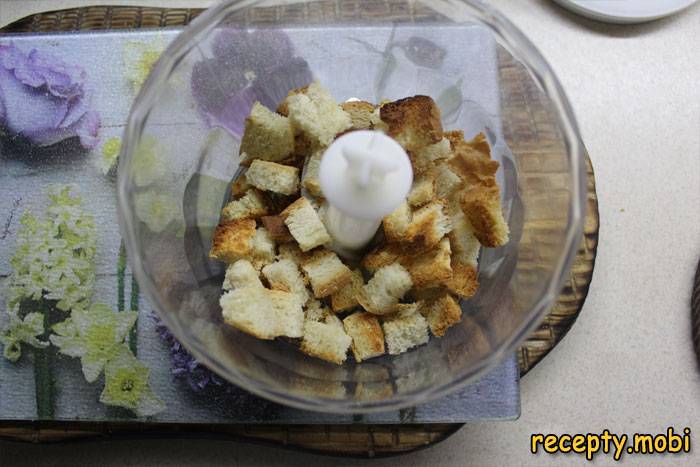
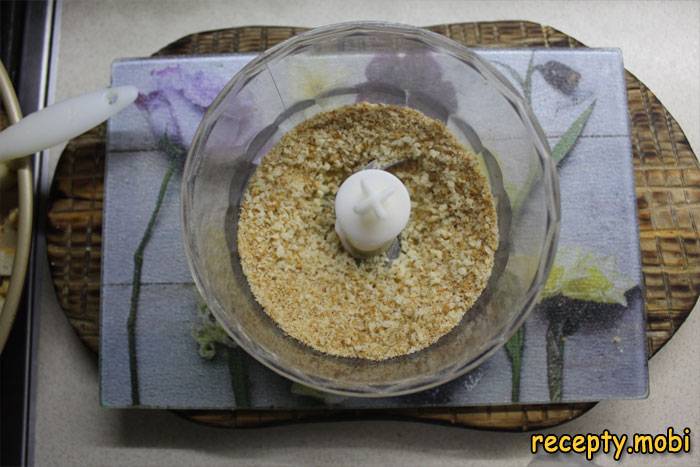
Grind the cooled crumbs in a blender or food processor into a uniform crumb of the size you need. Grinding takes 30–60 seconds for a medium crumb and 1.5–2 minutes for a fine one. For a coarse "panko-style" coating, 15–20 seconds of pulsing is enough. Each crumb size suits different dishes: fine for delicate schnitzels, coarse for chicken drumsticks and fish cutlets.
The finished breadcrumbs should be of a uniform texture, with no large, under-dried pieces. If you come across any damp bits, go back to step 2 and dry them further. Without being fully dried, the crumbs spoil quickly in storage and turn mouldy within a week.
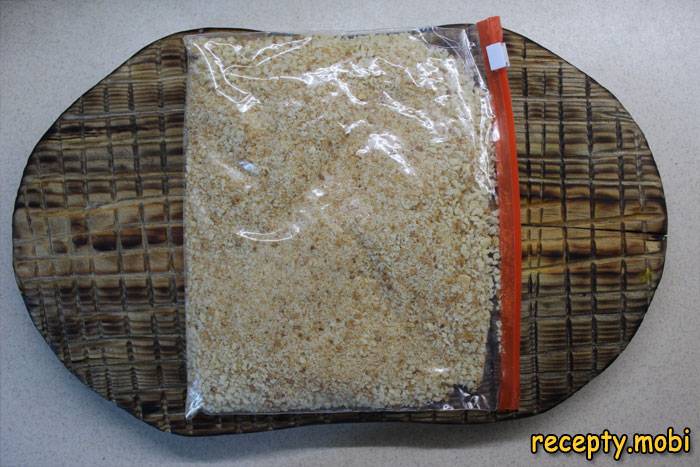
Transfer the finished crumbs into zip-lock bags or glass jars with tight lids. Remove the air from the bag before sealing it – air encourages oxidation and the loss of crispness. Write the date of preparation on it with a marker – that way I won't forget the shelf life.


Tips
- 1
Rye bread makes darker, more aromatic crumbs – ideal for coating fish dishes and cutlets made with liver.
- 2
You can add spices before baking – paprika, dried garlic, oregano, thyme – for an aromatic "Italian" coating for chicken and schnitzels.
- 3
Store in a dry, dark place for up to 3 months, or in the freezer for up to 6 months – moisture is the main enemy of breadcrumbs. They are perfect for making homemade pork cutlets.
- 4
Adjust the crumb size by the grinding time – fine for delicate dishes, coarse for "panko"-style frying.
FAQ
Do I have to dry the bread in the oven? +
No, there are alternatives: leave the cut cubes out in the open air for 24–48 hours under a piece of muslin, dry them in a dry frying pan with constant stirring for 15–20 minutes, or use a vegetable dehydrator at 60–70 °C for 4–6 hours. Each method has its advantages: air-drying is the most natural, the frying pan is the fastest, and the oven is the most even. Don't use the microwave – the bread turns "rubbery" rather than crisp.
Can I grind the crumbs without a blender? +
Yes, there are several ways: crush them with a rolling pin inside a sturdy bag (you'll get a coarse, uneven crumb), pass them through a meat grinder with a fine plate (a fine, even crumb), or grate them on a coarse grater (a rough, "homemade" texture). The grater is the most labour-intensive method, the rolling pin the fastest. A food processor or blender gives the best result in the least time, but you can manage perfectly well without one.
What dishes are homemade breadcrumbs good for? +
They are ideal for classic cutlets (pork, beef, chicken, fish), schnitzels, chops, chicken drumsticks and wings, battered vegetables (cauliflower, aubergine, courgette) and cheese sticks. They also work for bakes – sprinkled on top for a golden crust. You can use them in mince as a binder instead of flour. In diet dishes they replace flour for coating to reduce the calorie content.
How long do ready breadcrumbs keep? +
In a dry, dark place at room temperature in a tightly sealed container – up to 3 months. In the fridge – up to 6 months, but the risk of going soggy is higher because of condensation. In the freezer – up to a year in an airtight bag with no loss of quality. Before use, dry them for 2–3 minutes in a hot, dry frying pan – this restores their crispness. Signs of spoilage: a musty smell, mould, darkening – throw such crumbs away.
- Comment
or post as a guest
Be the first to comment.

")

