How to extinguish baking soda – popular and simple methods
Activating baking soda – sometimes called slaking or quenching – is a simple step that makes cakes and pastries rise light and fluffy. The soda reacts with an acidic ingredient, releases carbon dioxide and lifts the batter. You can activate it with white vinegar, lemon juice, buttermilk, sour cream or even boiling water, depending on what's in your recipe. The standard ratio is about 1 teaspoon of vinegar or 2 teaspoons of lemon juice per teaspoon of baking soda. I'll explain when activation is essential, when you can simply mix the soda into the flour, and why getting the proportions wrong leads to dense, flat results.
Baking soda is an indispensable ingredient in any baking made from unleavened dough. With its help, you can turn a dense flatbread into an airy pie. However, to achieve a good result, you need to put not dry soda but extinguished (slaked) soda into the dough. In this article I will explain how to properly extinguish baking soda for baking.
This guide is my "cheat sheet" for working with baking soda. I will cover all the popular methods of extinguishing it: with vinegar, citric acid, kefir or sour cream – each has its own particularities and suits different types of baking.
Why extinguish baking soda
While studying recipes carefully, beginner cooks notice how important it is to add extinguished soda. It can be extinguished in advance or directly in the dough. Why does this matter so much? The thing is that fluffiness in baking comes from the gas bubbles that form as a result of a chemical reaction. The soda absolutely must be in an acidic environment, otherwise it will be of no use.
How to choose baking soda
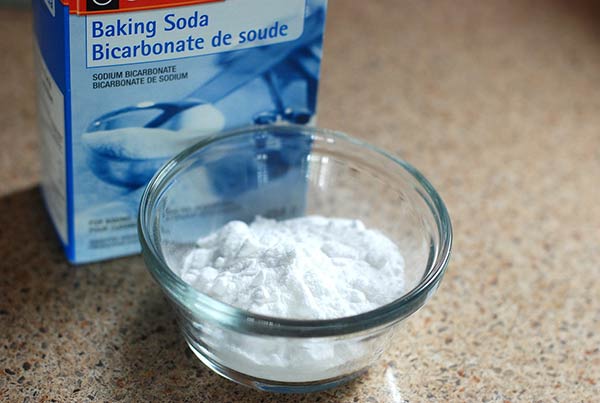
When choosing baking soda in a shop, many questions and doubts may arise. To easily make sure of the product's quality, follow a few basic rules when buying:
- When reading the information on the packaging, pay attention to the production date. Although soda keeps for a long time, it is still better to choose the freshest product. It is very good if no more than a year has passed since the date of manufacture.
- The soda in the pack should be loose and uniform, without lumps. Without opening the packaging, you can judge its characteristics by touch. If the pack is too hard, the soda has most likely turned into a lump – it is not worth buying.
- To check the quality at home, sprinkle 1 tablespoon of baking soda onto a saucer and pour lemon juice over it. If a fizzing reaction begins, the product is of good quality.
How to extinguish soda with vinegar
I use table vinegar with a concentration of no more than 9%. A 6% vinegar is also perfectly suitable and is practically as good as the first option in its characteristics.
To make any baking (for example, a charlotte cake), I mix the soda with the flour in a deep bowl. Then I add table vinegar to the liquid ingredients (chicken eggs or water). I mix all the products together – the reaction with the release of bubbles will take place directly in the dough.
For 1 cup of wheat flour I take no more than 1/4 teaspoon of soda. To extinguish it, I use about 1 teaspoon of vinegar.

How to extinguish soda with citric acid
Show ingredients
The most practical and simple way to extinguish soda is to add citric acid to it. You can use either fresh lemon juice or dry powder. What is the sequence of actions?
- I dissolve 1 teaspoon of citric acid in 1/4 cup of drinking water.
- In the same amount of water I dissolve the baking soda (1 teaspoon).
- I pour both mixtures into the bowl with the flour mixture and immediately knead the dough.
- I start baking the dish.
How to extinguish soda with kefir or sour cream
Very often the dough for various bakes is made on a kefir base. Sometimes the fermented milk drink is replaced with low-fat sour cream. To extinguish soda in a liquid dough, you do not need to mix it with anything. It is enough simply to add it during the kneading.
For the baking to come out fluffy and soft, it is best to put the soda into the liquid kefir dough. In this case the soda will be distributed more evenly through the dough. The rest of the flour is added last.
A tasty recipe
There are many baking recipes published on the internet that use soda. They are usually made on a base of unleavened dough. Below I will share a few options.
Fluffy kefir pancakes
These pancakes turn out aromatic, fluffy and golden. Be sure to try this recipe – the pancakes are very, very easy to make.
Ingredients:
- 1 egg;
- 1 cup of kefir (250 ml);
- 1/3 teaspoon of vanilla sugar;
- 1 tablespoon of granulated sugar;
- a pinch of salt;
- 1/3 teaspoon of baking soda;
- 230 g of wheat flour;
- sunflower oil.
Preparation:
- In a saucepan I mix the granulated sugar, salt and vanilla sugar. Then I break in the egg and stir with a spoon.
- I warm the kefir to room temperature (but better to +37 °C). I pour it into the saucepan with the egg mixture and whisk until smooth.
- I add the sifted flour in small portions and stir thoroughly. The dough should be of medium consistency – neither thick nor runny. Pancake dough should not stick to the tablespoon.
- Last of all I add the baking soda and whisk once more. I leave the dough for 15 minutes so that all the ingredients soak in and the pancakes turn out fluffy.
- I fry the pancakes in a thick-bottomed pan, always in heated sunflower oil. I fry on both sides until golden brown.
- I put the finished pancakes on a paper napkin. When they have cooled a little, I serve them.
Another tasty pancake recipe is fluffy kefir pancakes with soda.
Many cooks prefer to make confectionery with the addition of baking soda. For the result to be pleasing, you need to follow the basic rules and recommendations for using this product.
Tips and tricks
Tip 1. Do not exceed the dose – at most 1/4 teaspoon of soda per 1 cup of flour. An excess will give the baking a "soapy" aftertaste.
Tip 2. For sweet baking, use APPLE cider vinegar (6%) instead of table vinegar – its fruity aroma will not spoil the taste of pies and cupcakes.
Tip 3. For liquid dough made with kefir/sour cream, do NOT extinguish the soda in advance, add it straight into the dough. I use a similar principle in other recipes with soda.
Tip 4. Check the freshness of the soda at home – 1 tablespoon on a saucer + lemon juice. It should FIZZ intensively. A weak reaction means the soda is old.
❓ Frequently asked questions
Can you use soda without extinguishing it?
In dough made with kefir, sour cream, soured milk or yogurt – YES, these liquids contain enough of their own acid to activate the soda. In dough made with water or milk – NO, an additional acid is needed (vinegar, citric acid, lemon juice). Without extinguishing, the soda will give a "soapy" aftertaste and will not provide fluffiness. If in doubt – always extinguish it. An excess of acid for extinguishing does no harm, while a shortage spoils the result.
What is the difference between soda and baking powder?
Soda is pure sodium bicarbonate (NaHCO₃) and requires acid to activate it. Baking powder is a ready-made mixture of soda + acid + starch that activates on contact with moisture and heat. Advantages of baking powder: it is easier to use, no need to extinguish it. Advantages of soda: it is cheaper and works instantly. Substitution: 1 teaspoon of soda + 1 teaspoon of citric acid = 2–3 teaspoons of baking powder. For most home baking, baking powder is more convenient, but soda is the classic choice.
How do you know that enough soda has been added?
The right amount: 1/4–1/2 teaspoon of soda per 1 cup of flour (for kefir dough) or together with vinegar for extinguishing. Signs of the correct dose: the dough is fluffy when baked, the taste is neutral without any "soda" flavour, the colour of the layers is golden. Signs of an excess: a "soapy" aftertaste, a yellowish colour of the layers, a specific smell. It is better to start with a smaller amount – it is easy to overdo it, and it can no longer be fixed. With experience you will find "your own" dose.
Can you replace soda with baking powder and vice versa?
Yes, the substitutions work: 1 teaspoon of soda = 2–3 teaspoons of baking powder (taking into account the acid in the dough). The other way round: 2–3 teaspoons of baking powder = 1 teaspoon of soda + 1–2 teaspoons of citric acid or vinegar. If a recipe specifies soda and there is no source of acid in the dough (water, milk without acidic additions) – be sure to add acid for extinguishing. Otherwise the soda will not work. The most universal substitution is baking powder: it "extinguishes" itself when heated.


