
Secrets of Baking Bread at Home
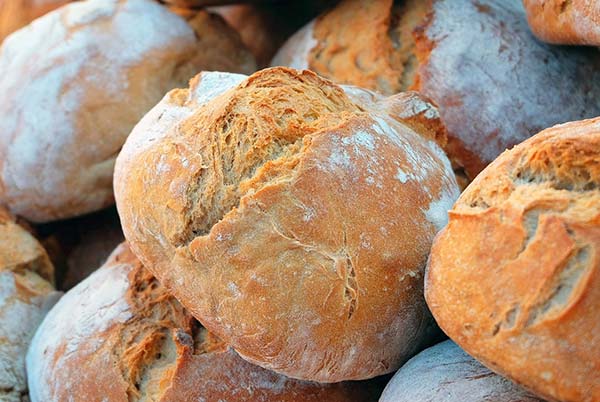
Bread is the head of everything, as the Russian saying goes. It is so desirable for that "head" to be soft, tasty, and genuine. Unfortunately, finding real bread in stores is practically impossible today. Industrial production cannot give bread the patient attention our grandmothers did. Factory bread also contains many unpleasant additives and preservatives. For these reasons, more home cooks prefer to bake bread themselves. The process has many subtle peculiarities and secrets that separate good homemade bread from disappointing attempts. This guide walks through every important stage from flour selection to the final cooling rest, with the techniques that consistently produce excellent results.
The basics of basics
Classic bread consists of the simplest ingredients: flour, yeast, water, and salt. At home, bread can be baked in an ordinary oven; a bread maker is not required. All ingredients used to make the dough should be warm. If they came from a cold pantry or just from the store, leave them on the counter to reach room temperature. During mixing, add flour to water rather than the reverse — this makes it much easier to achieve a homogeneous consistency without lumps.
Flour
The base of bread is wheat flour. Even rye or corn breads use wheat flour as the foundation, with other flours added for flavor. Never try to make bread solely from rye flour — it is too "heavy" and absorbs too much water, so the dough fails to rise or bake properly. Always use high-quality wheat flour as the base (the simplest option). The ideal ratio for mixed-grain bread is seventy percent wheat flour and thirty percent of another type of flour. Sift flour to saturate it with oxygen before mixing.
Yeast
Beginners are best off using fast-acting dry yeast. With this, the dough will reliably rise and the bread will turn out. However, even reliable yeast can ruin bread if too much is used — the result smells of yeast and tastes off. If you fear you added too much, increase the proofing time. Dissolve yeast only in warm water (about 36°C). Never use boiling water — it kills yeast instantly and your dough will not rise.
About sourdough
An ancient substitute for modern yeast is sourdough. Baking bread with sourdough is true art. Sourdough is made from flour and water, and its fermentation takes a long time, sometimes several days. The fermentation requires constant monitoring. The starter needs feeding with flour, water, and sometimes other ingredients like honey, raisins, hops, or grapes. The process is long but interesting and produces bread of unmatched complexity. Try sourdough only when you have a deep interest in bread making and the time to commit.

Kneading the dough
Many home cooks hesitate to bake bread, thinking the dough must be kneaded for a very long time. This is a misconception — bread dough only needs five to ten minutes of kneading until it stops sticking to the hands. The purpose of kneading is to saturate the dough with oxygen. Kneading by hand transfers your warmth to the future bread. Modern kitchen mixers and dough kneaders do the job too, but at the end, knead by hand for at least a couple of minutes. Some home cooks make the mistake of constantly adding flour to prevent sticking. Do not do this — the dough sticks not from lack of flour but from lack of oxygen, which is exactly what kneading provides.
Proofing and punching down
Yeast bread needs about three hours to fully absorb oxygen. The bread is placed in a warm spot (25-26°C) without drafts. Cover the container with a damp towel to prevent crust formation and retain moisture. Some cooks use the cold fermentation method and put the dough in the refrigerator overnight for slower flavor development. Beginners should stick with the warm-fermentation method first. About 90 minutes into fermentation, the dough is "punched down" to remove excess air and prevent large holes from forming in the finished bread. Punching down is required for both yeast and sourdough breads.
Shaping
Wet doughs are baked in molds to prevent spreading on the baking sheet. Baguettes are prepared this way. Cast-iron or ceramic molds are best because heat distributes evenly through them. Without these, silicone, metal, or paper molds work too. After placing the dough in the mold, score the surface in the necessary places — the cuts let the bread rise evenly and create the appetizing appearance. After shaping, the bread needs another rise: yeast bread for one hour, sourdough for two.
Baking
Preheat the oven to the temperature specified in the recipe (200-240°C). Place a saucer with water or ice cubes at the bottom — the increased humidity prevents harsh crust formation and helps the bread bake evenly. To prevent burning, sprinkle coarse salt on the baking sheet, or place a cabbage leaf under each loaf. Loaves can be covered with foil or damp paper. For the first 40 minutes, do not open the oven — the temperature drop causes the bread to collapse. Check doneness by inserting a wooden skewer; if it comes out dry, the bread is done. After baking, cover the bread with a dry towel and let it "rest" for 30 minutes. Regular yeast bread keeps about three days; sourdough masterpieces stay fresh up to ten days.
Tips and Tricks
Tip 1. Invest in a kitchen scale and weigh ingredients. Bread baking is essentially chemistry, and small variations in flour-to-water ratio show up as big differences in the final loaf. Measuring cups vary by 20-30g of flour depending on how packed they are. A scale costs little and pays back its price in better bread within weeks. Professional bakers always weigh, never measure by volume.
Tip 2. Use steam in the oven for the perfect crackling crust. Place a metal tray of hot water on the lower rack when you slide in the bread, or spray the oven walls with water at the start. The humidity delays crust formation, allowing the loaf to expand fully before the surface sets. The same steam technique works in homemade bread recipes and other yeasted baked goods.
Tip 3. Test yeast freshness before committing to a whole batch. Old yeast loses potency, especially after the package is opened. Stir half a teaspoon of yeast into warm water with a pinch of sugar — if it does not foam within 10 minutes, the yeast is dead. Use fresh yeast and you avoid the heartbreak of a dense, flat loaf after hours of work.
Tip 4. Cool bread on a wire rack, never on a flat surface. Air must circulate underneath, otherwise steam trapped against the counter softens the bottom crust into mushy disappointment. The minimum 30-minute cool also lets the interior finish cooking from residual heat — cutting too soon releases steam and gummies the crumb. Pair finished slices with sharp cheese, butter, and a steaming bowl of classic pickle soup.
FAQ
Why does my bread turn out dense and heavy?
Three usual culprits: dead yeast, insufficient kneading, or insufficient rising time. Test yeast freshness with the foam test. Knead until the dough passes the windowpane test — a small piece stretches thin enough to see light through without tearing. Let the dough rise until truly doubled, even if it takes longer than the recipe says. Ambient temperature significantly affects rising time, so a cool kitchen needs more patience than a warm one.
What is the difference between bread flour and all-purpose flour?
Bread flour has 12-14% protein, all-purpose has 10-12%. The higher protein in bread flour develops more gluten, producing chewier breads with better structure. For tender breads like brioche, all-purpose works fine. For crusty artisan breads with open crumb, bread flour is essential. If a recipe calls for bread flour and you only have all-purpose, the bread still works but with slightly less structural strength.
Can I make bread without a bread maker or stand mixer?
Absolutely. Hand-mixing and hand-kneading produce excellent bread — that is how bread was made for thousands of years before electric appliances. Use a large bowl, a wooden spoon, and your hands. The whole process takes about 15 minutes of active work spread across 4 hours of total time. Many bakers prefer hand-mixing for the connection it builds with the dough and the sensory feedback during kneading.
How long does homemade bread keep?
Properly cooled and wrapped in clean cotton or linen, homemade yeast bread keeps for 3 days at room temperature. Sourdough lasts up to 10 days due to its higher acidity. Plastic bags trap moisture and accelerate mold; cloth wrapping breathes properly. For longer storage, slice the bread, place in a freezer bag, and freeze for up to 3 months. Thaw individual slices in the toaster — nearly indistinguishable from fresh.


