
avg —
Homemade Dried Fruit Candies
Instructions
Prepare everything from the list: a sour apple, seedless raisins, dried apricots or dried oranges, and a bar of white chocolate. A sour apple really matters here: a sweet one will not give the right balance and the candies will turn out cloying. Choose fresh, soft dried fruit – old raisins will be dry and hard in the finished mixture.

I use soft raisins, always seedless. Pick through them one berry at a time, discarding any spoiled fruits and stems. Rinse the sorted raisins in cool water, then tip them into a colander and pour boiling water over them – this removes dust and any waxy residue from the surface. Let the water drain off completely, then spread the raisins on a plate to dry.

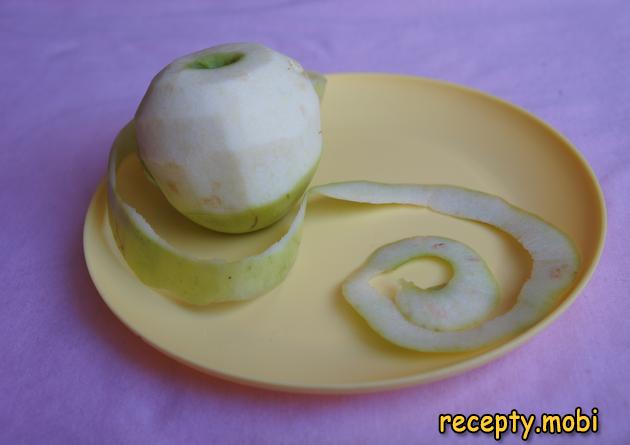
Take a sweet-and-sour apple, wash it thoroughly under running water and peel off the skin. Peeling matters: even thin skin turns into tough fibres in the blender that catch on your teeth. Without the peel the flesh comes out tender and smooth.
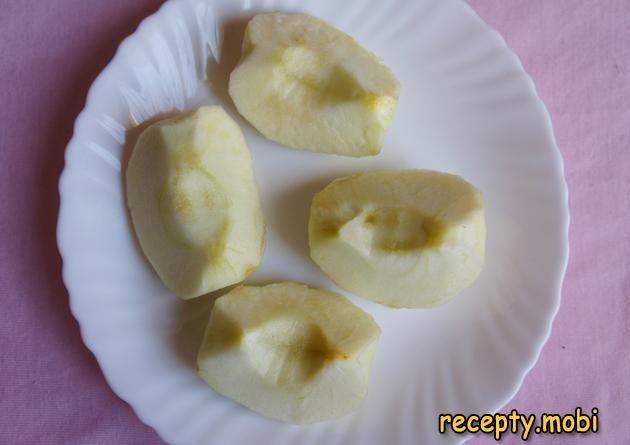
Cut the apple into 4 pieces and remove the seeds along with the tough sections of the core. It is important to take out every section: even one left behind will give a crunch in the finished mixture. Check each quarter with your fingers.
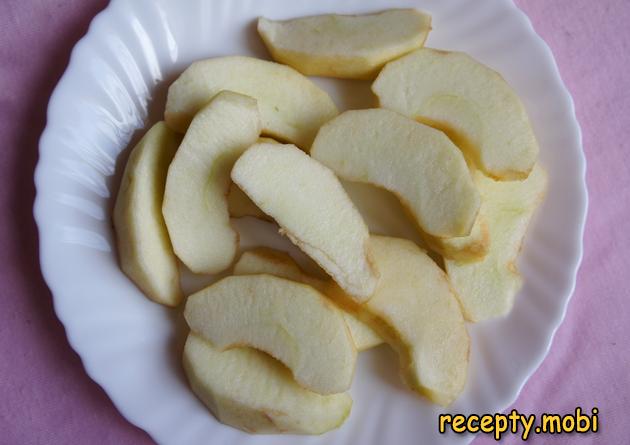
Cut the apple quarters into small slices and put them in the microwave for 3 minutes. In that time the apple will steam and soften – flesh like this is easy to purée in a blender. If you do not have a microwave, you can stew the apple slices in a saucepan with 1 tablespoon of water until softened – the result will be the same.
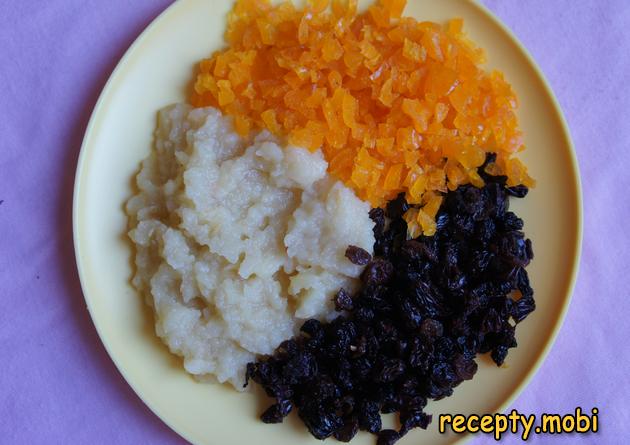
Blend the softened apple into a smooth purée. Rinse the dried apricots in cold water and pour boiling water over them (just like the raisins earlier). Then chop the apricots and raisins into small pieces with a knife – this way they spread evenly through the mixture. Combine all the prepared ingredients and mix well with a spoon until smooth.
Wet your hands with water and roll the mixture into balls the size of a walnut. Damp hands are the key to neat shaping: dry hands will drag at the mixture and tear it. Place the finished balls on a plate and put them in the fridge for 15 minutes to firm up.

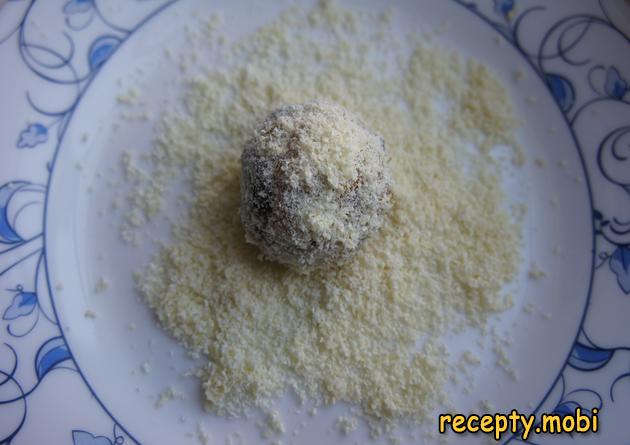
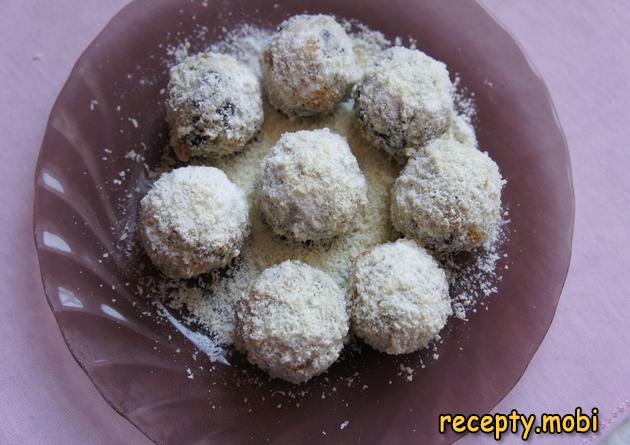
Grate the bar of white chocolate on a fine grater to make fluffy shavings. Take the fruit balls out of the fridge and roll each one in the chocolate shavings on all sides. Put the coated candies back in the cold for 1 hour – the chocolate will set in that time and the candies will gain a neat, snow-white shell.
The homemade dried fruit candies are ready! From simple, easy-to-find ingredients you get a healthy dessert that children and adults alike will love. I serve them with morning tea, coffee or cocoa.Treat yourself and your children to a healthy and very tasty treat.


Tips
- 1
Be sure to use a sour apple (such as Antonovka or Granny Smith) – the acidity balances the sweetness of the dried fruit and white chocolate, otherwise the candies will turn out cloying.
- 2
Wet your hands not just with water, but with water and a tiny drop of odourless vegetable oil – then the mixture does not stick to your hands at all and the balls come out perfectly round.
- 3
Grate the chocolate straight from the fridge while it is cold – warm chocolate starts to melt on the grater and the coating comes out smeared rather than fluffy. I use a similar principle in chocolate desserts.
- 4
If the mixture turns out too runny, add 1–2 tablespoons of ground rolled oats. They absorb the excess moisture without changing the flavour.
FAQ
What can I use instead of white chocolate for the coating? +
Milk chocolate or grated dark chocolate work well instead of white – you get "darker" candies with a more pronounced chocolate flavour. These are also good: desiccated coconut (a lower-calorie alternative), cocoa powder (for a "truffle" effect), chopped nuts (walnuts, almonds, hazelnuts), or confectionery sprinkles. Each coating gives its own character: white chocolate is delicate and creamy, dark is intense, coconut is tropical, and cocoa is the classic truffle.
How long do the candies keep in the fridge? +
The finished candies keep for up to 5 days in the fridge in a tightly sealed container, so they do not absorb other smells. Thanks to the dried fruit and chocolate they do not spoil quickly. You can also freeze them in a container for 1 month – thaw in the fridge for 2–3 hours before serving. Frozen candies are no different in texture from fresh ones – a handy dessert to keep in reserve.
Can I make the candies without apple? +
Yes, other soft fruits work instead of apple: a ripe pear, a banana, or a fresh fig. The principle is the same – the fruit needs to be juicy enough for the mixture to hold together. A banana will make the flavour sweeter (you may need to add a little lemon juice for balance), while a pear gives a softer aroma. Without a fresh fruit the candies will not bind – dried fruit alone does not provide enough stickiness.
Can I use other dried fruits? +
Of course, the recipe is versatile: prunes, dried dates, dried cherries, and dried apples or pears all work. Prunes give a more "grown-up" flavour with a smoky note, dates a rich sweetness, and cherries a pleasant tartness. You can mix several kinds for a complex blend. The main thing is to keep the total weight of dried fruit at roughly 225 g (100 g of raisins plus 15 pieces of the rest), so the proportions and the structure of the mixture stay the same.
- Comment
or post as a guest
Be the first to comment.


