avg —
Glazed curd snacks at home from cottage cheese
Instructions
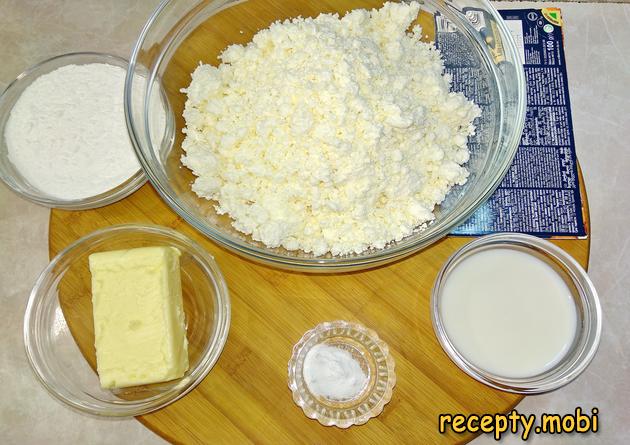
I prepare the ingredients from the list. I use only homemade cottage cheese – it is denser, with a rich milky flavour and no excess whey. Shop-bought "diet" cottage cheese will not do: the mass turns out too runny and will not hold its shape.
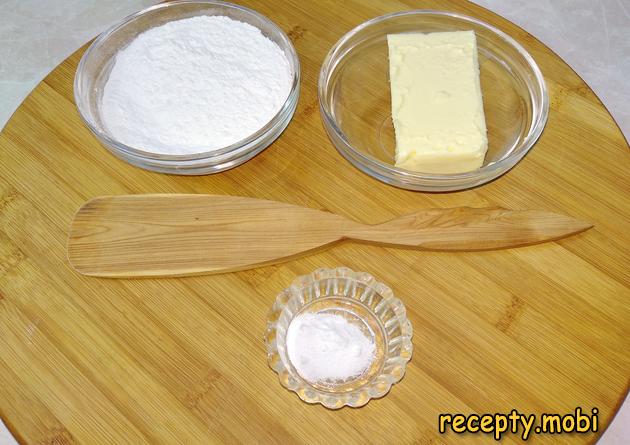
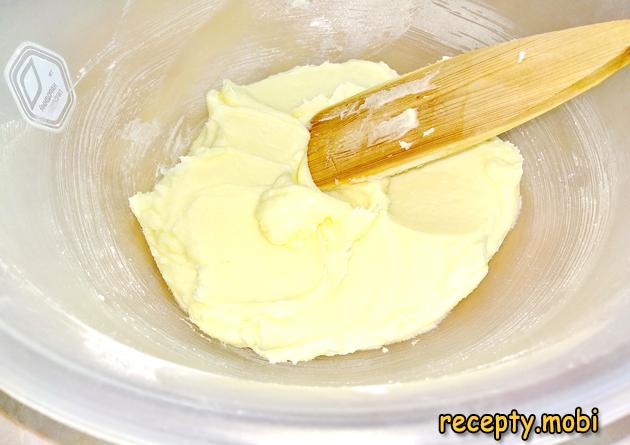
First, I mix the powdered sugar with the softened butter until smooth, then add the vanillin. It has to be powdered sugar rather than granulated – sugar crystals will not dissolve in the butter, and the finished mass would feel gritty on the teeth. The butter should be soft, not melted.
The result is a smooth, fragrant, uniform mass of a light cream colour. At this stage it should look like a delicate buttercream for cakes.
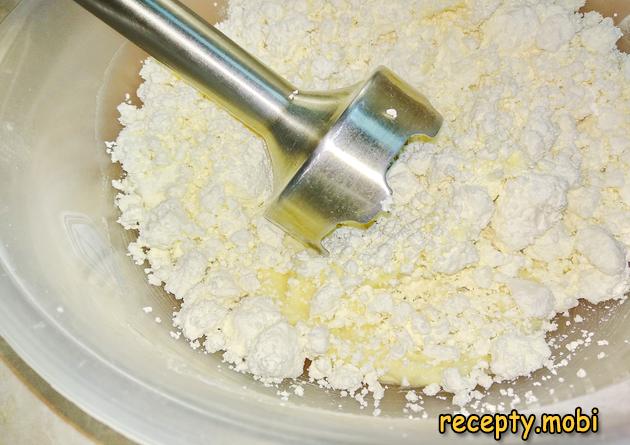
I add the cottage cheese to the prepared butter mass and blend it with a blender. The blender matters here – it breaks down the grains of cottage cheese and gives the finished snacks a perfectly smooth texture. You cannot achieve this result with a fork or a whisk.
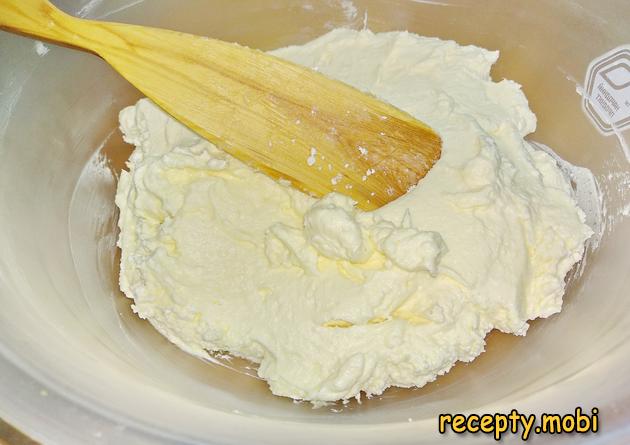
The result is a smooth, uniform mass that is tasty and fragrant. If the curd mass is not sweet enough, you can add a little more powdered sugar. I taste it and adjust to my liking.
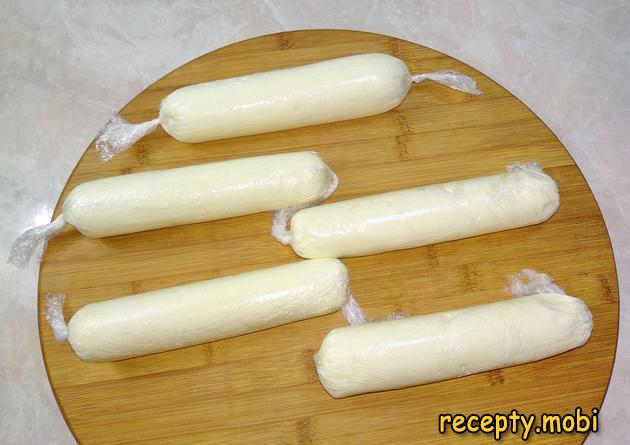
I spread a sheet of cling film on a flat surface of the table. Leaving a little space from the edge, I lay out the right amount of curd mass – roughly enough for one snack. The film is a handy "mould": the mass does not stick to your hands with it.

I form a little roll from the mass, wrapping it in the film. I try to give it a shape close to a cylinder – the "classic" look of a shop-bought curd snack. I twist the ends of the film tightly.
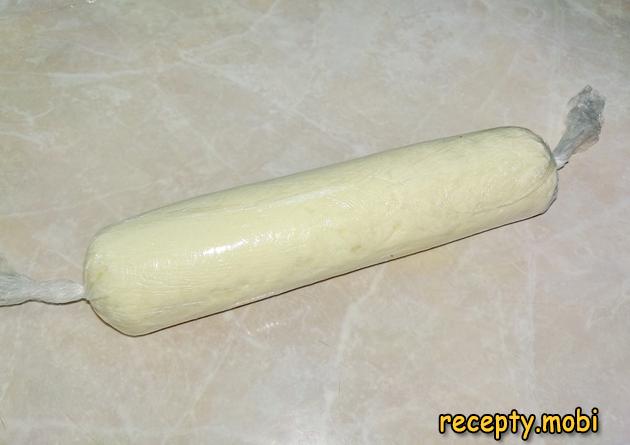
I make such rolls from all of the curd mass – it works out to about 10 of them. I put them in the freezer for at least 2 hours to set. Without freezing it is impossible to coat the snacks with glaze afterwards – the mass would be sticky and soft.
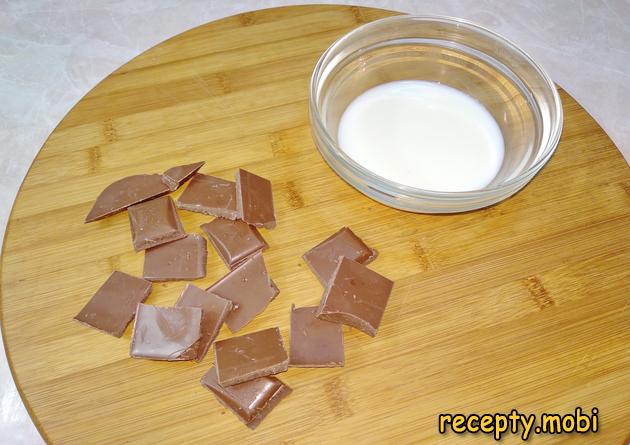
For the glaze I prepare 35% cream and chocolate. You can choose the chocolate to your taste: dark gives the classic slightly bitter glaze, milk chocolate a sweeter one, and white an elegant, pale finish.
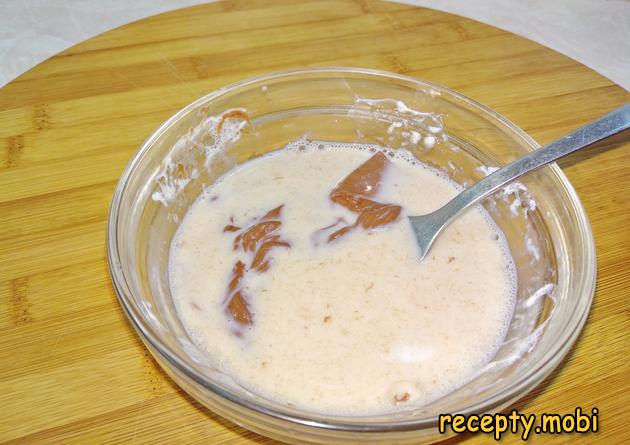
I heat the cream in the microwave (until hot, but not boiling) and add the chocolate to it. I stir thoroughly until I get a smooth, glossy mass. This is a classic "ganache" – the base for most chocolate glazes.
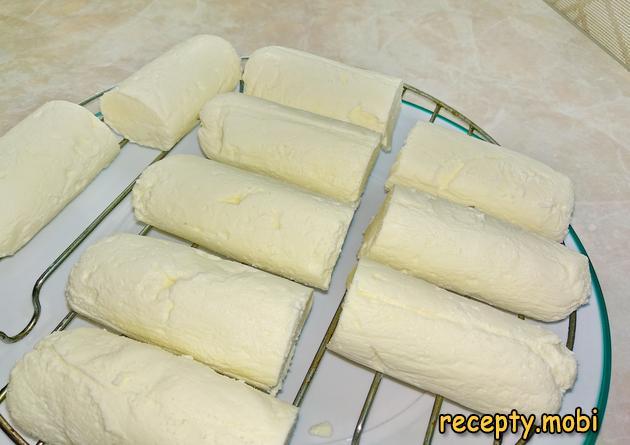
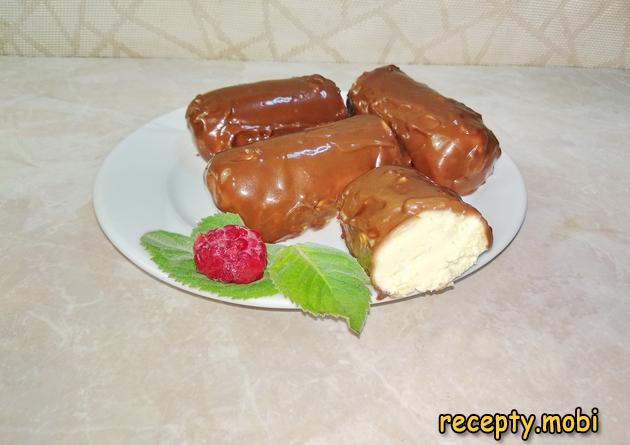
I take the snacks out of the freezer and cut them in two (so they become the familiar "shop" size). I place them on a wire rack – under the rack I put a plate or parchment to catch the dripping glaze. I cover the snacks with the chocolate glaze using a silicone brush or a spoon.
The snacks are coated with glaze – I put them back in the freezer to set for 15–20 minutes. The cold quickly "grabs" the chocolate, giving a smooth, shiny coating.
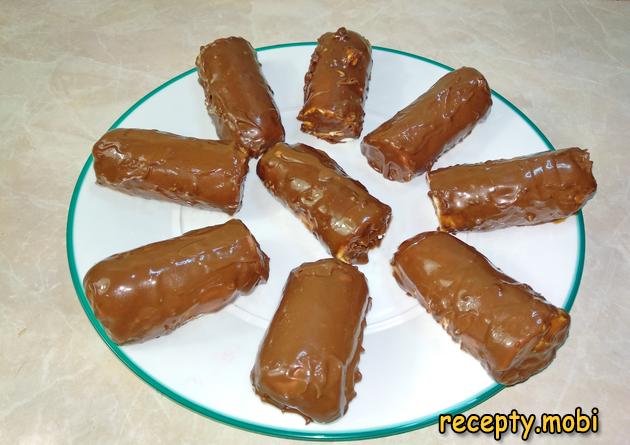
The homemade glazed curd snacks from cottage cheese are ready! Such snacks can be made with different fillings – berries, jam or caramel inside (add them to the curd mass while shaping).


Tips
- 1
Be sure to use homemade cottage cheese – it is denser and does not give off excess moisture. Shop-bought "diet" cottage cheese will give too soft a mass, which will not form into snacks.
- 2
Use POWDERED SUGAR rather than ordinary granulated sugar – sugar crystals will not dissolve in the buttery mass, and the snacks will turn out gritty.
- 3
Freezing for 2+ hours before glazing is essential – otherwise the mass is sticky and the chocolate will "sink" into it. I use a similar principle in other frozen desserts.
- 4
For variety you can add pieces of dried apricots, raisins or nuts, or drops of jam to the curd mass – you will get your own "signature" versions of filled snacks.
Video
FAQ
Which chocolate is best for the glaze? +
For a classic "shop-style" glaze, use dark chocolate with 50–60% cocoa – it gives that characteristic flavour with a slight bitterness that pairs perfectly with the delicate cottage cheese. Milk chocolate (30–35%) is a sweeter, more "child-friendly" alternative and suits little ones. White chocolate is an elegant option for "festive" snacks. Good chocolate contains cocoa butter rather than "vegetable fat" – check the ingredients. An inexpensive "chocolate" confectionery coating can also be used, but the flavour will be simpler.
Can the cream in the glaze be replaced? +
35% cream is the classic choice for ganache. Substitutes: 20–22% cream (the glaze will be thinner, so you need more chocolate, 1:2 instead of 1:1), butter (melt 30 g with the chocolate for a denser glaze), or milk (60 ml + 10 g butter – the most budget-friendly option). Without a fat addition the chocolate simply sets like glass and cracks. Low-fat cream or milk give a "starchy" result; the ideal one is exactly the rich 35%.
How long do homemade curd snacks keep? +
In the fridge – 3–4 days in a closed container. In the freezer – up to 1 month; thaw in the fridge for 2–3 hours. The buttery curd cream takes freezing well, unlike many other desserts. Eat the snacks chilled – at room temperature the curd mass softens quickly and the glaze starts to melt. It is ideal to take them out of the fridge 5 minutes before eating – they become a little softer but keep their shape.
What fillings can be used for the snacks? +
Before shaping, you can add to the curd mass: grated chocolate (3–4 tbsp), finely chopped dried apricots or raisins (50 g), chopped nuts (almonds, hazelnuts, walnuts – 50 g), drops of jam in the centre of each snack (for a "tasty surprise"), fresh berries (raspberries, strawberries, blueberries – 1–2 in the centre), or cocoa powder (2 tbsp for "chocolate" snacks). Experiment with combinations and you will get a varied set of your own "signature" versions.
- Comment
or post as a guest
Be the first to comment.