
avg —
Beef Ribs in the Oven
Instructions
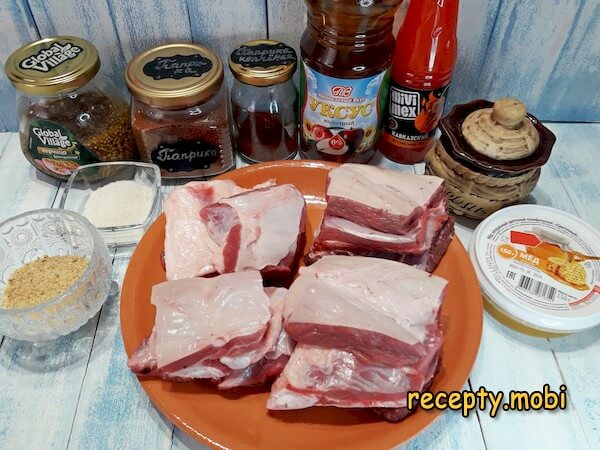
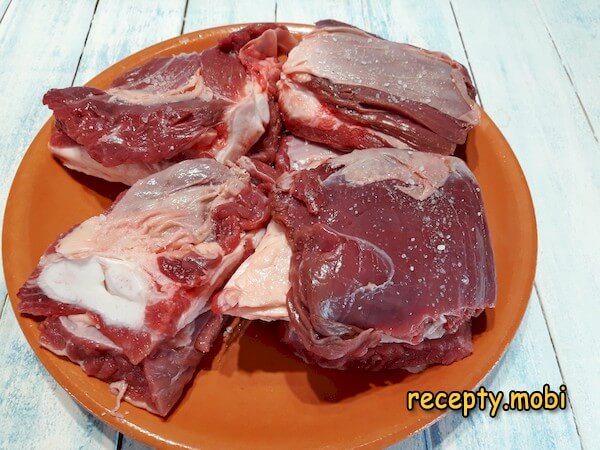
I prepare the ingredients. The ribs should be meaty, with plenty of flesh between the bones. The mustard should be mild rather than sharp – Dijon works best. The salt should be coarse rock salt with large crystals, so the meat can be seasoned more evenly; the grains will not stick to your fingers or clump in one spot.
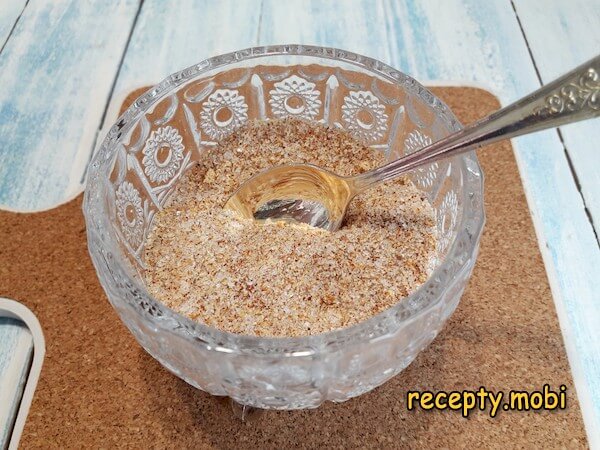
First I prepare the aromatic mix. In a bowl with the dried garlic I add the sugar – the "dry rub" is the secret of the BBQ style.

I add the sweet paprika here too (I leave the smoked paprika aside for now – to intensify the flavour, it will go directly onto the meat).
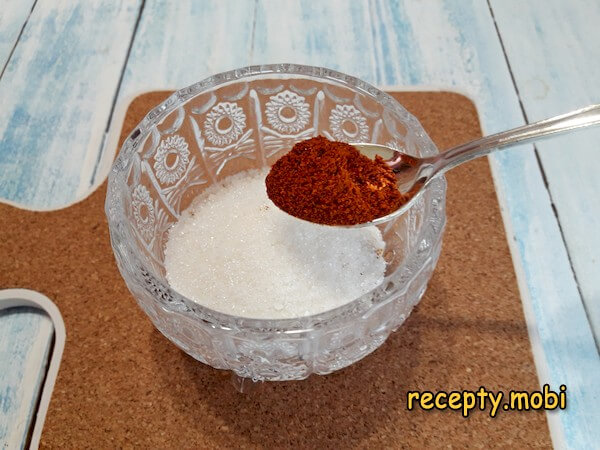
I mix everything well – this is the spice mix for the beef.
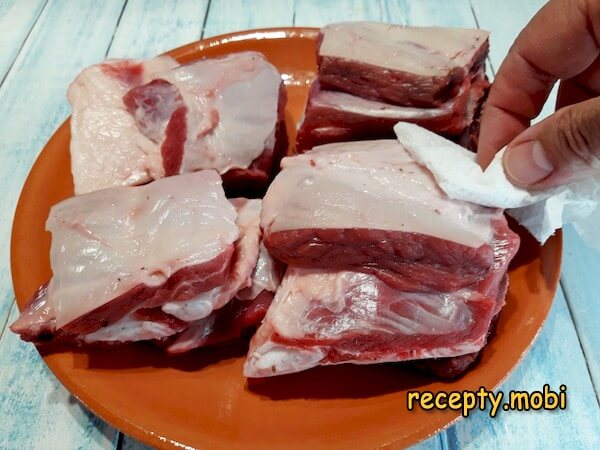
I check the meat on the ribs for any small bone fragments, wiping it with a paper towel. There is no need to cut off the membrane – after long cooking it softens and makes the meat juicy. This is the secret to keeping the collagen in the membrane.
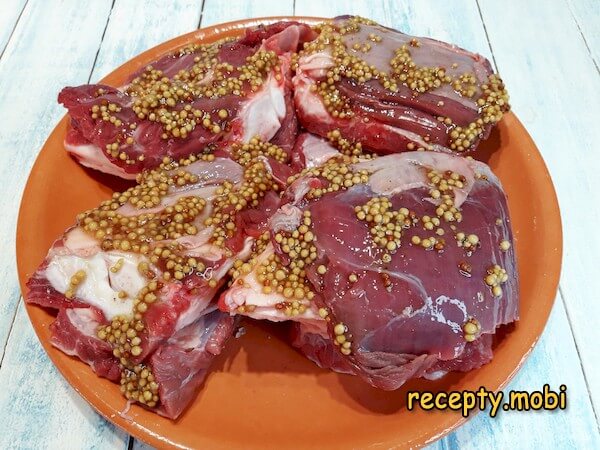
I sprinkle the meat with salt on both sides – before all the other seasonings, so that they "stick" to the salted meat.
I spread on the mustard – Dijon works like "glue" for all the other seasonings.
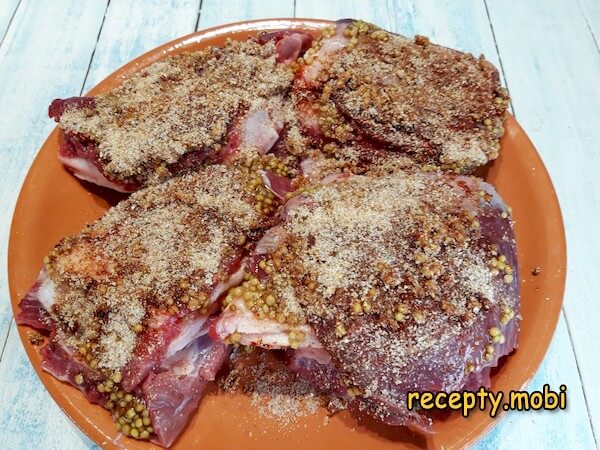
After that I sprinkle on the smoked paprika – it is what gives the characteristic smoky BBQ aroma.

I coat the ribs on all sides with the dry aromatic mix – the whole surface of the ribs should be covered with an even "seasoning crust".
I place the ribs on a baking sheet or in a baking dish (no oil is used, since this type of meat has plenty of sinews, membranes, and fat layers that release juices during cooking – there is no need to add fat from outside).
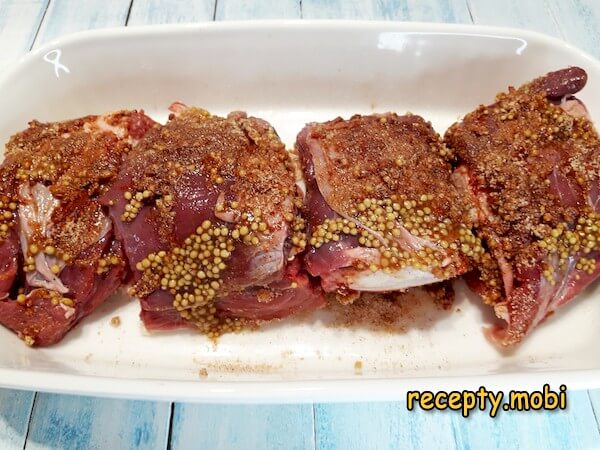
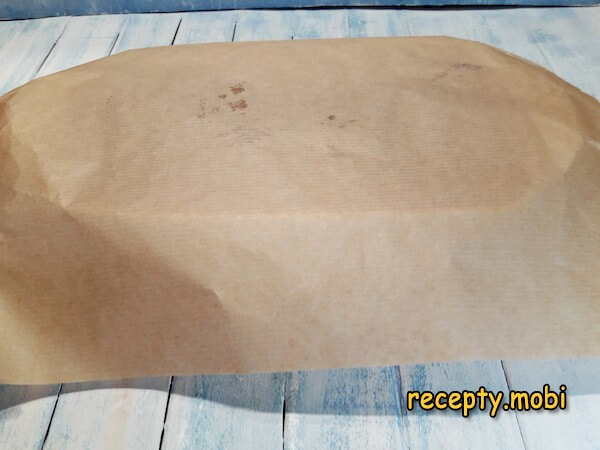
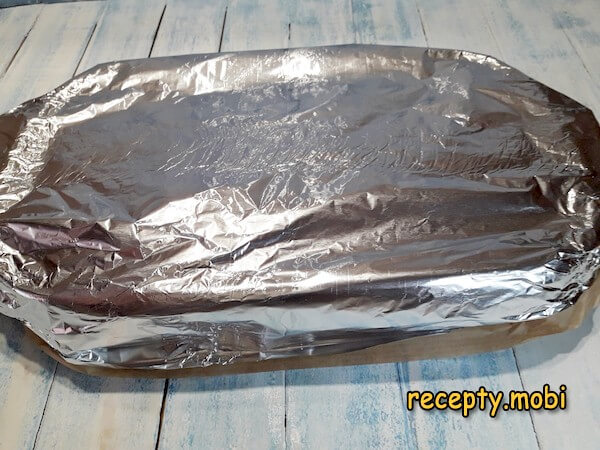
Now the dish needs to be sealed tightly. First I cover it with baking paper – this is a layer between the meat and the foil, so the acids in the glaze do not react with the foil.
Then I press foil tightly on top. At this point I turn the oven on to 150 degrees, and while it heats up, the meat marinates; after that the dish goes onto the middle rack. Meanwhile, I can prepare the barbecue glaze.
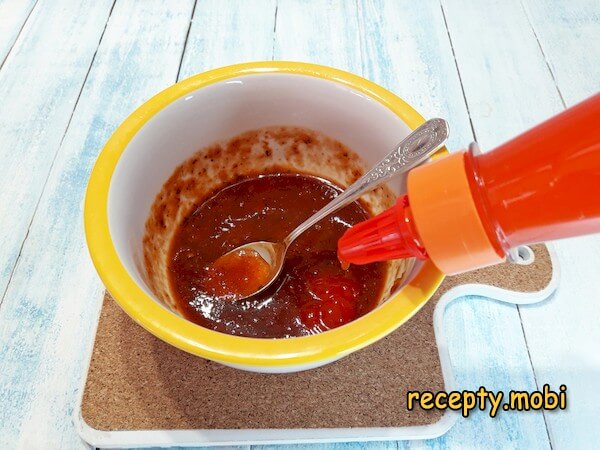
For this I put the ketchup in a bowl – it is the "tomato base" for the glaze.
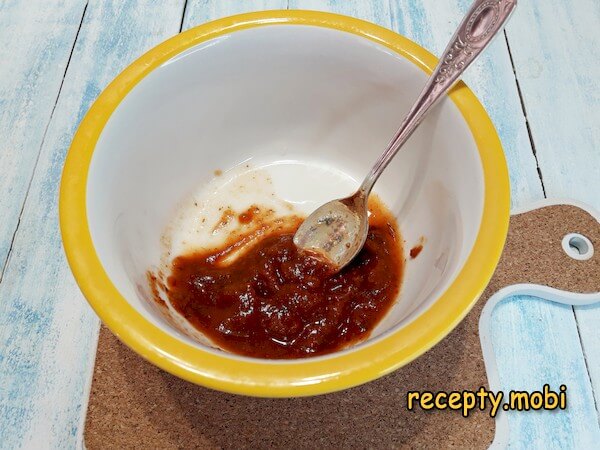
I add the apple cider vinegar – the acidity balances the sweetness of the ketchup and honey.
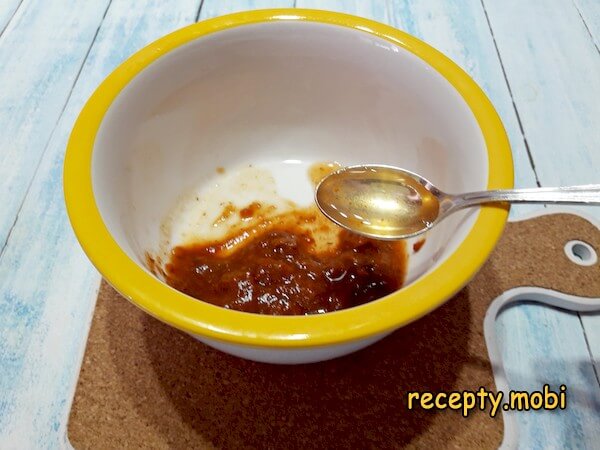
The honey creates the glossy crust – I add it to the rest of the ingredients. Honey is exactly what gives the characteristic BBQ shine.

I add a touch of heat – the chili sauce. I stir everything together. The finished glaze will be needed later, at the end of baking.
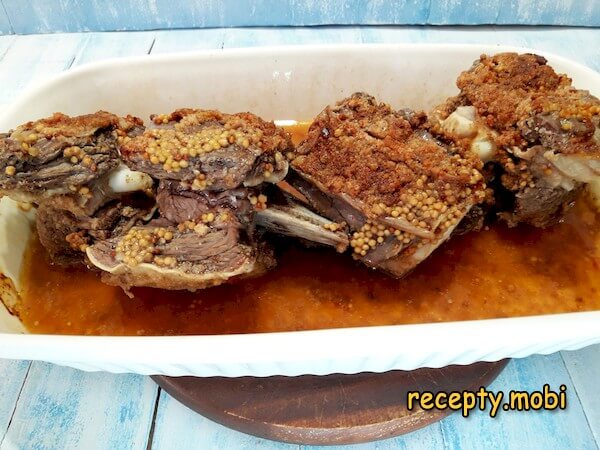
After 2 hours and 50 minutes I take the dish out of the oven and remove the top cover – by this time the meat is almost done.
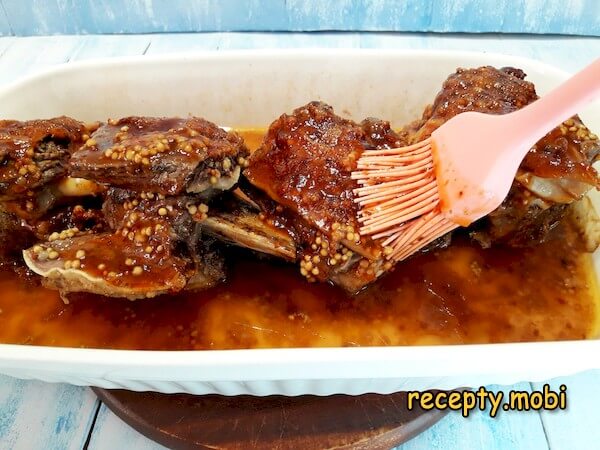
I brush the ribs with the barbecue glaze and put the dish back in the oven for 5 minutes (no need to cover it). After that time I repeat the procedure – the "double glaze" is what gives the glossy, shiny crust.
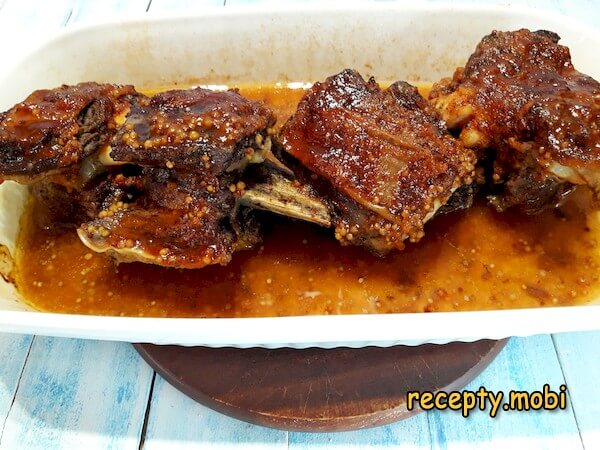
In total, the meat cooks for 3 hours – "low and slow", in the American BBQ tradition.The beef ribs, slow-cooked in the oven until completely tender, turned out incredibly soft and aromatic, with a pleasant tang, a bit of heat, and moderate sweetness. I serve them with thinly sliced rings of red onion and vegetables. This dish suits not only a family lunch but also a festive table – a celebratory presentation for sure.


Tips
- 1
LOW AND SLOW – the secret of tender meat. This is the golden rule of American BBQ: "low temperature and a long time". At 150 °C the collagen in the beef sinews slowly turns into gelatine, making the meat "melting". At 200 °C and above the meat burns on the outside and stays dry inside. A minimum of 2.5 hours, ideally 3 hours. If the meat is dry, lower the temperature to 130 °C and increase the time to 4 hours. This same "slow roasting" principle works for oven-baked pork ribs.
- 2
MUSTARD AS "GLUE" – the secret to the spices sticking. If you simply sprinkle dry spices over dry meat, most of them will "fall off" into the dish and never reach your tongue. Dijon mustard, applied in a thin layer, works like "glue" – all the following seasonings stick firmly to the meat and do not come off during cooking. Bonus: the mustard adds a light tang that balances the richness of the beef. In American BBQ this is called the "mustard slather" – an essential step for ribs.
- 3
TWO-LAYER COVER – the secret of juiciness. Baking paper plus foil on top creates a "greenhouse" effect for the cooking. The paper protects the meat from direct contact with the foil (the acids in the glaze can "etch" the aluminium and give a metallic taste). The foil seals it, holding the steam inside. Without this "double cover", the meat dries out over 3 hours in the oven. An alternative is a ceramic pot or a cast-iron pot with a lid, which also works well.
- 4
DOUBLE GLAZE – the secret of the glossy crust. A single pass of glaze gives a "pale" shine. Two passes 5 minutes apart give a thick, glossy, rich finish. Between the glazes, the honey and sugar have time to caramelise, forming a "lacquer" on the meat. A third pass is possible but usually excessive. The glaze is applied only at the very end – if you put the ribs in glazed for 3 hours, the sugar will burn and the crust will turn bitter. A similar "glazing technique" is used for Canadian-style pork ribs in the oven.
FAQ
What can replace Dijon mustard in the recipe? +
The best alternatives: wholegrain mustard (with whole seeds, mild), sweet Bavarian mustard (with honey, for a "Canadian" character), or Russian table mustard (only in a small amount – it is three times sharper). For a mustard-free version: a 50/50 blend of mayonnaise and soy sauce (which gives "stickiness" without the mustard note), or a mix of olive oil, lemon, and garlic (instead of the "mustard slather"). Sweet "Honey Mustard" in a large amount is definitely not suitable – it will overpower the BBQ flavour of the glaze. The main point is that there should be "glue" for the spices.
Can I replace the beef ribs with pork? +
Yes, the recipe is universal for ribs of any meat. Pork "baby back" ribs (from the back) are the most tender and need only 2 hours at 150 °C. Pork "spare ribs" (from the rib cage) are fattier and need 2.5 hours. Lamb ribs cook faster, 1.5–2 hours, but have a more pronounced "lamb" flavour. Chicken wings or legs are dramatically faster, 30–40 minutes at 200 °C. Beef is the most "sinewy" and needs exactly 3 hours of "low and slow". The glaze suits all kinds of meat equally well, but for chicken it is better to add orange zest.
How do I know the ribs are done? +
There are several reliable signs. First, the "toothpick test": pierce the meat at its thickest point – it should go in "like butter", without resistance. Second, the "pull test": take a rib by one edge, and the meat should start to "droop" off the bone (but not fall off completely). Third, internal temperature: 90–95 °C on a thermometer at the thickest point. Fourth, visual: the bone "exposes" by 5–7 mm at one end (this is "retracting"). If the ribs are still "tough" during the tests, extend the time by 30–60 minutes.
What to serve with beef ribs? +
The American BBQ classics. Side dishes: coleslaw (cabbage salad with a sour-cream dressing), corn on the cob, jacket-baked potatoes with butter, French fries, steak fries, or baked beans. For drinks: dark beer (stout, porter), bourbon on the rocks, whisky and cola, or homemade fizzy lemonade. As for sauces on the side: Kansas City BBQ sauce (sweet and thick), Carolina (vinegary, tangy), Texas (tomato and spicy). For a buffet, cut them "one rib at a time" with a skewer.
- Comment
or post as a guest
Be the first to comment.
")


