
avg —
Apple Jam for Winter
Instructions
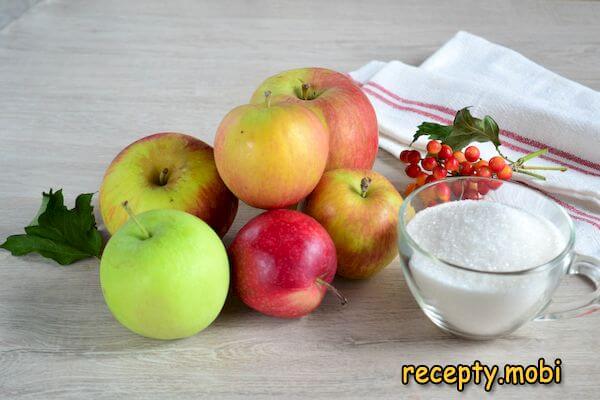
Prepare all the necessary ingredients.
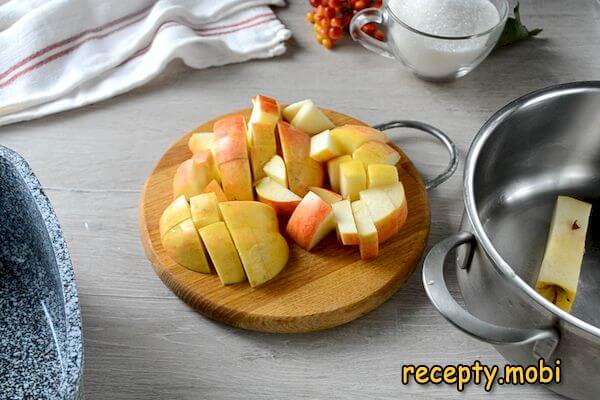
Cut the apples into small pieces. Peeling is not necessary – you only need to remove the stem. You can chop the fruit finely, grate it, or pass it through a meat grinder. However, when grated or put through a grinder, the apples darken very quickly.
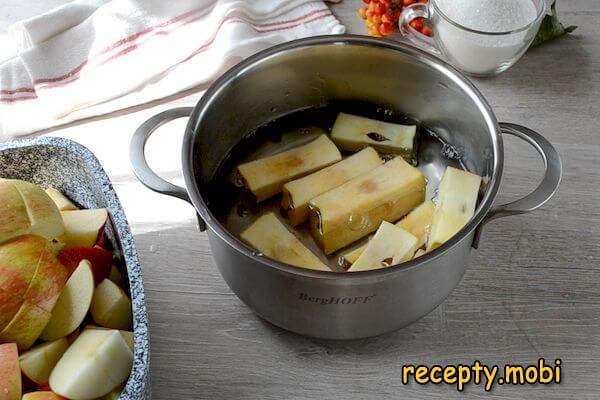
Do not throw away the seed cores left after cutting – we will need them. They contain a lot of pectin, which helps to thicken the jam naturally. Put the seed cores into a saucepan, add 300 ml of water, bring to a boil and simmer for 10–15 minutes. Then squeeze the cores well and drain off the liquid.
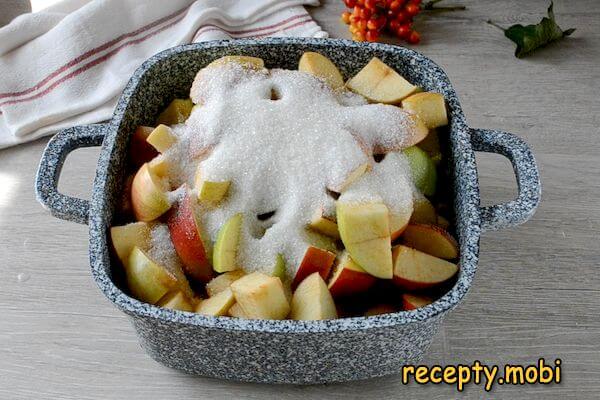
Add the pectin-rich liquid to the chopped apples, along with half of the sugar. Stir and place on the heat. Simmer for 10 minutes after it comes to a boil – the apples should become soft.
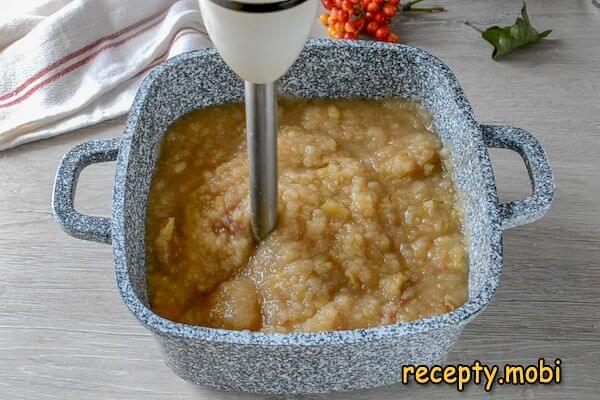
Using an immersion blender, puree the apples until smooth and uniform.
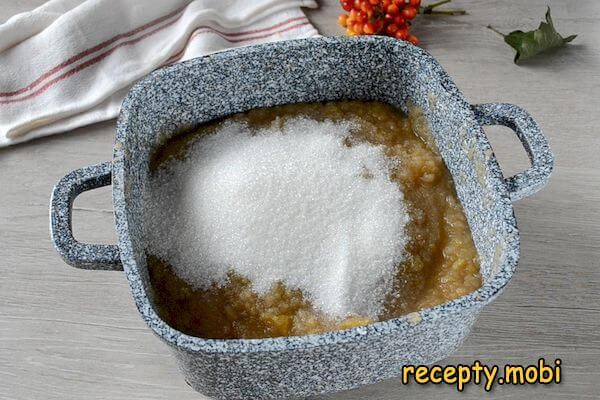
Add the remaining sugar to the blended apples. Now all that is left is to reduce the puree to the right consistency – this will take from 1 to 4–5 hours. After it comes to a boil the puree bubbles quite actively, so cover the pot halfway with the lid. It must not be fully closed – the liquid needs to evaporate. Cook the jam over low heat, stirring often.
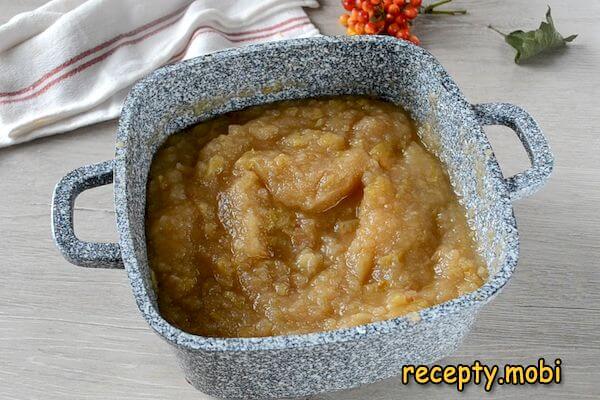
As soon as the jam has reached the right consistency, remove it from the heat and spoon it into sterilized jars. From 2 kg of apples I got two half-litre jars. Be sure to give it a try!Enjoy your meal!


Tips
- 1
DO NOT THROW AWAY THE SEED CORES – they contain pectin, a natural thickener. The decoction made from them replaces shop-bought pectin.
- 2
ADD HALF OF THE SUGAR at the start and the rest after blending. This way the sugar is absorbed evenly and does not caramelise on the bottom.
- 3
DO NOT CLOSE THE LID COMPLETELY – the moisture must evaporate, otherwise the jam will not thicken. Cover it halfway so that the puree does not "shoot" onto the hob.
- 4
CHECK FOR DONENESS with a spoon – scoop some up and run a finger across the spoon: if the trail does not "flow" back together, the jam is ready. The same principle works for other fruit jams.
Video
FAQ
Which apples are best for jam? +
Tart and sweet-and-sour varieties are good for jam: Antonovka (a classic, lots of pectin), Simirenko (firm flesh), Granny Smith (tart), Semerenko (rich flavour). Juicy summer varieties (White Transparent, Melba) give off a lot of liquid, so cooking will take longer, but the jam will be tender. Sweet varieties (Golden, Gala) require the addition of citric acid (1/2 tsp per 2 kg of apples) for balance and better setting. The best option is "autumn" home-grown apples, as they contain the optimal amount of pectin.
Do the apples need to be peeled? +
In this recipe – not necessarily. The skin contains a lot of pectin and natural aromatic substances, so the jam turns out richer. After blending, the skin will not be noticeable at all – the blender breaks it down completely. For a perfectly smooth texture (like shop-bought jam), rub it through a sieve after the blender, but this is an extra step. If the skin is tough (late varieties) it is better to remove it with a peeler. For "hybrid" apples (waxed, shop-bought) it is also better to peel them.
How long does the jam keep? +
In a cellar or cool pantry – up to 12 months. At room temperature – 6–8 months. Once opened – 1–2 months in the fridge. Thanks to the high concentration of sugar (30% of the weight of the apples) and the long cooking, the jam keeps very well. Over time it may "candy" slightly – warm the jar in warm water for 10 minutes and the sugar will dissolve. For children you can reduce the sugar to 400 g, but then store it in the fridge for up to 3 months.
How do you use apple jam? +
It is a versatile treat. For baking: a filling for pies, croissants, strudel and sweet buns. On fritters, pancakes and waffles – a classic. In cottage cheese and rice bakes – instead of sugar. In muffin batter (3 tbsp of jam instead of butter = a lighter version). With ice cream (a spoonful of jam plus a scoop of vanilla). In tea as a "preserve". For children – spread it on bread with butter to make an "apple sandwich". You can also dilute it with hot water to get an "apple compote concentrate".
- Comment
or post as a guest
Be the first to comment.


