
avg —
Bread in the oven at home
Instructions
I prepare all the ingredients in advance: I sift the premium flour (500 g) through a sieve once or twice to enrich it with oxygen and leave it on the table to warm up to room temperature. I also get ready the salt (1.5 tsp) and the yeast (1.5 tsp dry or 15 g fresh). Dry yeast is more convenient to use, while fresh yeast gives a more “authentic” yeasty aroma.
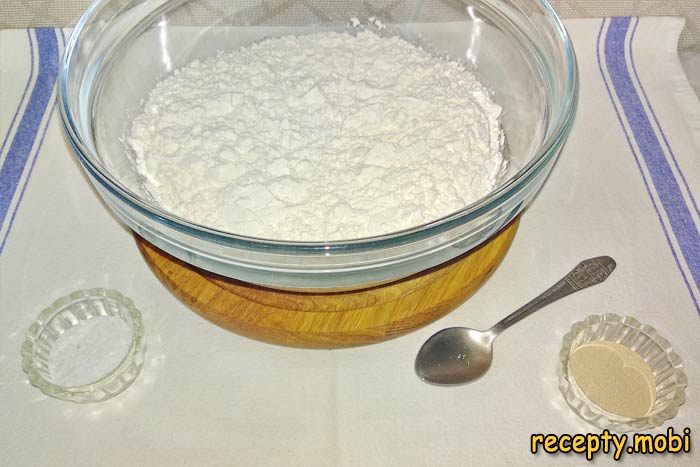
I use WARM water (about 36°C), but NOT hot – hot water will “kill” the yeast. Into a separate container of warm water I first add the salt, then the yeast, and quickly stir until everything is fully dissolved. This needs to be done QUICKLY so that the salt does not “react” with the yeast and “kill” its activity.
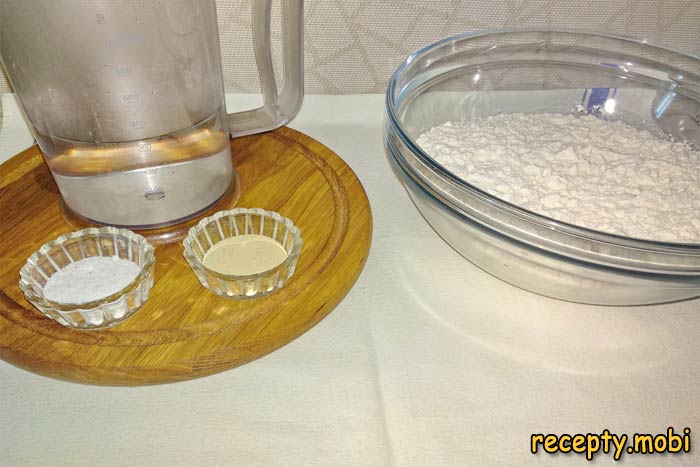
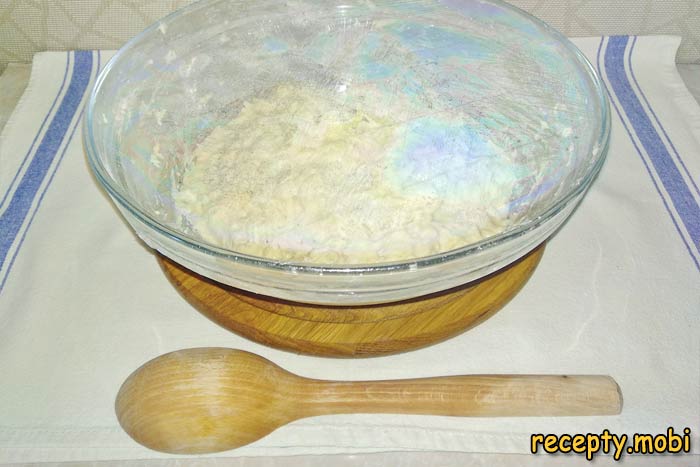
I pour the prepared liquid with the yeast and salt into a large bowl with the sifted flour. I stir thoroughly with a spoon until all the ingredients come together into a uniform mass. At this stage the dough should “gather” into a single lump with no dry patches of flour.
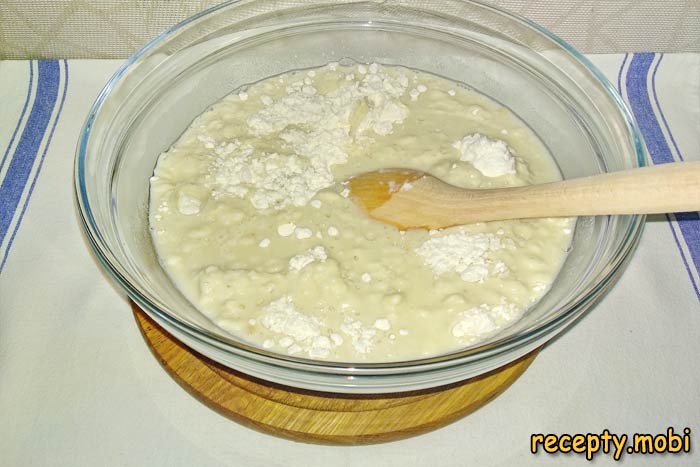
There is NO need to knead the dough for a long time – this is a “lazy” bread recipe, without lengthy work on the dough. It is enough simply to combine all the ingredients into a uniform mass for 1–2 minutes with a spoon – the dough will be sticky, and that is normal for this simple “rustic” recipe.
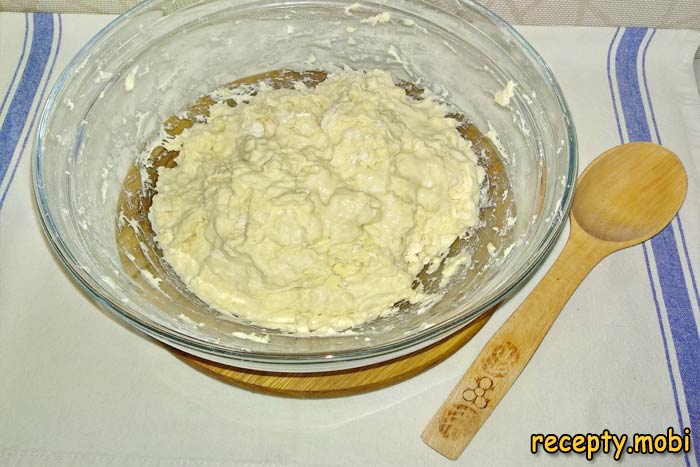
I cover the bowl of dough tightly with cling film and put it in a warm place free of draughts (ideally inside a switched-off oven with only the light on). I “forget” about the dough for 2 hours. The active time spent on the mixing is only 3–5 minutes.
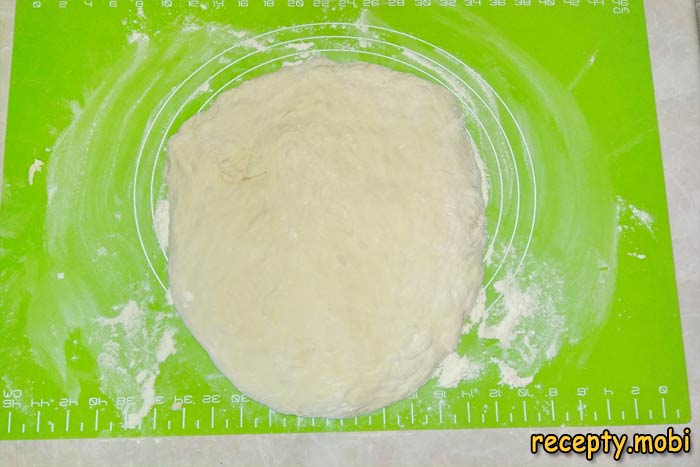
After 2 hours the dough will have increased in volume by 2.5–3 times – a sign that the yeast is working actively. This is the ideal moment to shape the bread. If the dough has not “risen”, the yeast is dead, so start again with fresh yeast.

I move on to shaping the bread. I dust the work surface with flour and carefully turn out the whole mass of risen dough. I simply stretch the dough by hand into the shape of a large rectangle. There is no need to use a rolling pin – it would knock the air out of the dough.
I fold the dough like an “envelope”: with my right hand I take the right edge of the rectangle, pull it slightly to the side (the dough is elastic and stretches well) and fold it over the main mass. This gives a “layered” structure in the finished bread – a special feature of this simple recipe.
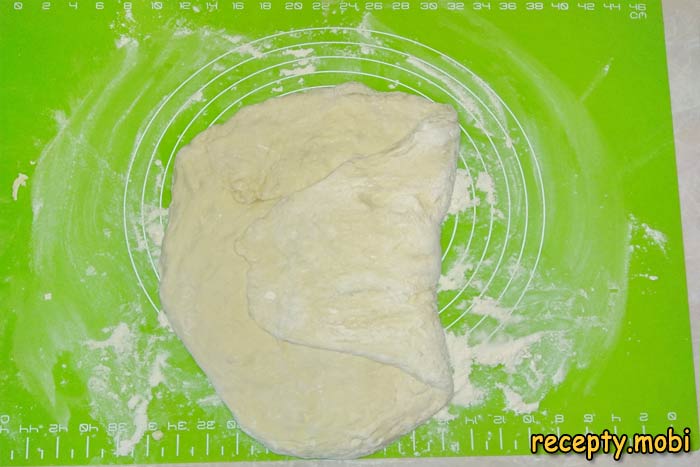
With my left hand I stretch the left edge of the rectangle in the same way and fold it over the main mass of dough from the top. The result is a “double layer” on both sides – the dough becomes more structured. This gives a “layered” effect in the finished crumb of the bread.
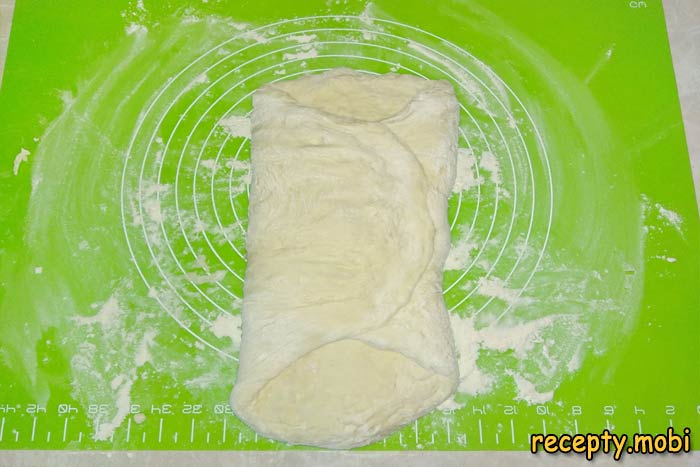
I also repeat this with the bottom edge of the dough – I stretch the edge and fold it over the mass “towards me” (in the direction of my body). The result is a three-layer construction of dough with even “wrapping”. This technique ensures an airy structure in the bread.
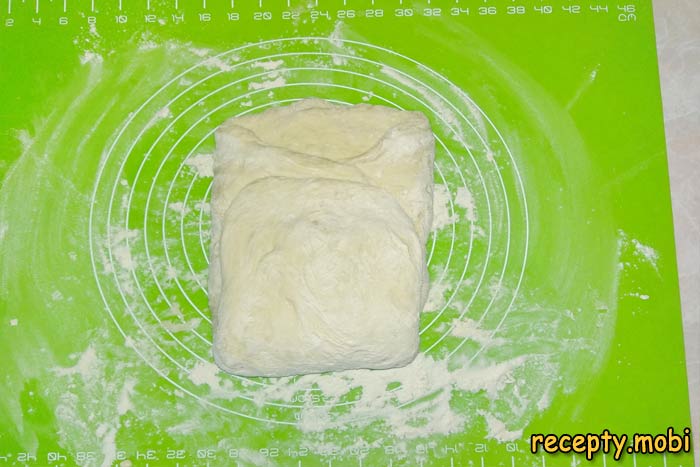
I fold the top edge in the same way. In the end I get an “envelope” of dough with 4 “layers”. If you plan to bake in a square form, this shaping is enough; you only need to tuck the sides of the dough underneath for an even loaf.
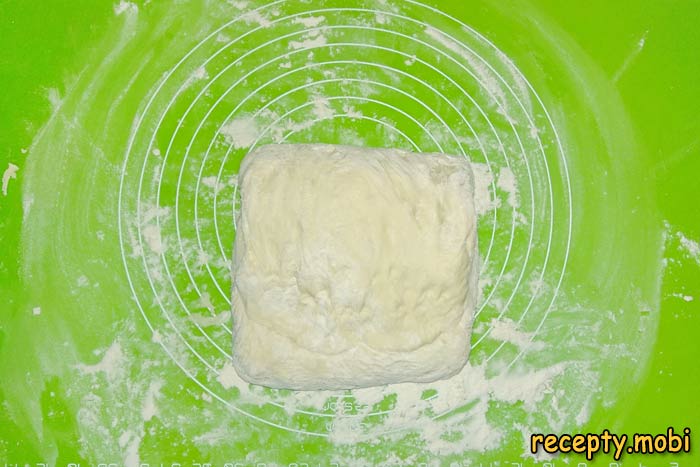
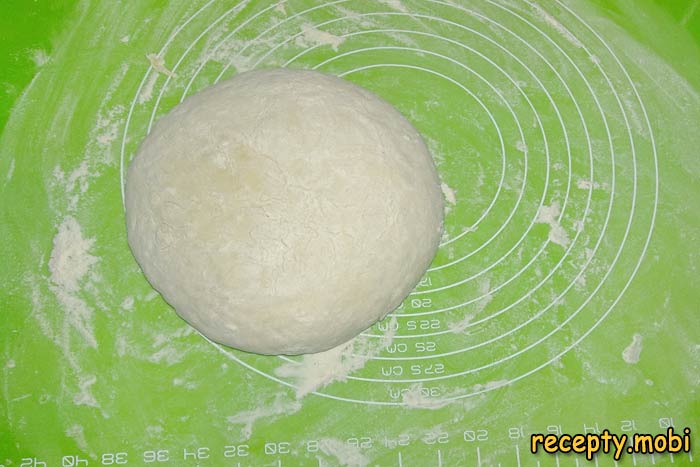
For a round loaf I shape the dough into a ball: I fold all the edges of the dough into a “little bag” (on the principle of khinkali), then turn it seam side down onto the floured surface. The result is a neat “round bun”. During shaping I use flour generously – I dust the table surface, my hands and the dough itself so it does not stick. Shaping the loaf takes another 5 minutes.
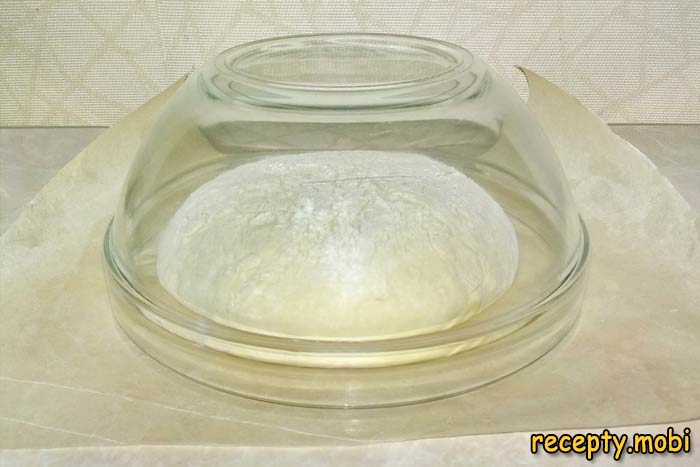
I transfer the finished “round bun” of bread onto parchment paper that I have greased in advance with vegetable oil. I cover it with a bowl and leave it to “rest” on the table for 30 minutes – a second proofing for extra rise. At the same time I switch on the oven and let the baking form heat up together with it. I set the temperature to 230°C.
After 30 minutes I prepare a “steam bath”: into any heatproof metal form or bowl I pour 300 ml of hot water and place it on the lower level of the oven. We will bake the bread with steam – this gives a crisp, handsome crust without any hardness.
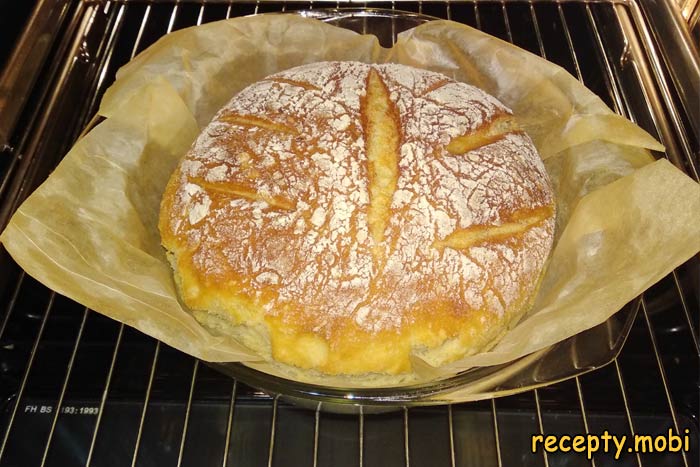
I take the heated form out of the oven (cast iron is preferable). Together with the parchment paper I quickly transfer the rested “round bun” of dough into the hot form. With a sharp knife or a special blade I make 2–3 decorative cuts on top of the bread about 0.5 cm deep – the steam escapes through them during baking so the bread does not “burst” in an unexpected place.

I keep the oven at 230°C and bake the bread for 45–50 minutes. During this time the container of water MUST stay in the oven – it provides constant steam. I check for doneness with a skewer – it should come out dry from the thickest part of the bread. The crust should be golden-brown and crisp.
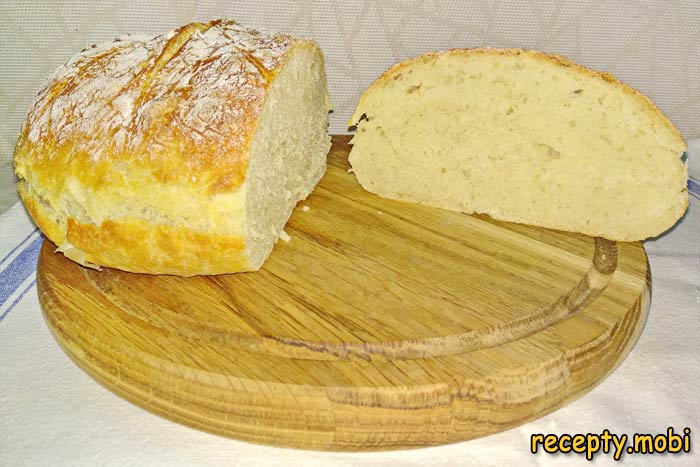
I take the finished fragrant bread out of the oven and place it to “rest” on a wire rack. I cover it with a clean cotton towel – this sets the structure of the crumb. I leave it undisturbed for 20–30 minutes before slicing.
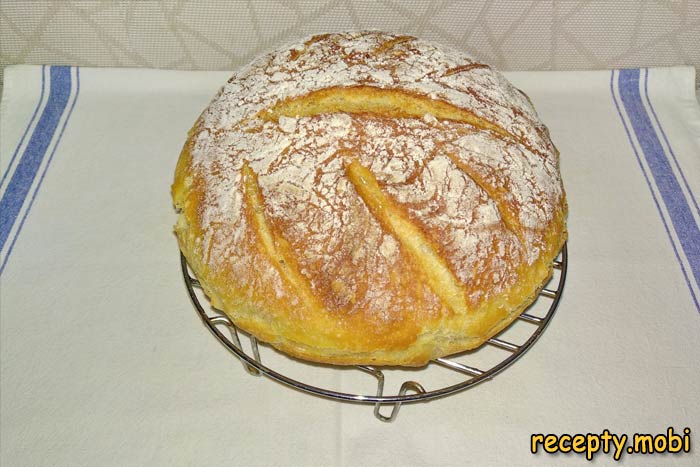
The fragrant homemade bread with its crisp crust is ready! We spent at most 10 minutes on active cooking – the bread “worked” the rest of the time without us. The result is incredibly tasty homemade bread with a golden crust and a dense “rustic” crumb.


Tips
- 1
The water must be warm, 36°C, not hot – hot water will “kill” the yeast and the dough will not rise. Check the temperature against your wrist, as you would for a baby.
- 2
Add the salt and yeast to the water QUICKLY and stir straight away – the salt should not have time to “kill” the yeast on direct contact.
- 3
A bowl of water in the oven is essential – the steam gives a crisp crust and prevents the crust from turning “coarse”. I bake sourdough bread on a similar principle.
- 4
Cover the finished bread with a towel after baking – the structure of the crumb will “set” properly over 20–30 minutes of rest.
FAQ
Which yeast is better – dry or fresh? +
Both options work – they give a similar result with small differences. Dry yeast (1.5 tsp = 5 g) is more convenient to use – it keeps for a long time, needs no preliminary sponge, and is always “fresh”. Fresh pressed yeast (15 g) gives a more “authentic” yeasty aroma, an airier crumb and a more “grandmother’s” bread flavour – but it needs to be fresh (it keeps in the fridge for 2 weeks). For experienced bakers, fresh yeast is preferable. For beginners, dry yeast is more convenient. Substitution ratio: 5 g dry = 15 g fresh yeast. The quality of the yeast directly affects the result – use fresh, proven yeast.
Why put a bowl of water in the oven? +
Humidity is critical for baking bread properly – steam slows down the formation of the crust in the first 10 minutes, allowing the dough to rise as much as possible without resistance. The moisture then helps the crust become thin and crisp rather than thick and coarse like shop-bought bread. Without steam the bread turns out with an “armoured” crust and bakes poorly inside. An alternative is to spray the dough with water from a spray bottle during the first 5 minutes of baking. Professional bakers use combi-steam ovens to achieve this effect.
How long does homemade bread keep? +
Homemade bread with a crisp crust keeps in a cloth bag or a bread bin at room temperature for up to 3 days without losing freshness. On the second day it starts to go stale – you can revive it by warming it for 5 minutes in the oven at 100°C. I do NOT recommend storing it in the fridge – it goes stale faster (within 5 days). For longer storage, freeze it for 1 month tightly wrapped – before use, thaw it in the air or in the oven. Do not store it in plastic bags – it will turn “damp” and lose its crisp crust. Natural bread with no preservatives goes stale faster than shop-bought.
What to serve with homemade bread? +
It is universal – it goes with any dish! With soups and borscht instead of shop-bought croutons, on sandwiches with butter and honey, cheese, sausage or pâté. For breakfast – with fried eggs, omelette or avocado. With first courses – solyanka, kharcho or mushroom soup. With butter and salt – a “Russian open sandwich”. For a festive table – with a cheese platter, cold meats and olives. Fresh warm bread with butter is the ideal addition to any meal. Serve it to guests – it will impress them with the taste and aroma “just like grandmother’s”.
- Comment
or post as a guest
Be the first to comment.

")

