
avg —
Easter Krafins – step-by-step recipe with photos
Instructions
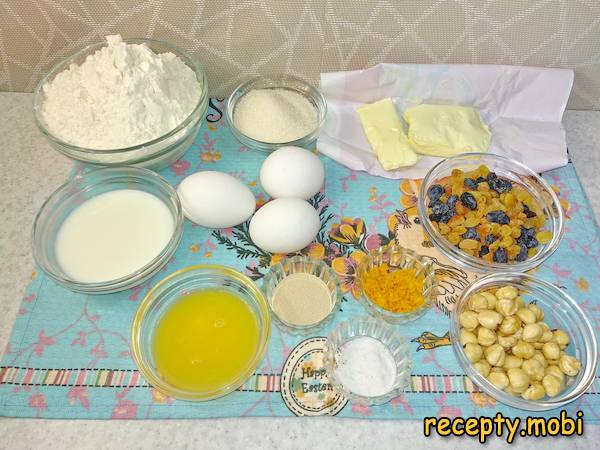
Take all the ingredients out of the refrigerator about an hour in advance and let them warm up to room temperature. Cold ingredients hinder the yeast activity and slow down the rising process significantly, so this brief warming step is genuinely worth the wait for the best possible results in the finished kuliches.
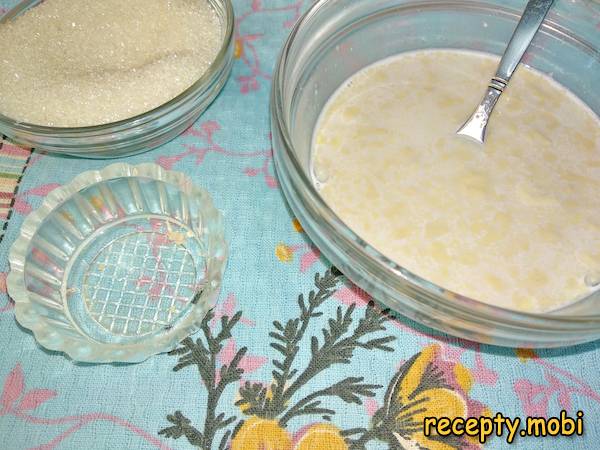
In slightly warm milk, dissolve one teaspoon of sugar and the dry yeast. Stir gently and let the mixture stand for five to ten minutes until a characteristic frothy "cap" appears on the surface. This proving step confirms that the yeast is alive and active before you commit to the full dough.
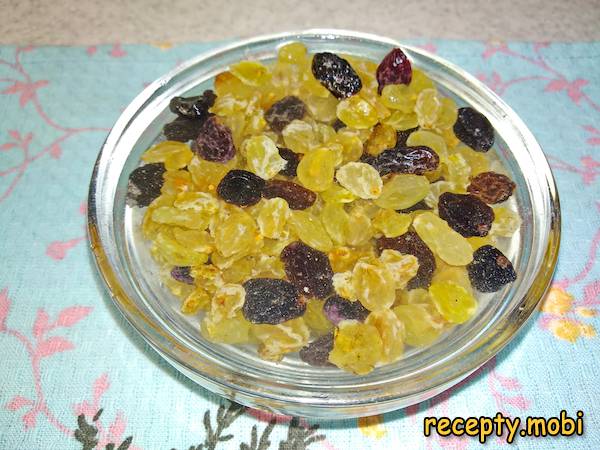
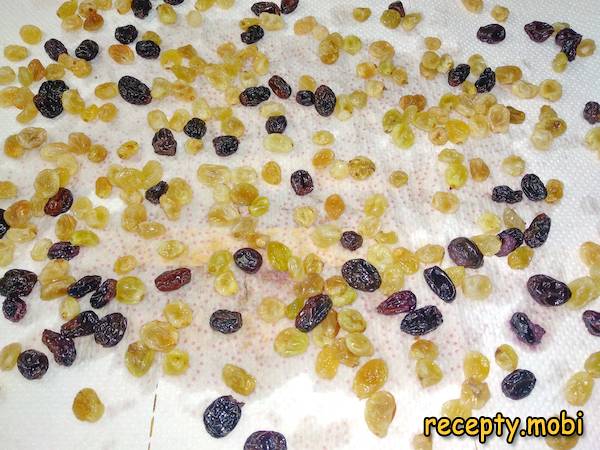
Pour boiling water over the raisins in a small bowl and let them stand for fifteen minutes to plump up. Then drain thoroughly and lay them out to dry on a paper towel for several minutes before incorporating into the dough later.
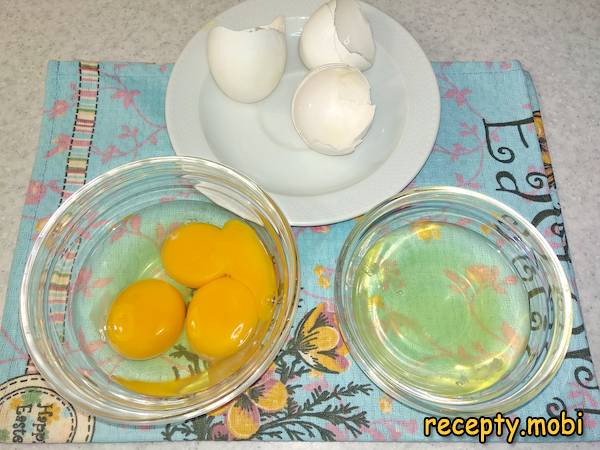
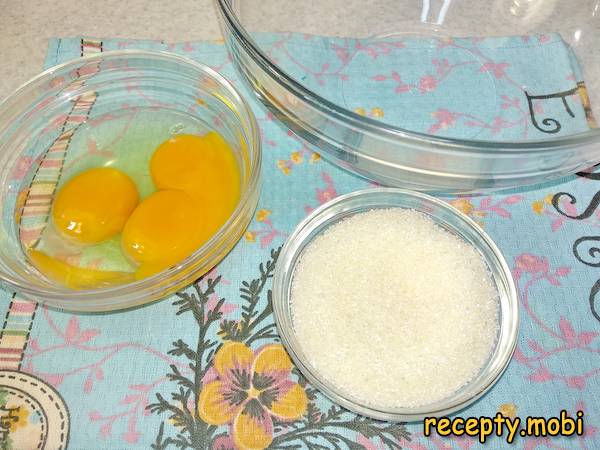
In a separate bowl, crack one whole egg and add the two egg yolks. The whites of the two extra eggs are not needed for this recipe, so save them in a covered container in the refrigerator for use in another recipe such as meringues or fluffy pancakes later in the week.
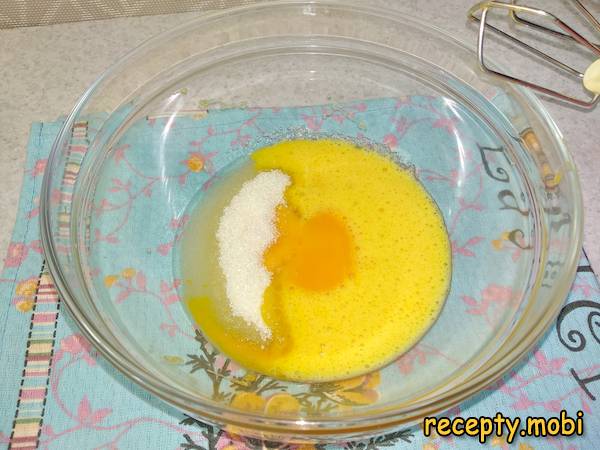
Transfer the eggs and yolks to a deep mixing bowl, then add the remaining sugar (the recipe total minus the small amount used to feed the yeast in the milk step). Use about 80 to 100 grams of sugar in total depending on how sweet you like your sweet bread.
Whip the egg-and-sugar mixture with an electric mixer for about five minutes until pale, fluffy and noticeably increased in volume. The mixture should fall from the whisk in a thick ribbon that holds its shape briefly on the surface before slowly sinking back in.
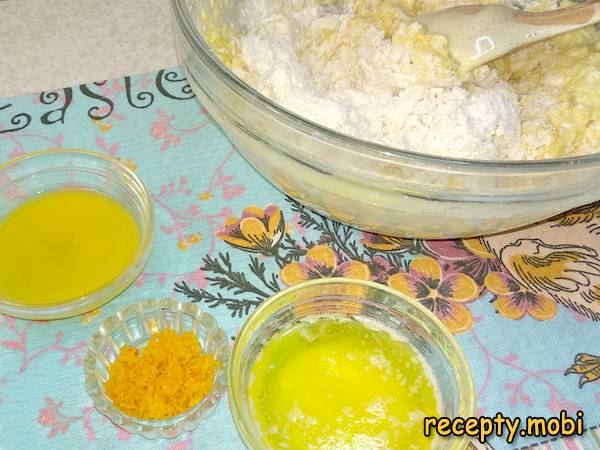
Sift the flour into a large mixing bowl, add the salt and stir to combine the dry ingredients evenly. Then add the risen yeast mixture (the proven sponge) to the bowl. Sifting the flour adds extra air to the dough and helps the kraffins rise to their maximum height during baking.
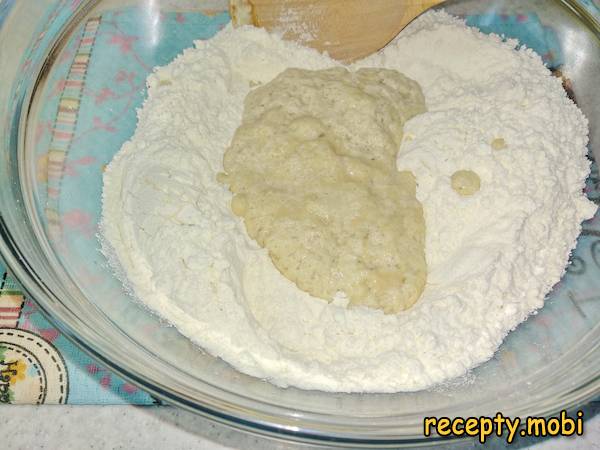
Pour in the whipped eggs with sugar and start kneading the dough together with a wooden spoon. The mixture will look rough and shaggy at first, but will gradually come together into a cohesive ball as you continue working it.
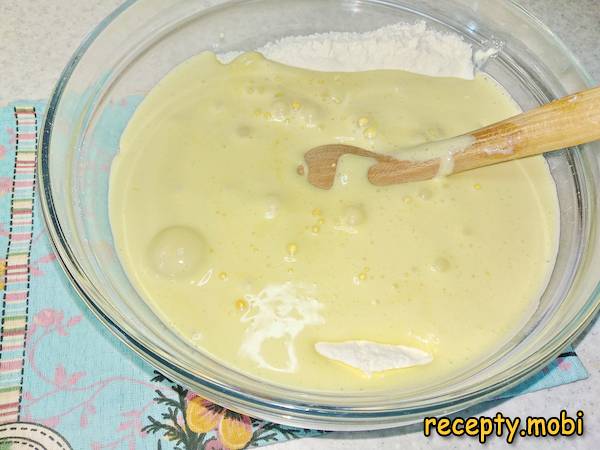
Melt 40 grams of butter (the rest is reserved for the lamination step later) and add it to the dough along with the orange juice. Add the orange zest at this stage now, or save it for the filling later when rolling out the dough into the rectangle.
Knead the dough by hand on a lightly floured work surface for about ten minutes until smooth, elastic and no longer sticky. Transfer the kneaded dough to a clean bowl, cover with plastic wrap, and let it rise in a warm draft-free spot for one to one and a half hours.

While the dough rises, dry the soaked raisins thoroughly by laying them out on a clean paper towel. Excess moisture from the raisins would otherwise leak into the dough during baking and produce wet patches in the finished kraffins.
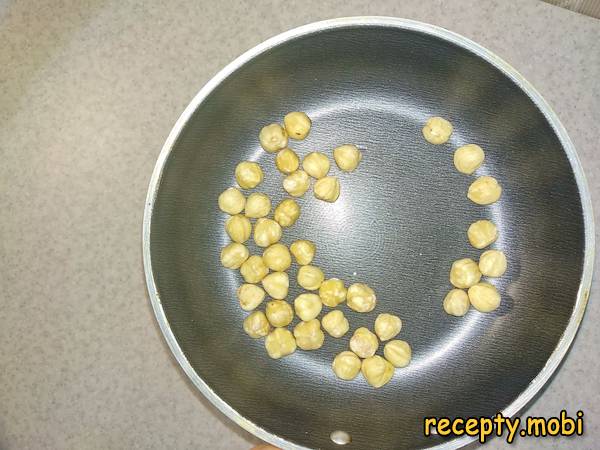
Toast the nuts briefly in a dry frying pan over medium heat, stirring constantly, until they smell fragrant and have darkened slightly. Watch them carefully, since nuts burn quickly and the bitter flavour of scorched nuts will completely spoil the entire filling for the kraffins.
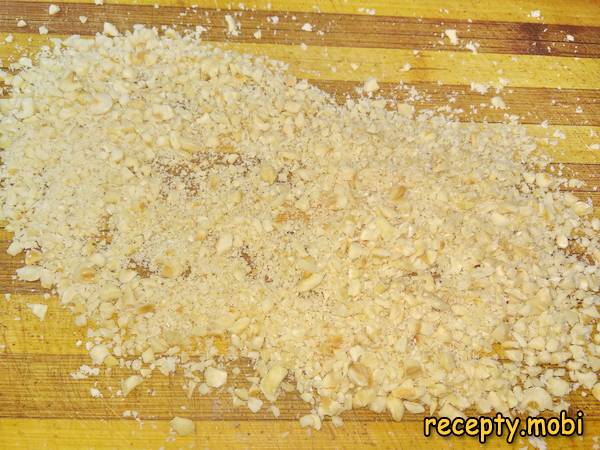
Finely chop the cooled toasted nuts with a sharp knife on a wooden cutting board. Aim for pieces about the size of small lentils, which is small enough to integrate smoothly into the rolled dough but large enough to provide a satisfying crunch in the finished baked kraffins.
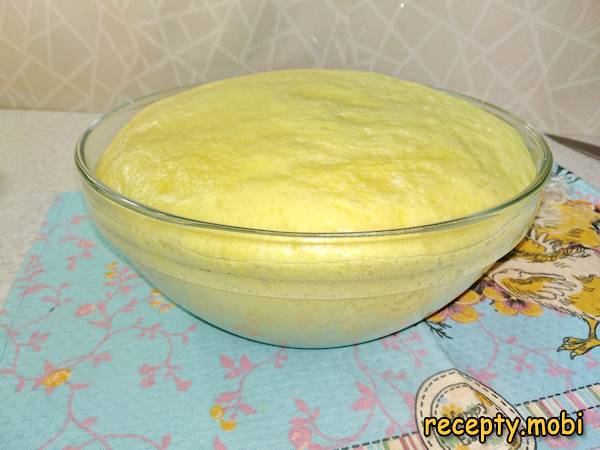
After the long first rise, the dough should have increased in volume by two to two and a half times. Punch down gently to release excess air and place the dough on a lightly floured work surface ready for the next stage of the process.
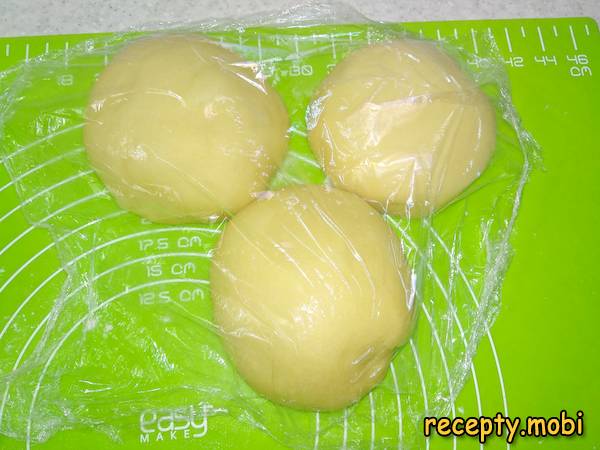
Divide the dough into three equal parts according to the number of moulds you have available. A simple kitchen scale makes the division precise, since equal pieces will rise and bake at the same rate, producing three consistent kraffins from the batch.
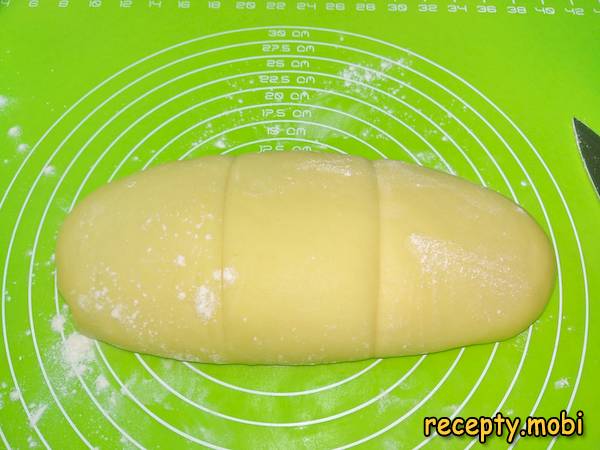
Roll each portion into a smooth ball with cupped hands, cover loosely with plastic wrap, and let the balls rest on the work surface for ten to fifteen minutes. This rest period relaxes the gluten structure and makes the dough far easier to roll out thinly in the next step of the recipe.
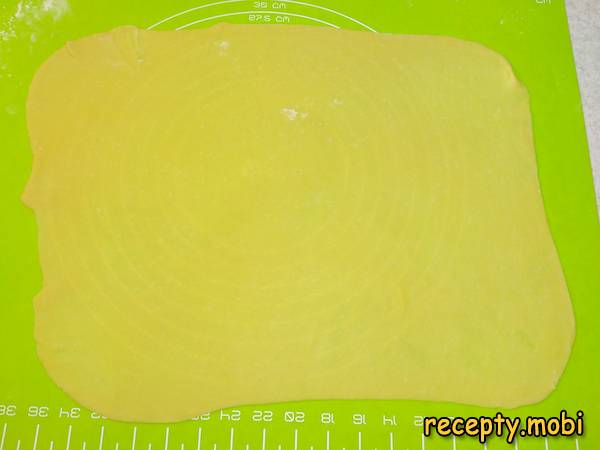
Roll one portion of the dough into a thin even rectangle on a lightly floured work surface. Aim for about three to four millimetres thick, which is thin enough to roll up tightly later but thick enough to hold the filling without tearing during shaping.
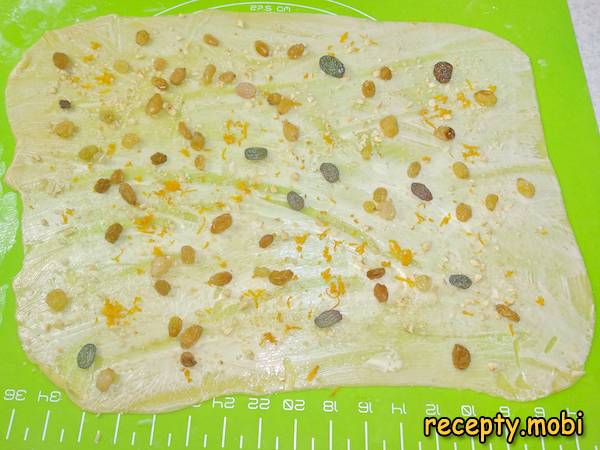
Take one third of the remaining soft butter and distribute it evenly over the entire rolled-out dough surface using an offset spatula or the back of a spoon. The soft butter creates the lamination layers that give the finished kraffins their famous flaky structure when baked.

Sprinkle the buttered surface generously with a portion of the chopped toasted nuts, the dried raisins and the grated orange zest. Distribute the filling evenly across the entire dough rectangle for a uniformly flavoured kraffin without any unfilled patches.
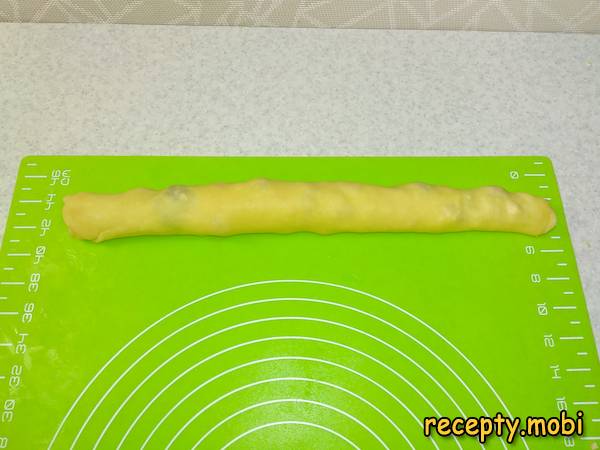
Carefully roll up the dough into a tight log starting from one of the long edges, working steadily without stretching or tearing the dough. Let the rolled log rest under plastic wrap to prevent drying. Repeat the rolling and filling process with the remaining two portions of dough.
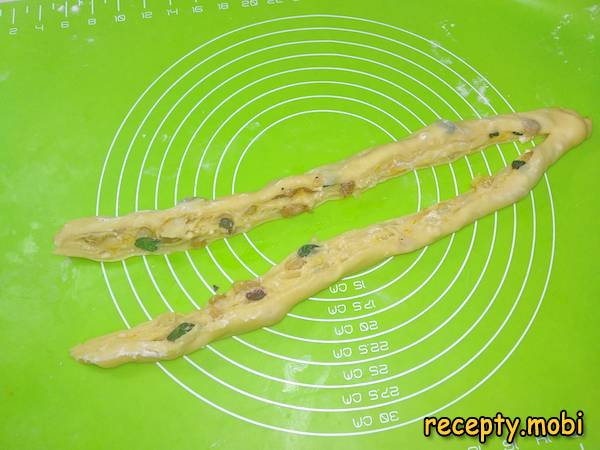
Cut the first log lengthwise with a very sharp knife, leaving about three to four centimetres uncut at one end of the log. This important detail prevents the dough from falling completely apart during the spiral shaping that follows in the next step.
Begin twisting one half of the cut log, working carefully to keep the cut side facing outward as you twist. This way, all the beautiful lamination layers and the colourful filling will be visibly displayed in the finished baked kraffin rather than hidden inside.
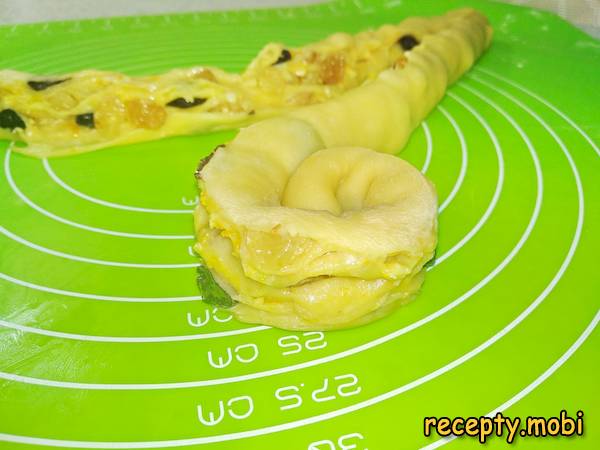
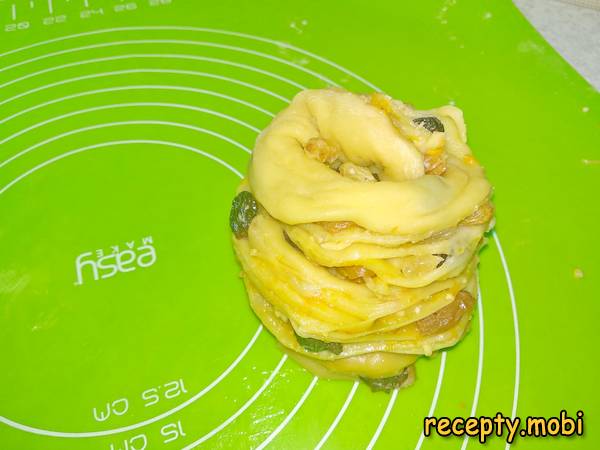
Form the twisted half into a tight spiral "snail" shape, which will become the bottom part of the finished kraffin. Place the uncut three-to-four-centimetre section neatly on top of the spiral as the starting point for the upper half of the bread.
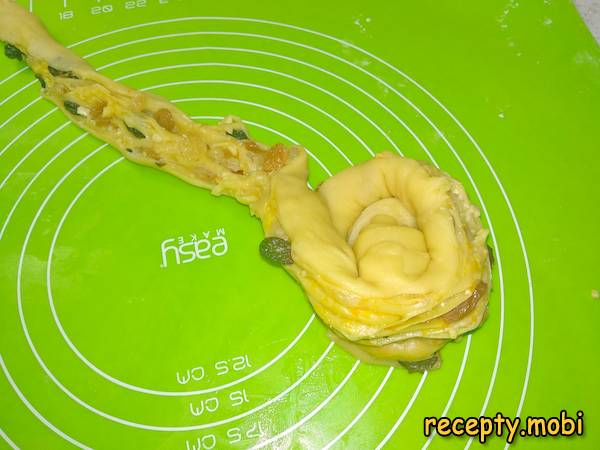
Wrap the second half of the log around the outside of the spiral to form the walls of the kraffin. The result should look something like a small "well" with the layers and filling clearly visible in the cross-section, then tuck the free end inside to fill the central opening.
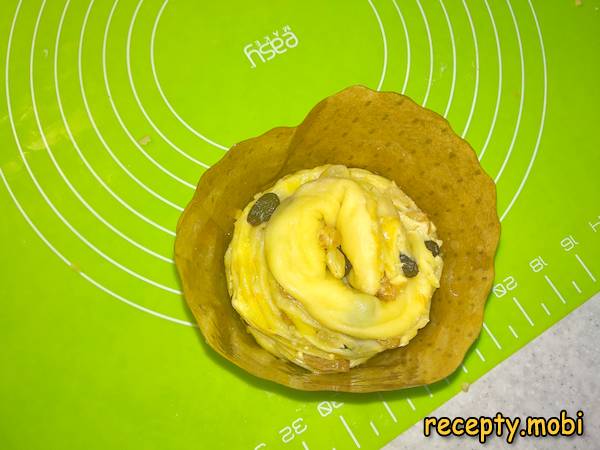
Carefully transfer the formed kraffin into a baking mould. If using a metal or silicone mould, grease it lightly with vegetable oil first to prevent sticking. Paper panettone moulds need no greasing and produce particularly attractive finished kuliches with the paper still attached.
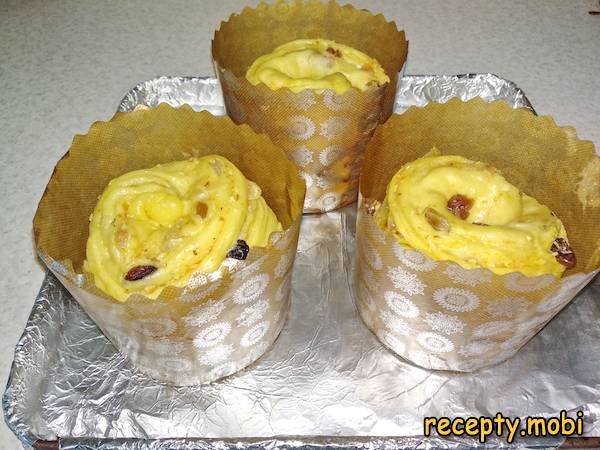
Cover the filled moulds loosely with plastic wrap and leave them in a warm draft-free place for thirty to forty minutes for a final proving rise. The dough should expand visibly during this final rise and look puffy and ready for the oven.
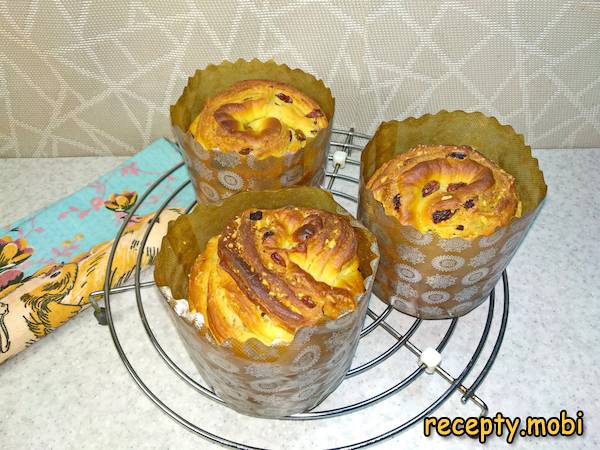
Bake the proven kraffins in a preheated oven: first for ten minutes at 190 degrees Celsius, then reduce the temperature to 180 degrees and bake for another thirty minutes. To prevent the tops from burning, cover the moulds loosely with a sheet of foil partway through baking. Once baked, remove the kuliches from the moulds and cool completely on a wire rack. Before serving, dust the tops with powdered sugar. Bon appetit and Happy Easter!


Tips
- 1
Use only fresh active dry yeast for these kraffins, since stale yeast simply will not rise the dough properly and produces flat dense disappointing bread instead of the airy laminated structure you want. Always test the yeast in warm milk with a teaspoon of sugar first, looking for a frothy active "cap" within ten minutes. If the cap fails to appear, replace the yeast with a fresh packet before continuing with the rest of the recipe.
- 2
Add the soft butter very gradually during the lamination step rather than all at once, since gradual incorporation produces a more elastic and less crumbly final dough. To pair these beautiful Easter kraffins with another properly traditional Easter dessert, try our beautifully tender custard curd Easter cake for a stunning twin-dessert celebration spread that earns universal compliments.
- 3
Never rush the shaping step, since under-rested dough resists the spiral form and tends to spring back rather than holding the desired shape. Let each rolled log rest briefly under plastic wrap for ten minutes before shaping, which makes the dough far more pliable and cooperative. Patience really pays off in any laminated yeast bread, and these kraffins are no exception to the general rule.
- 4
Watch the baking temperature carefully, since each oven runs slightly differently and burnt tops can ruin the otherwise gorgeous finished kraffins. Cover the moulds loosely with foil if the tops brown too quickly. For another celebration-worthy bread to add variety to your Easter spread, try our beautifully indulgent Bounty cake with coconut flakes as a chocolate-and-coconut alternative.
FAQ
Can I replace dry yeast with fresh yeast? +
Yes, use about 18 grams of fresh compressed yeast in place of the 6 grams of dry yeast called for in the original recipe. Fresh yeast produces a slightly more pronounced bready aroma in the finished kraffins and works just as reliably as the dry equivalent. Crumble the fresh yeast directly into the warm milk along with the sugar and let it dissolve completely before continuing with the rest of the proving step.
What nuts are best to use in this recipe? +
Walnuts give the most traditional flavour, while hazelnuts add a richer roasted note and almonds contribute a more delicate elegance to the finished filling. Pecans, pistachios and even macadamia nuts all work beautifully too. Whichever nuts you choose, always toast them briefly in a dry pan first for the deepest most aromatic flavour, then chop them to a small even size for the most pleasing distribution throughout the rolled dough.
Can I use other dried fruits instead of raisins? +
Absolutely. Chopped dried apricots, dried cherries, candied citron peel, sweetened dried cranberries and even chopped Medjool dates all work brilliantly in place of the traditional raisins called for in this recipe. A combination of two or three different dried fruits often gives the most interesting flavour and visual contrast in the finished kraffins. Always soak any dried fruit briefly in boiling water first to plump it up and prevent it from drawing moisture out of the dough.
How long do baked kraffins keep? +
Properly baked kraffins stay soft and delicious for three to four days when wrapped tightly in plastic wrap or stored in an airtight container at cool room temperature. The bread tends to dry out faster in the refrigerator, so room-temperature storage is genuinely better for short-term keeping. For longer storage of up to two months, slice the cooled kraffins thickly, wrap individual slices in foil, and freeze. Thaw at room temperature and warm briefly in the oven before serving.
- Comment
or post as a guest
Be the first to comment.


