
avg —
Honey-Ginger Cookies
Instructions
Build the dough base from honey and sugar. Choose a generously sized saucepan, ideally five-litre capacity, since the mixture expands dramatically when the baking soda joins it. Add the sugar, the honey, and the spices to the empty pan, stir lightly to combine, and set over medium heat. Cook the mixture while stirring continuously to keep it from scorching on the bottom of the pan.
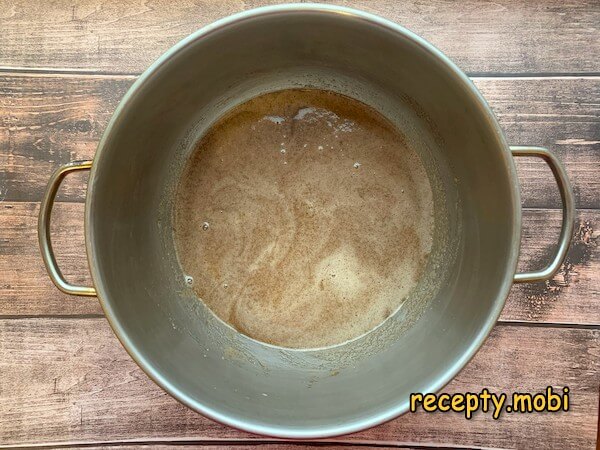
The moment the sugar dissolves into the honey, sprinkle in the baking soda. A vigorous reaction follows; the sweet mass swells dramatically upward, which is why such a large pot is essential. Stir vigorously to keep the foam under control and watch carefully to prevent burning. The honey-sugar mixture begins to darken in color; continue cooking until it reaches the shade of caramel that you want for your cookies.
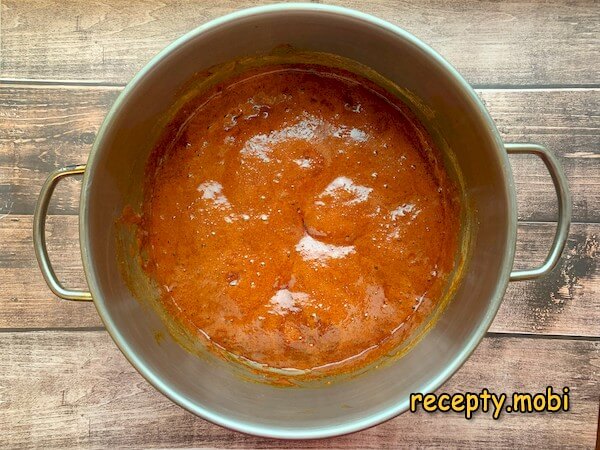
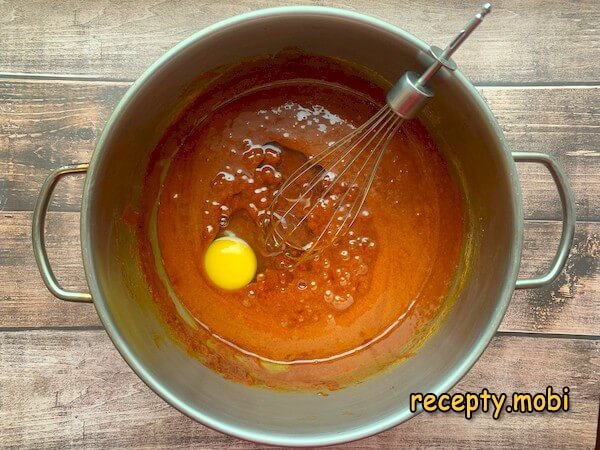
The moment the desired color is reached, pull the saucepan off the heat, stir once more, and add all the butter. Wait patiently until the butter has melted completely into the hot mass. Now the egg needs to join the dough, but do not rush; if the mixture is too hot, the egg curdles instantly into ugly white shreds. Wait until the temperature drops to about fifty to fifty-five degrees, usually about five minutes of stirring after removing from the heat.
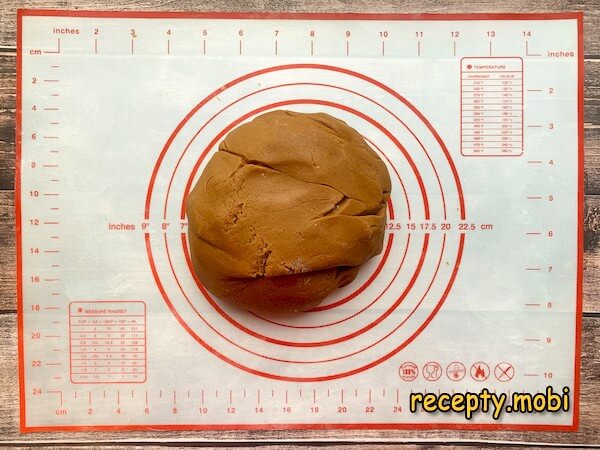
Introduce the flour to the warm honey mixture in three stages. Add two portions directly into the saucepan, then sprinkle the third onto the work surface where you will finish kneading by hand. Knead the dough while it remains warm rather than waiting for it to cool; the warmth produces tender cookies that hold their shape without cracking. Wrap the finished dough in a bag and rest it at room temperature for one full hour.
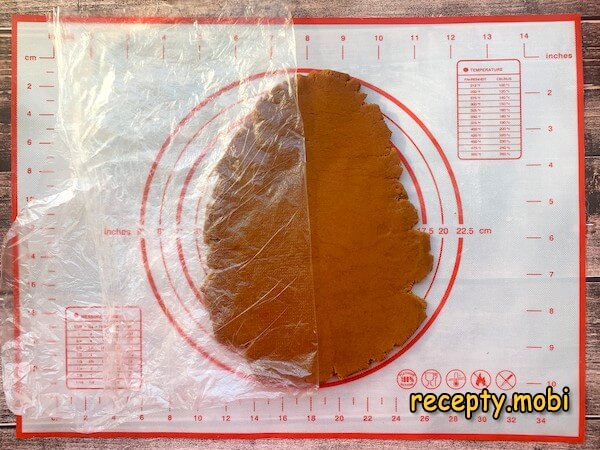
Roll the dough between two sheets of plastic film to a thickness of five to seven millimeters. The film method prevents the dough from sticking and keeps the surface beautifully smooth. Try this technique once and you will never see another crack on rolled gingerbread dough; the film acts like a barrier that keeps the moisture inside where it belongs.
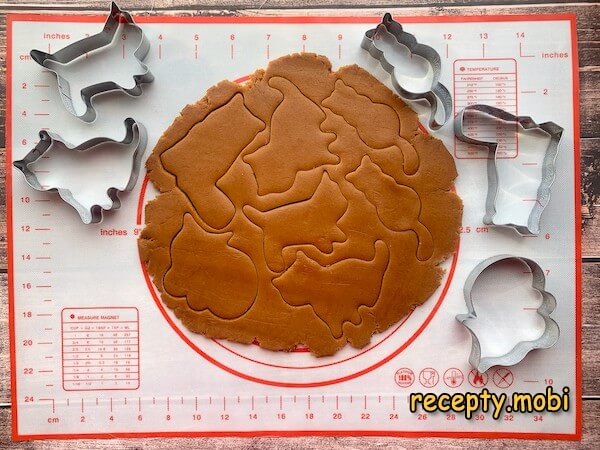
Cut shapes from the rolled dough using cookie cutters of any festive design. Without cookie cutters, lay a paper template over the dough and trace around it with a very sharp knife. Move the cut shapes to parchment-lined baking trays with one and a half to two centimeters of space between them. Bake at one hundred and eighty degrees on the conventional setting without convection for seven to ten minutes.
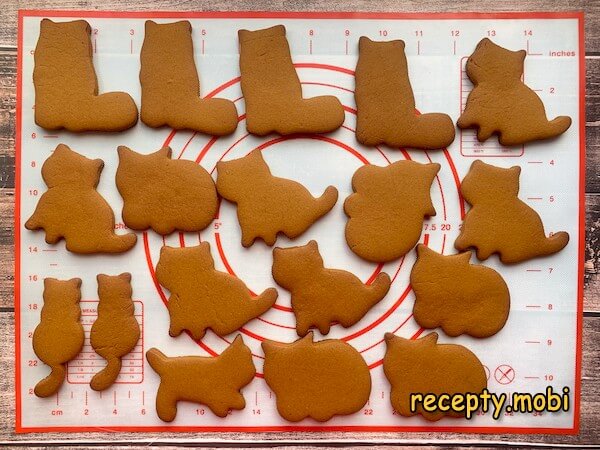
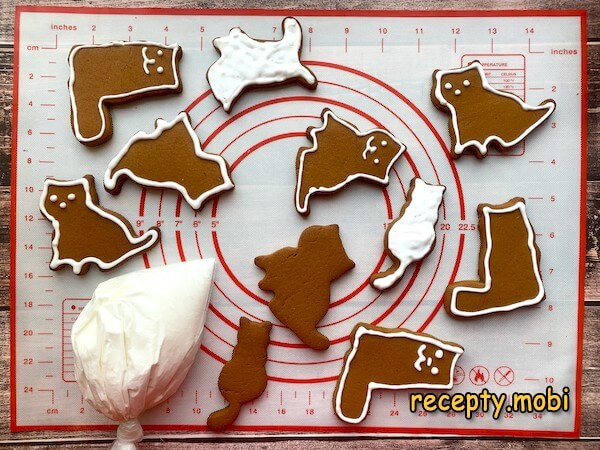
Prepare the warm cookies for decoration by gently pressing each one with a flat board to flatten the surface evenly. After this small adjustment, leave the cookies on a wire rack to cool for one to two hours before icing. Cooling matters more than it sounds; royal icing piped onto warm cookies melts and runs, ruining all the careful design work that follows in the next step.
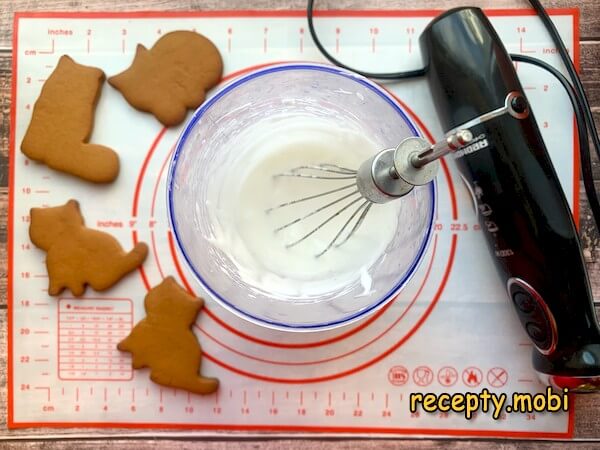
Make the royal icing for decoration. Beat the egg white together with the lemon juice using a mixer on its lowest speed, gradually adding the powdered sugar a little at a time. Continue whipping until the icing reaches a flowing yet workable consistency that holds a soft peak when the beaters lift away. Food coloring can be added at this stage to create different shades for different designs.
For the decorating work, fill a small piping bag with icing and snip just two or three millimeters off the tip; the small opening produces fine, neat lines for delicate designs. The simplest decoration approach is to trace each cookie's outline along the edge. Anyone with artistic flair can take the design further with details and patterns inside the outline; cookie decorating welcomes creativity at every level of skill.
Leave the decorated cookies undisturbed for two more hours so the icing dries hard and stops smudging on contact. Once dry, the homemade honey-ginger cookies are ready for the holiday table, the gift box, or the Christmas tree branch. Store any uneaten cookies in an airtight tin to maintain their texture and flavor for several weeks of seasonal enjoyment.


Tips
- 1
Use a saucepan with at least double the capacity of the cooked mixture. The baking soda reaction produces a dramatic foam that triples the volume in a few seconds, and a smaller pan overflows in a sticky honey disaster across the stovetop. A five-litre saucepan or a tall stockpot keeps the bubbling mixture safely contained while you stir without panic. The extra space also makes it much easier to incorporate the flour later without flour dust escaping from the top.
- 2
Roll the dough thicker than you think it needs to be. Five to seven millimeters is the sweet spot for cookies that bake into a tender chewy texture rather than crisp snaps. Thinner dough produces brittle cookies that crack under the icing and break easily during transport or hanging on the tree. Try the same baking-soda-honey technique with the festive style of chocolate shortbread cookies for a different texture.
- 3
Watch the cookies in the oven through the door rather than opening it. The thin honey-spiced dough turns from underbaked to overbaked in barely a minute, and opening the oven door drops the temperature enough to slow the bake and produce uneven coloring. Keep the oven light on and check progress visually; pull the cookies out the moment the edges turn deep amber, even if the center still looks slightly soft.
- 4
Add a tiny pinch of cardamom to the spice blend for a more sophisticated flavor profile. The warmth of cardamom complements the ginger and cinnamon beautifully and lifts the cookies from familiar holiday territory into something more memorable for guests. Just a quarter teaspoon is enough; more and the cardamom dominates. Pair the finished cookies with a delicate sweet yeast dough buns with jam for a complete tea-table spread.
FAQ
How long do honey-ginger cookies stay fresh after baking? +
Stored properly in an airtight tin at room temperature, honey-ginger cookies stay fresh and chewy for up to three weeks, and many bakers find that the flavor actually improves with a few days of resting. The honey continues to soften the dough gently from within, deepening the spice notes and producing a more rounded flavor than freshly baked cookies. Avoid plastic containers in humid kitchens because they trap moisture against the icing surface; tins or cardboard boxes work much better. For longer storage, the dough itself freezes for up to three months.
Can I make these cookies without honey? +
Yes, several substitutes work well, though each changes the flavor profile slightly. Maple syrup is the closest substitute and produces cookies with a similar sticky chewy texture and a beautiful caramel undertone. Golden syrup, popular in British baking, gives a slightly milder result that lets the spices shine more. For a fully vegan version, replace the honey with the same volume of agave nectar or rice syrup. Whichever liquid sweetener you choose, keep the same total weight as the honey called for in the recipe to maintain the dough's consistency.
What is the best way to decorate gingerbread cookies? +
Royal icing is the traditional choice and gives the crispest, most professional-looking decorations. For beginners, simple outlines around each cookie shape produce satisfying results without any artistic skill needed. Adding small dots, lines, or names with a fine piping tip creates a more personal touch. Sanding sugar sprinkled over wet icing adds sparkle. For an even simpler approach, dip cooled cookies into a bowl of icing for a smooth glossy coating that sets hard within an hour and provides a clean blank canvas for any sprinkles or drawn patterns.
Can I make gluten-free honey-ginger cookies? +
Yes, the recipe adapts well to a gluten-free flour blend with a few small adjustments. Replace the wheat flour with an equal weight of a quality gluten-free all-purpose blend that contains xanthan gum; without the gum, the cookies crumble easily during decoration. Add an extra tablespoon of honey to compensate for the drier texture of most gluten-free flours. Roll the dough between sheets of parchment paper rather than directly on the work surface, since gluten-free dough tears more easily. Bake at the same temperature for the same length of time as the original recipe.
- Comment
or post as a guest
Be the first to comment.


