
avg —
Strawberry and Pitted Cherry Jam
Instructions
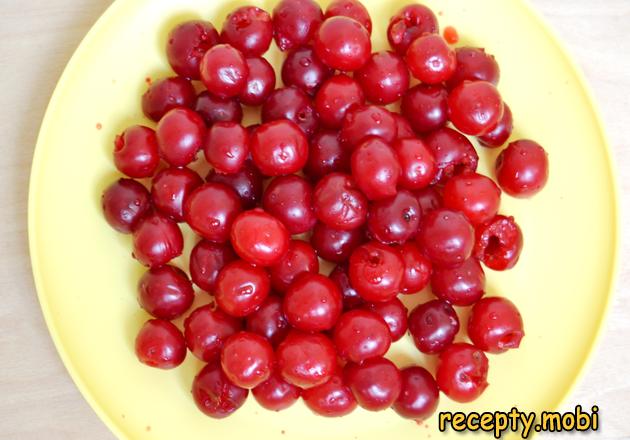
First, prepare the cherries for the jam. Rinse the fresh cherries thoroughly under cold running water. If there are stems left attached on the fruits, remove all the stems carefully. Then, use a special cherry-pitting tool to remove the pits from the cherries. If such a device is not available at home, the pits can be easily removed using a regular safety pin. To do this, insert the loop of the pin into the small hole left by the stem on the cherry. Use the loop to catch the pit, pull it out gently, and discard the pit. This way, we free all the cherries from the pits ready for the jam.
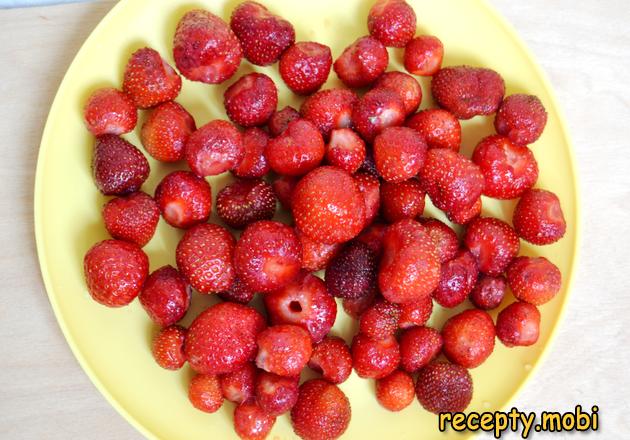
Next, prepare the other ingredient for the jam, the fresh strawberries. The strawberries should be rinsed gently under cold water, since the fruit is genuinely very delicate. Place the strawberries in a bowl of cold water. Gently mix the berries with your hand, then drain the water carefully. Repeat this rinsing procedure once more for the cleanest finished berries. After that, remove the green caps from the berries.
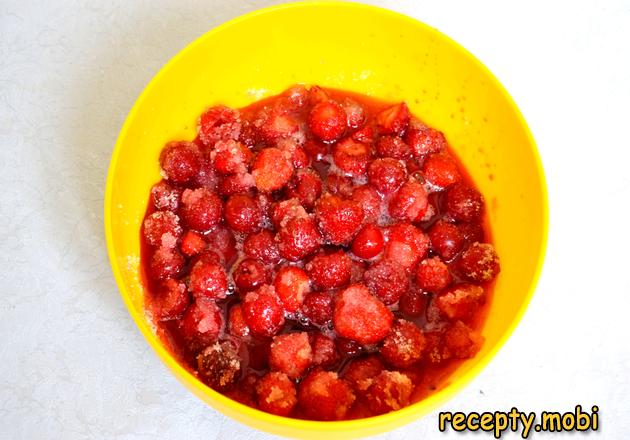
Now combine the prepared strawberries and the pitted cherries together in a deep mixing bowl. Sprinkle generously with the measured sugar according to the recipe and let sit undisturbed for 30-45 minutes total. During this brief macerating time, most of the sugar will dissolve into the released juice from the berries.
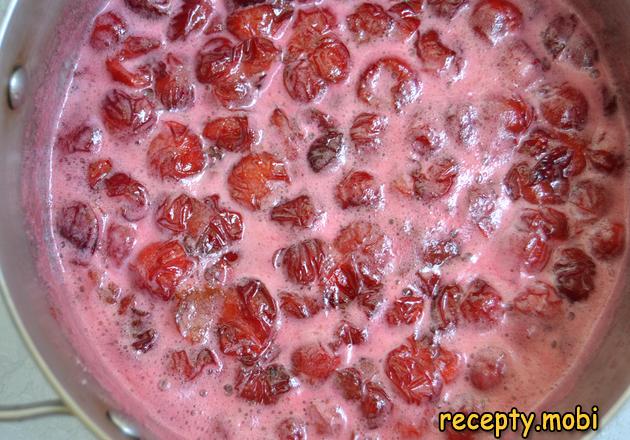
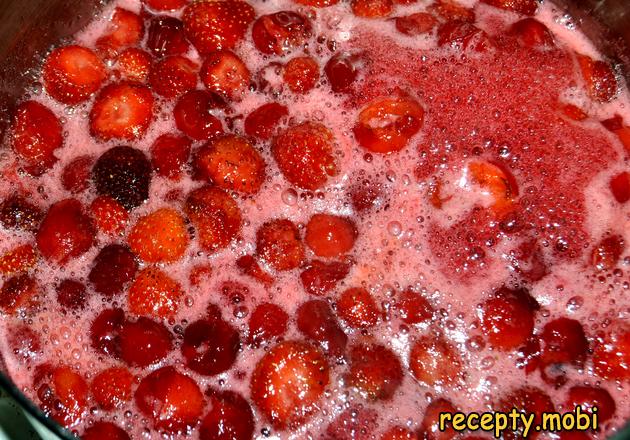
Transfer the macerated berry mixture to a heavy cooking pot and put it on the heat. Bring to a rolling boil, stirring the mixture gently with a wooden spatula. A lot of foam will immediately form on the surface of the cooking jam, which we remove carefully with a wooden spoon.
Reduce the heat to low and cook the strawberry and cherry jam for 10 minutes total. The strawberry and cherry jam is now properly ready.
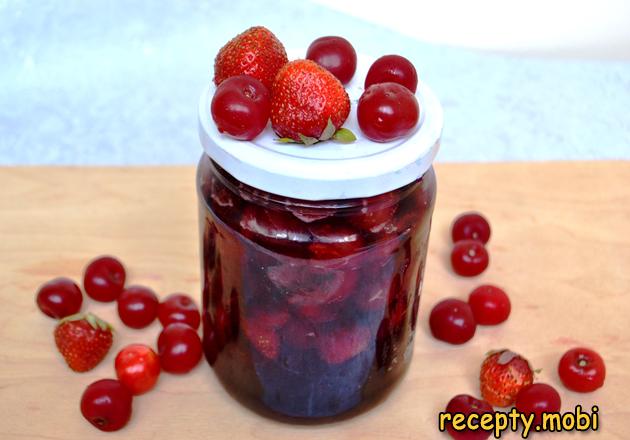
Spoon the still-hot jam into a sterilized glass jar and seal the jar tightly with a sterilized lid. Place the sealed jar of pitted strawberry and cherry jam upside down on a clean towel for a while and leave it in that position until it has cooled completely. Then return the jar to its normal position and store it in a cool dark location.


Tips
- 1
Pit the cherries carefully one by one rather than rushing through the step, since stray cherry pits in the finished jam are an unpleasant surprise that can chip teeth at the breakfast table. Use a proper cherry-pitting tool for the fastest cleanest results, or improvise with a sturdy safety pin or even a small chopstick. The brief patience for proper pitting genuinely matters for the most safely enjoyable finished jam every single time.
- 2
Macerate the berries with sugar for at least 30 minutes before cooking, since the brief resting time properly draws out the natural berry juices and produces noticeably more flavourful finished jam. To pair this beautifully bright summer berry jam with another properly classic homemade jam preparation for a complete pantry shelf, try our beautifully fragrant cherry jam with pits for winter as a complementary single-fruit alternative.
- 3
Skim the foam from the surface during cooking, since the foam contains impurities that would cloud the finished jam. The brief skimming step genuinely matters for the most beautifully clear finished result every single time. Use a wooden or silicone spoon for the gentlest skimming without disturbing the cooking berries underneath the foam layer.
- 4
Sterilize the glass jar and lid thoroughly before filling, since proper sterilization is genuinely critical for safe long-term winter storage without any risk of spoilage. For another properly classic homemade preserved-fruit recipe to add variety to your pantry shelves, try our beautifully bright strawberry topping (sauce) as a contrasting fresh-style strawberry preparation for sweet finishing touches on cakes and ice cream.
FAQ
Can I use other berry combinations? +
Absolutely. Try combining strawberries with raspberries, blackberries, blueberries, blackcurrants, redcurrants, or even gooseberries for properly different finished flavour profiles. Each combination brings its own character to the jar. Maintain roughly equal weights of the two berry types for the most balanced finished result. Cherries can be substituted with sour Morello cherries, sweet Bing cherries, or even ripe pitted plums for slightly different finished flavour profiles in the homemade jam jar.
Can I make this jam with frozen berries? +
Yes, frozen berries work absolutely brilliantly in this recipe when fresh seasonal berries are not available locally. Use the frozen berries directly from the freezer without any pre-thawing for the best finished texture, since pre-thawed berries release too much excess liquid during cooking. You may need to cook the jam for slightly longer to reduce any extra moisture from the frozen fruit. The finished flavour from frozen berries is genuinely indistinguishable from the fresh-berry version in the closed jar.
How long does this jam keep? +
Properly sealed and stored in a cool dark location like a cellar or pantry, the homemade strawberry and cherry jam will keep beautifully for up to 12 full months for the best finished flavour. After opening, store the jar in the refrigerator and consume the contents within four weeks for the best quality. The flavours actually develop and deepen significantly over the first month of storage as all the fruits properly merge into the harmonious whole.
Can I reduce the sugar amount? +
Yes, you can reduce the sugar by up to 25% for a less sweet finished jam, though this will reduce the natural preservation effect significantly and shorten the storage life. For low-sugar jam, plan to consume within 3-4 months stored in the refrigerator after opening. Alternatively, add a small amount of pectin powder to compensate for the reduced sugar's gelling power, which produces a properly thick finished jam with less added sweetness in the spoon.
- Comment
or post as a guest
Be the first to comment.

")

