
avg —
Sushi Salad
Instructions
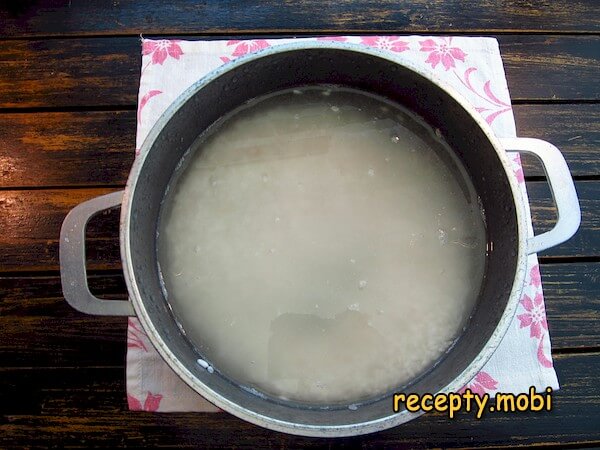
Rinse rice thoroughly until water runs CLEAR (removes excess starch). Cover with water; cook until done and rice fully absorbs the liquid.
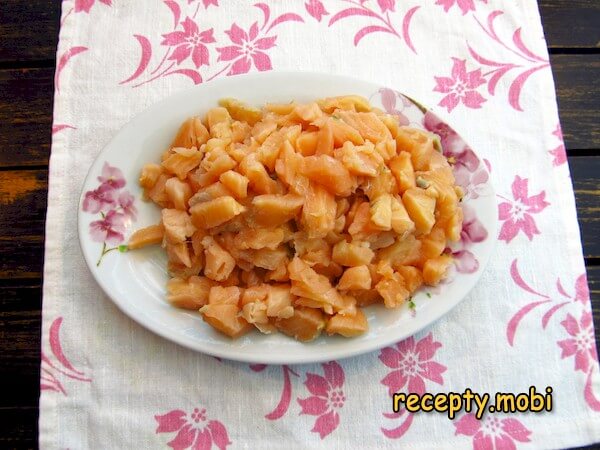
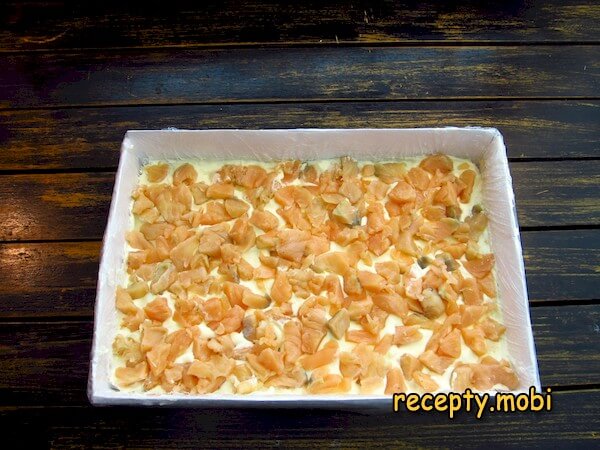
Cut salmon into medium-sized pieces (~2 cm cubes). Use SUSHI-GRADE salmon for safety (frozen salmon labelled "sushi-grade" is safest for raw consumption).
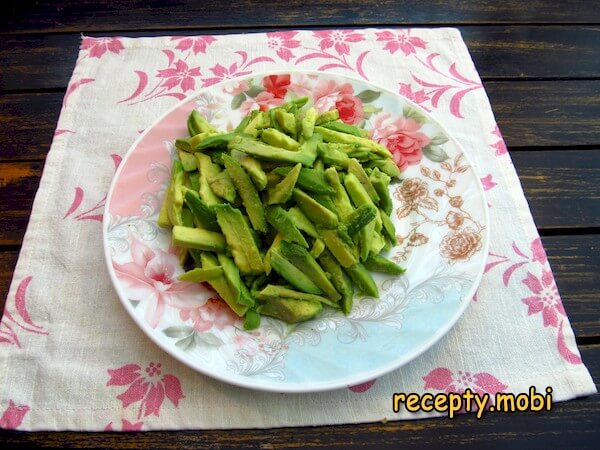
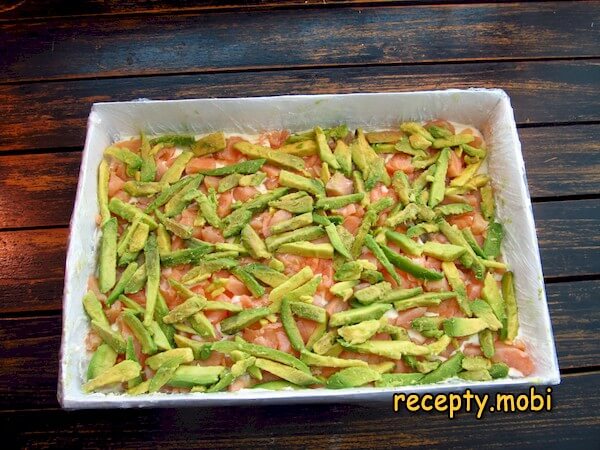
Peel avocado; slice into sticks (1 cm × 5 cm).
Add vinegar + sugar to the prepared HOT rice (hot rice absorbs seasonings better).
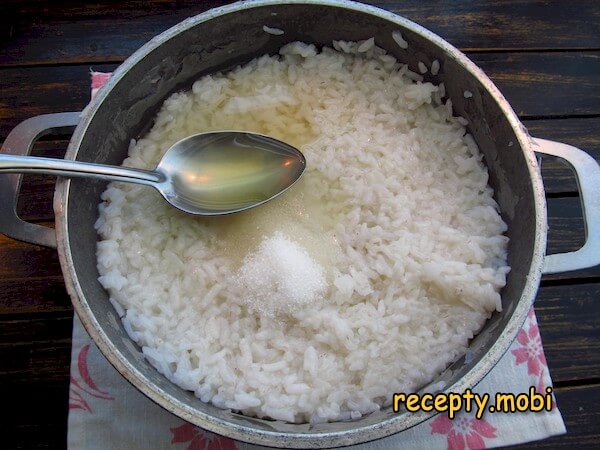
Add salt to rice.
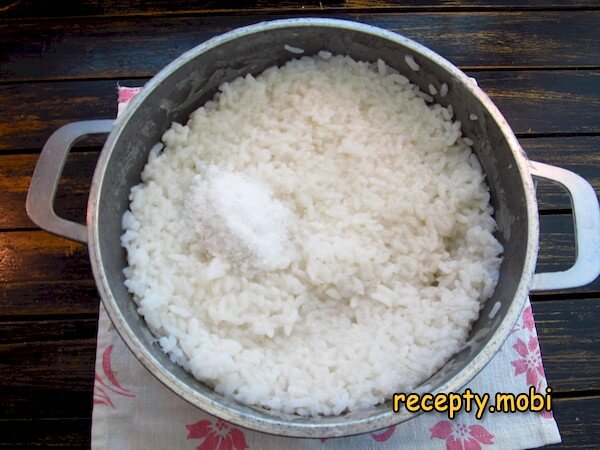
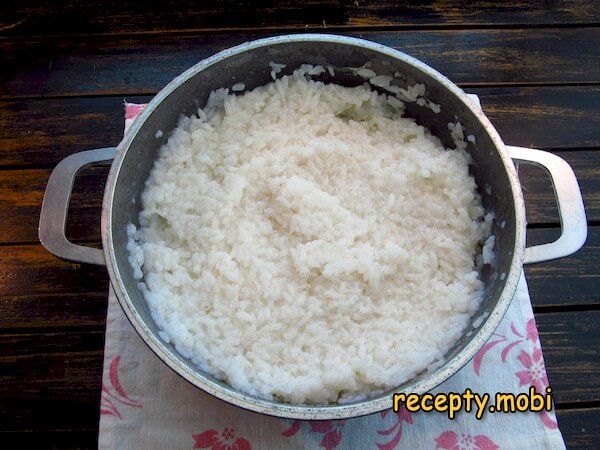
Mix rice thoroughly to distribute seasonings; cover with lid; let cool to room temperature.
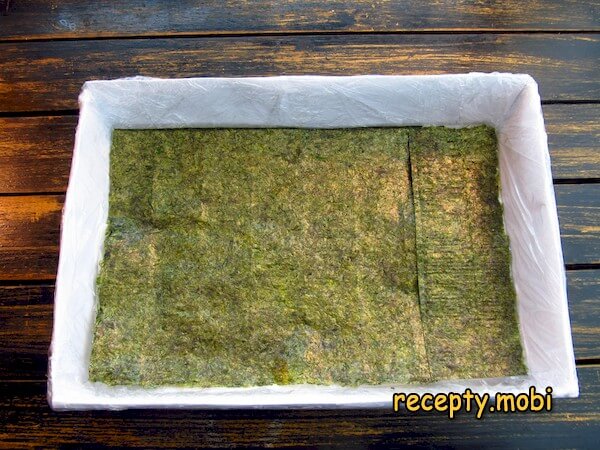
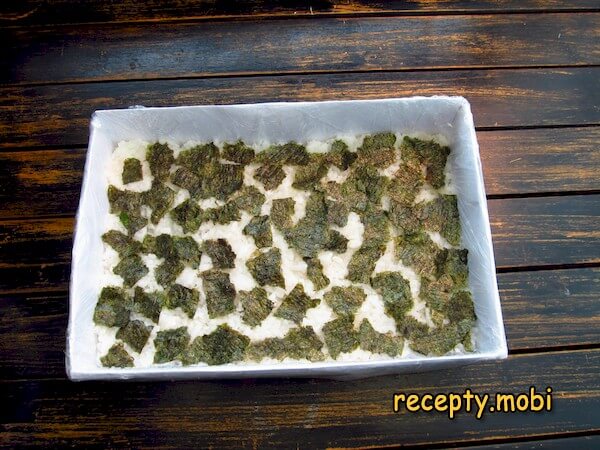
Place a sheet of nori in rectangular mold (18 × 28 cm). The mold should be food-safe; line with plastic wrap if removable mold isn't available.
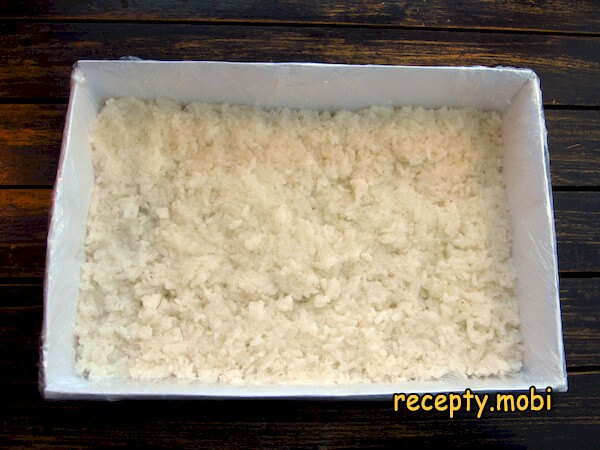
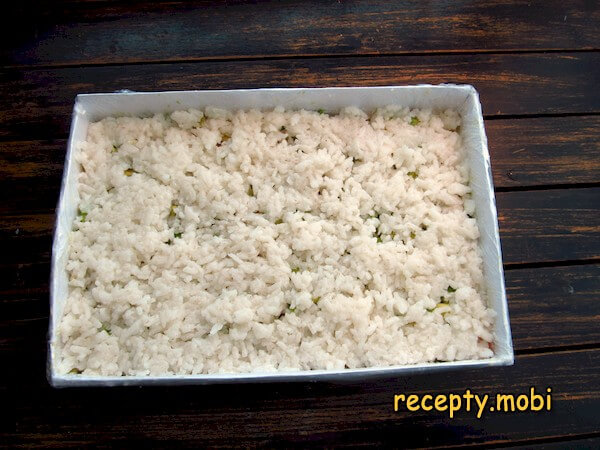
LAYER 1: spread half the cooled rice evenly across the nori (gently press flat, don't compress).
LAYER 2: cut 1 nori sheet into pieces; place pieces on rice layer (creates internal nori contrast).
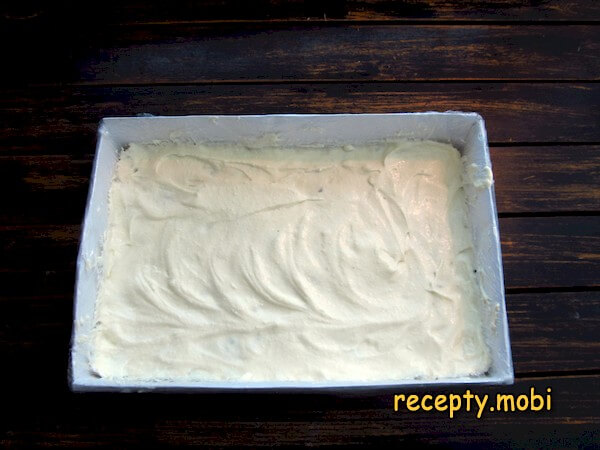
LAYER 3: spread cream cheese (the 200 g salad portion) evenly over the nori-pieces layer.
LAYER 4: place salmon pieces evenly distributed.
LAYER 5: arrange avocado sticks across surface.
LAYER 6: spread remaining rice evenly on top.
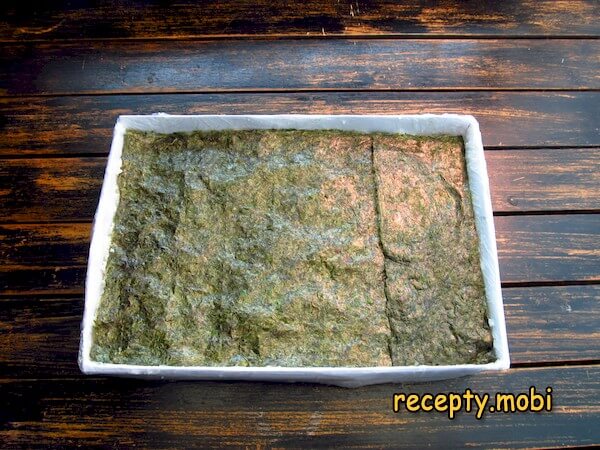
LAYER 7 (top): place a final sheet of nori as topping. Refrigerate sushi salad 1 HOUR (allows layers to set + flavors to integrate).
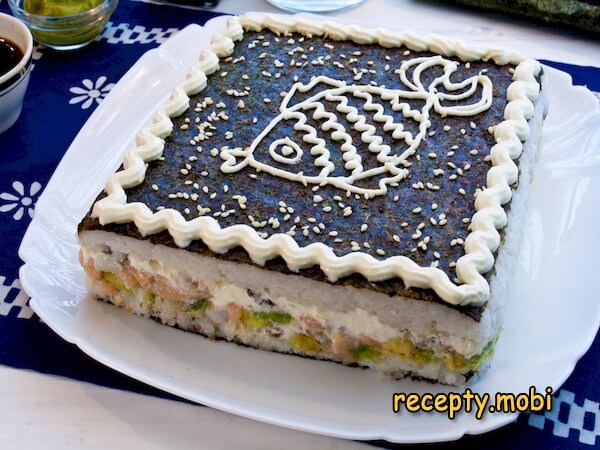
After 1 hour, carefully remove the mold (lift straight up; if salad doesn't release: invert briefly onto plate, lift mold).

Decorate sushi salad with reserved 50 g cream cheese (use pastry syringe or piping bag for decorative dots/swirls). The sushi salad is ready. Serve with soy sauce + wasabi + pickled ginger alongside (traditional Japanese accompaniments). Enjoy!


Tips
- 1
THE SUSHI-GRADE SALMON IS NON-NEGOTIABLE FOR FOOD SAFETY. The recipe uses raw salmon — same as restaurant sushi. Critical: use SUSHI-GRADE salmon, which has been frozen at -20 °C for 7+ days (kills parasites that live in raw fish). FROZEN-AT-SEA salmon (often labeled "sashimi grade"): safe for raw consumption. FRESH-CAUGHT salmon from regular grocery: NOT safe for raw consumption (parasites). For total safety: use store-bought frozen salmon and thaw in refrigerator overnight before use. Alternative: use SMOKED salmon (cooked alternative, similar character but smokier flavour). Don't compromise on this — health risk is real.
- 2
THE RICE-RINSING IS QUALITY FOUNDATION. Step 1's "rinse until water runs clear" is non-negotiable for proper sushi-rice texture. WHY: rice surface contains excess starch that becomes gummy when cooked. Unrinsed rice: gluey-clumpy texture (wrong for sushi). Properly rinsed rice: distinct grains that cling slightly (correct sushi texture). Rinse 4-6 times until water runs almost clear. Same technique applies to: jasmine rice, basmati rice, any premium rice cooking. Don't skip this step — it's the technique difference between mediocre and excellent rice. For another classic Asian-fusion dish worth comparing, see California Roll Salad.
- 3
THE HOT-RICE-SEASONING TIMING. Step 4's "add vinegar + sugar to HOT rice" is critical timing. Hot rice (60-70 °C): absorbs vinegar-sugar mixture into individual grains, distributes seasoning uniformly. Cold rice: vinegar-sugar coats surface only (uneven seasoning, less integrated flavor). The traditional Japanese "sushi-meshi" (sushi rice) preparation requires this hot-seasoning step. Use a wooden bowl traditionally (called "hangiri") for cooling AND fanning to create glossy texture; modern alternative: spread rice on plate to cool while gently tossing.
- 4
THE MOLD-RELEASE TECHNIQUE. Step 15's "remove mold carefully" can be tricky. Best practice: line mold with plastic wrap BEFORE adding any layers (allows clean lift-out). Alternative: brush mold lightly with vegetable oil. Common mistake: forcing mold release without prep — salad collapses. Pro-tip: refrigerate longer (2-3 hours instead of 1) — firmer salad releases more cleanly. Same technique applies to all mold-formed layered salads (Snow Queen, Coral Reef, Sushi Salad). For another elegant party salad worth trying, try Poke Bowl Salmon.
FAQ
Can I use cooked salmon instead? +
Yes — popular variation for those uncomfortable with raw fish. SMOKED SALMON (hot-smoked or cold-smoked): adds smoky character, completely safe, similar texture-color profile. PAN-SEARED SALMON (slightly cooked, still pink interior): adds firmness, requires brief pan-sear. CANNED SALMON: most economical, more flaked texture, less elegant appearance. The flavour profile shifts toward "cooked-fish layered salad" rather than pure sushi-mimicking. For special-occasion sushi-bar quality: stick with sushi-grade raw. For family-friendly safer version: smoked salmon is excellent compromise.
What if I can't find nori? +
Nori is sold at most grocery stores in international/Asian section. ALTERNATIVE: skip nori entirely (still works as layered salmon-rice salad without the seaweed dimension). NORI replacement: dried wakame seaweed (different texture but maintains seaweed character), kombu (different flavour). Some markets carry "ssamjang" Korean seaweed sheets — different but acceptable. For online: nori sheets keep well refrigerated for months; buy in bulk if you sushi often. The toasted nori adds flavor depth + visual contrast that's worth seeking out — invest the effort to find proper nori.
Can I add other ingredients? +
Yes — popular additions exist. CUCUMBER (julienned, 1 small): adds crunch + freshness (recipe-mentioned as optional). MASAGO or TOBIKO (fish roe, 50 g): adds restaurant-style sushi authenticity, beautiful red-orange color. SESAME SEEDS (1 tbsp): adds nutty-flavor + visual interest, sprinkle on top. SCALLIONS (sliced thin): adds aromatic dimension. SPICY MAYO (mayo + sriracha + lime juice): drizzle on top for heat. UNAGI SAUCE (sweet eel sauce): drizzle for sweet-savoury balance. Each addition makes salad more complex/restaurant-quality. The base recipe is excellent foundation; additions tilt toward various sushi-bar specialties.
How long does it keep? +
Refrigerated covered: 24 hours MAXIMUM (raw salmon limits shelf life). Day 1 (after first hour soak): peak quality, flavors fully integrated, salmon at peak freshness. Day 2: salmon textures start changing (gets slightly mushy), avocado may oxidise (gray spots). Don't keep beyond 24 hours of assembly. Don't freeze (raw salmon shouldn't be re-frozen, avocado becomes mush). For meal-prep: prepare components separately + assemble just before serving. Make-ahead workflow: prep all ingredients in afternoon; assemble + 1-hour fridge before dinner; serve same evening.
- Comment
or post as a guest
Be the first to comment.


